
You’ve seen it on your neighbor’s driveway or a friend’s patio — that rich, textured surface with flecks of stone catching the light — and you’ve wondered how to get the same result without ending up with a patchy, crumbling mess six months later. Exposed aggregate concrete is one of Melbourne’s most popular outdoor finishes, and for good reason. But the gap between a stunning result and a costly failure comes down almost entirely to preparation and the contractor you choose. This guide walks you through everything you need to know before a single drop of concrete gets poured.
Table of Contents
- What is exposed aggregate concrete and why choose it?
- Planning your project: Tools, materials, and site preparation
- Step-by-step exposed aggregate installation: How the pros get it right
- Common mistakes and troubleshooting: What can go wrong and how to avoid it
- Hiring the right contractor: Questions to ask and red flags
- The real secret to flawless exposed aggregate: What matters most
- Get expert results with Melbourne’s exposed aggregate specialists
- Frequently asked questions
Key Takeaways
| Point | Details |
|---|---|
| Understand exposure process | Correct timing and technique are essential for a flawless exposed aggregate finish. |
| Preparation is crucial | Proper site work and quality materials lay the foundation for long-lasting results. |
| Avoid common pitfalls | Mistimed washing or skipped steps often lead to costly repairs or uneven surfaces. |
| Vet your contractor | Asking the right questions helps ensure your contractor is experienced and safety-focused. |
| Commit to maintenance | Periodic cleaning and resealing protect your investment for decades. |
What is exposed aggregate concrete and why choose it?
Exposed aggregate concrete is exactly what it sounds like: a concrete surface where the top layer of cement paste is removed to reveal the decorative stones, pebbles, or crushed rock mixed into the slab. The result is a textured, visually interesting surface that looks nothing like plain gray concrete.
Melbourne homeowners love it for driveways, paths, and patios because it solves two problems at once. First, it looks genuinely good, with color blends ranging from earthy tones to bold contrasts depending on your chosen aggregate mix. Second, the rough texture provides natural slip resistance, which matters when Melbourne’s wet winters arrive and your driveway becomes a slip hazard.
Key benefits at a glance:
- Long-lasting durability under vehicle traffic and foot traffic
- Natural slip resistance without added coatings
- Huge range of stone colors and sizes to match your home’s style
- UV resistance compared to some painted or stamped finishes
- Exposed aggregate driveway benefits include better property value when installed correctly
There are some genuine trade-offs worth knowing. Exposed aggregate maintenance is generally lower than other decorative finishes when sealed correctly, though repair matching can be tricky if a section is damaged years later. Periodic resealing is non-negotiable if you want the surface to hold its color and resist oil and stain absorption.
For a look at the variety available, checking out aggregate driveway options gives you a real sense of what’s possible across different budgets and styles.
Pro Tip: Before you commit to any aggregate blend, bring home physical samples and hold them against your home’s exterior in both direct sunlight and shade. Colors shift dramatically between the yard and the showroom.
With a clear idea of the value and versatility of exposed aggregate, let’s cover the critical planning steps and what’s required for a long-lasting finish.
Planning your project: Tools, materials, and site preparation
Good outcomes start before a single truck arrives. The site requirements for exposed aggregate work are more demanding than standard concrete, and skipping any of them is a reliable way to end up with cracking or uneven exposure.
Essential tools and materials for the job:
- Bull float and hand floats for leveling the surface
- Surface retarder spray (the chemical that slows the top layer from curing)
- High-pressure hoses for wash-off
- Formwork timber and stakes to frame the pour area
- Steel reinforcement (rebar or mesh) sized to the application
- Compactable base material, typically crushed rock
- Curing compound and sealer for post-wash application
- Safety gear: gloves, eye protection, and a respirator if abrasive cutting methods are involved
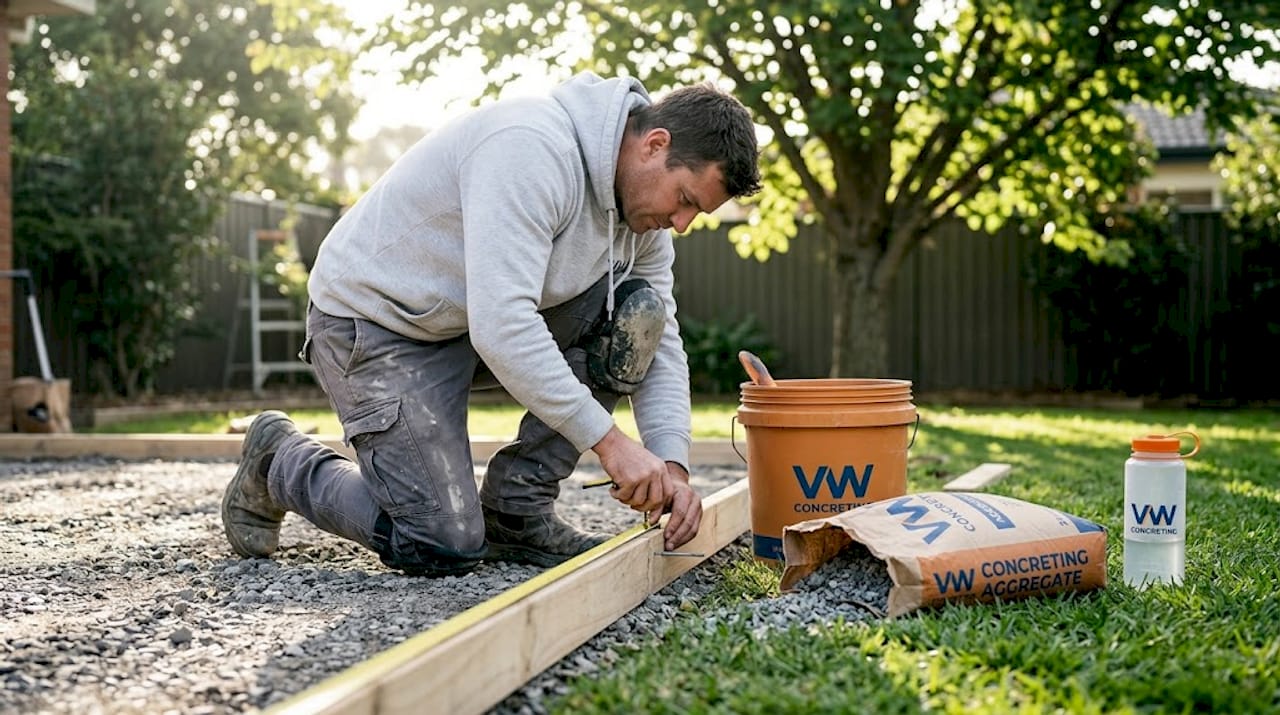
The base is where most DIY attempts and budget contractors cut corners. Properly compacted crushed rock, typically 100mm deep for a driveway, is the foundation that prevents movement and cracking. If the ground shifts under the slab, no amount of good technique at the surface level will save the job.
The American Concrete Institute describes exposed aggregate installation as a precise sequence: base preparation, reinforcement, control joint placement, the concrete pour itself, surface finishing, retarder application, timed wash-off, curing, and sealing. Every step feeds into the next.
| Planning element | Why it matters | What to check |
|---|---|---|
| Base compaction | Prevents cracking and subsidence | 100mm compacted base minimum |
| Formwork setup | Defines shape and slope | Check falls toward drainage |
| Reinforcement | Controls crack width and keeps slab together | Mesh or rebar correct for use |
| Drainage paths | Prevents pooling and surface damage | Mark before pour, not after |
For real-world context on what proper preparation examples look like on a Melbourne residential job, it’s worth reviewing completed project photos before your consultation.
Pro Tip: Mark every drainage path on your site plan before the pour day. It’s almost impossible to add effective drainage after the concrete is set, and poor drainage is one of the top reasons surfaces deteriorate prematurely.
Now that the groundwork is set, it’s time to dive into the step-by-step process that contractors follow to ensure a flawless finish.
Step-by-step exposed aggregate installation: How the pros get it right
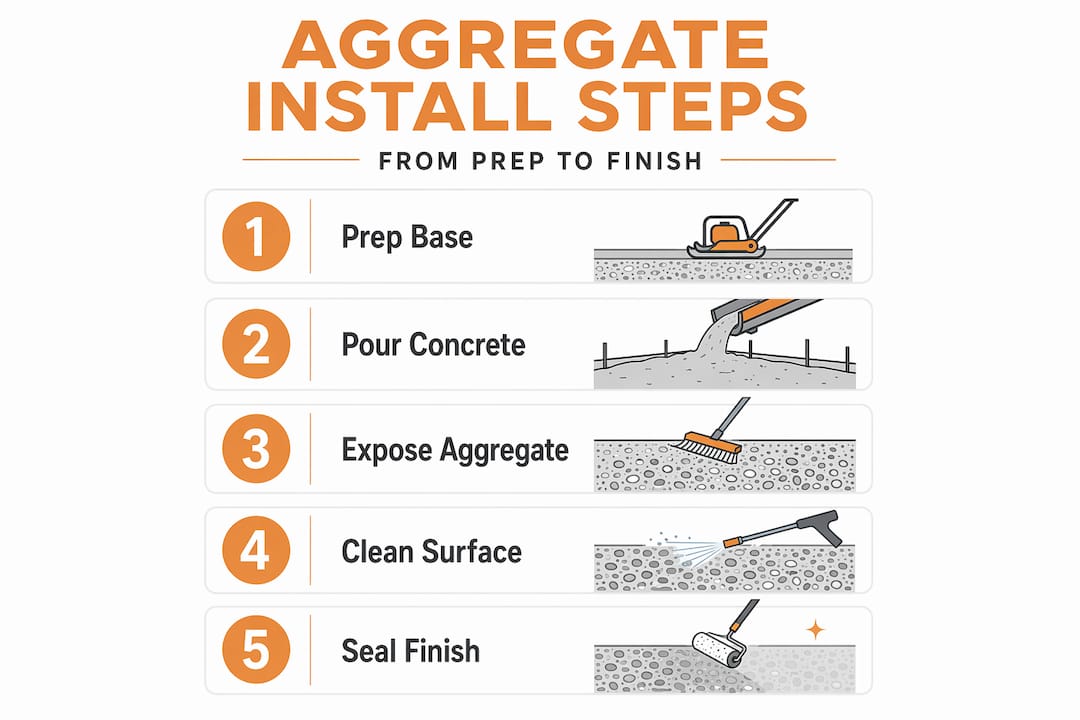
Understanding the process helps you ask better questions and spot corners being cut. Here’s how a quality installation unfolds:
- Site preparation. Excavate to the correct depth, compact the subbase, and install formwork that establishes the correct slope for drainage.
- Reinforcement and control joints. Lay mesh or rebar at the correct height within the pour, and pre-plan where control joints will be placed to manage natural cracking.
- Pour the concrete. Use a mix specified for exposed aggregate work, which typically includes a carefully graded stone blend for visual consistency.
- Bull float and finish. Level the surface and bring paste to the top, but don’t over-finish, as too much troweling pushes aggregate too deep.
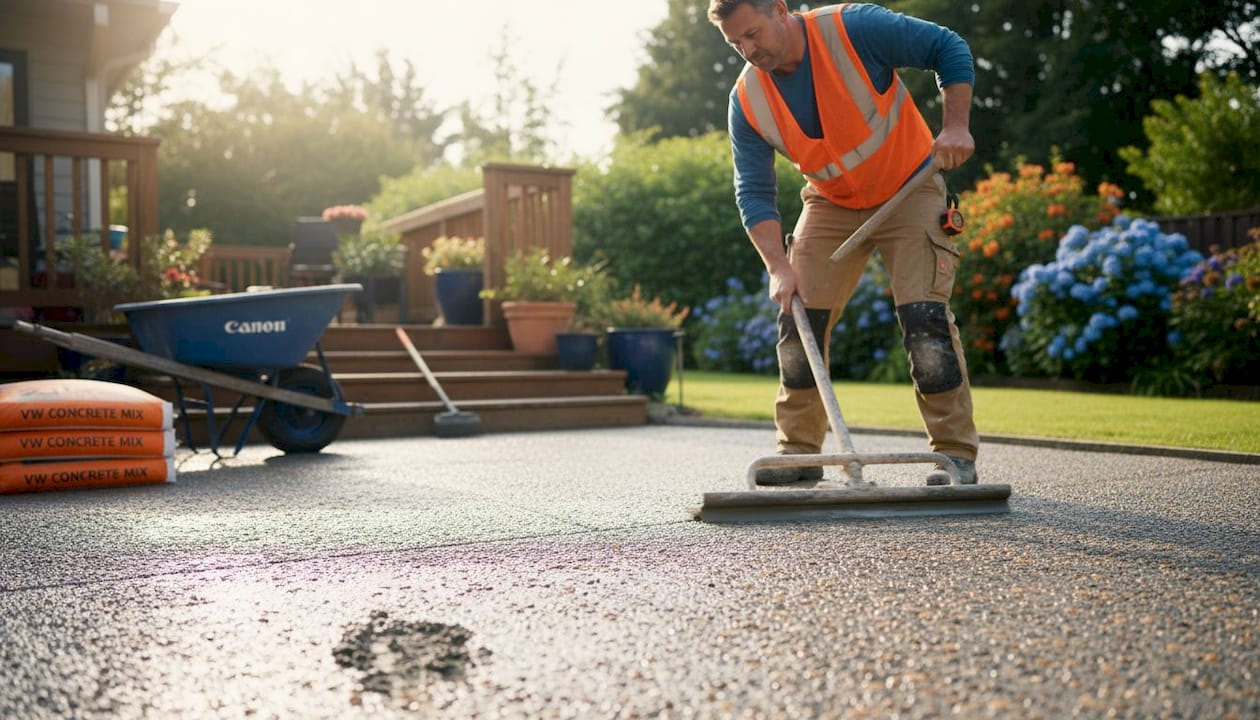
- Apply surface retarder. Spray an even coat across the entire surface to slow the top layer’s cure while the rest of the slab sets.
- Wait for the right set time. This is where most mistakes happen. Check the surface periodically — it needs to be firm but not fully cured.
- Test wash a small area. Before committing to the full wash-off, test a corner. If aggregate moves or loosens, wait longer.
- Full wash-off and exposure. Use water pressure and soft brushing to remove the retarded paste and reveal the aggregate. Work consistently to avoid uneven exposure.
- Cure the slab. Allow adequate curing time, protecting from direct sun and rain where possible.
- Apply sealer. A quality penetrating or film sealer locks in the finish and protects against staining.
The American Concrete Institute confirms this sequence is the foundation of every properly installed exposed aggregate job.
“Timing and method of exposure are critical to avoid uneven or failed finishes — wash too early and aggregate is lost, wash too late and the paste won’t release.” — Australian Slate Crete Supplies
| Method | How it works | Best for | Key risk |
|---|---|---|---|
| Surface retarder wash-off | Chemical slows top cure, paste washed off when ready | New poured slabs | Timing errors cause uneven finish |
| Abrasive/grinding method | Surface ground after full cure to expose aggregate | Precast or retrofit jobs | Silica dust hazard, depth control |
You can see how the retarder method plays out on a real-world driveway job and review the stages on a Sunbury project for comparison.
Detailed as the installation steps are, knowing what to avoid during and after installation is just as crucial for lasting results.
Common mistakes and troubleshooting: What can go wrong and how to avoid it
Most exposed aggregate failures trace back to a handful of predictable errors. Knowing them in advance protects you as a homeowner because you know what to watch for.
The most common problems and their causes:
- Washing too early. The paste is still too soft, aggregate shifts or pulls out, and you’re left with a rough, uneven surface and loose stones.
- Washing too late. The retarder can’t fully release the cured paste, creating patchy areas where some aggregate is exposed and others remain covered in gray film.
- Uneven retarder application. If the retarder spray isn’t applied consistently, exposure depth varies across the slab, which is visible once sealed.
- Missed spots in wash-off. Corners, edges, and areas near formwork are often under-washed, leaving gray patches on an otherwise clean surface.
- Water pooling on the finished surface. This almost always comes from incorrect falls set during formwork, which goes back to planning.
- Skipping or delaying the sealer. An unsealed surface absorbs oil, stains, and moisture, and begins to lose its color within the first year.
The exposure timing is the single most technically demanding part of the entire job. Weather affects it, concrete mix affects it, and so does the thickness of retarder applied. Experienced contractors use a finger-press test and a small corner test wash before committing to the full surface.
“A surface with uneven exposure can’t easily be repaired to look uniform — it’s almost always a full resurfacing job if the damage is widespread.” — Australian Slate Crete Supplies
If abrasive or grinding methods are used instead of a retarder, silica dust becomes a real safety issue. Workers need proper respirators and dust suppression equipment. When reviewing a contractor’s past work, ask directly how they managed dust control on any abrasive jobs.
Armed with troubleshooting tips, the final step is ensuring you hire a contractor who truly knows the process and what sets Melbourne professionals apart.
Hiring the right contractor: Questions to ask and red flags
A portfolio of finished photos tells you part of the story. What it doesn’t tell you is whether the contractor understood the timing, managed the retarder properly, or has ever dealt with a difficult pour in warm Melbourne weather. You need to ask.
Five vital questions before you hire:
- Can you walk me through your specific retarder timing process and how you adjust for weather on the day?
- Do you perform a test wash before committing to the full surface exposure?
- What reinforcement specification do you use for a driveway versus a path?
- How do you handle drainage falls, and can I see that on a site plan before work begins?
- What sealer do you use, and when is the first reseal recommended?
A contractor who fumbles on question one has likely not thought deeply about the process. Timing knowledge is what separates experienced tradespeople from operators who pour, spray, and hope.
Red flags to watch for include vague pricing with no specification detail, unwillingness to provide references from exposed aggregate jobs specifically, no written scope of work, and pressure to start immediately without a planning walkthrough.
The National Concrete Authority notes that exposure can be achieved by surface retarder wash-off for poured slabs or by abrasive methods for precast and retrofit scenarios, with abrasive methods carrying additional occupational safety requirements around silica dust management.
Pro Tip: If any abrasive or grinding method is proposed for your job, ask directly what silica dust controls will be in place. A vague answer is a serious warning sign.
A look at a finished Mount Cottrell project gives a useful benchmark for what a clean, professional result looks like so you can assess the quality of photos in any contractor’s portfolio.
To wrap up, let’s get into what most articles miss — the true make-or-break details that decide whether your upgrade stands the test of time.
The real secret to flawless exposed aggregate: What matters most
After watching exposed aggregate jobs succeed and fail across Melbourne for over two decades, the honest answer is that materials are almost never the deciding factor. Most contractors use similar concrete mixes, similar retarders, similar sealers. What separates beautiful, lasting work from patchy disappointment is timing control and communication.
A skilled concreter with an average mix will outperform an overconfident one with premium materials every single time. The window for correct wash-off can be as narrow as 30 to 60 minutes depending on weather conditions. On a hot Melbourne February afternoon, that window shrinks fast. A contractor who has done 10 exposed aggregate jobs knows this. One who has done 300 feels it instinctively.
The second thing most homeowners miss is the importance of a written sequence before work begins. Not just a quote with a dollar figure, but an actual written job timeline that covers base compaction day, pour day, expected set window, planned wash-off timing, cure period, and seal date. When a contractor provides this without being asked, it signals genuine expertise. When they can’t produce it on request, that tells you something important.
Communication matters just as much as craft. Ask what sets professionals apart in exposed aggregate work, and the answer will always come back to honest dialogue about what’s achievable, what the surface will look like in five years, and what the homeowner’s maintenance role is after handover.
Reference checks matter too. Not “did they do a good job” references, but “did the surface look the same three years later” conversations. That’s where the real quality shows.
Get expert results with Melbourne’s exposed aggregate specialists
If you want exposed aggregate work done properly the first time, the process starts with talking to a team that has seen the full picture of what makes these projects succeed. At VW Concreting, we’ve completed over 145 projects across Melbourne since 2001 and we understand exactly what the timing, technique, and communication demands of exposed aggregate work require.

Whether you’re planning a new driveway, an entertaining area, or a garden path, our team will walk you through every stage before work begins. Explore our exposed aggregate services to see the range of finishes available, and browse our custom driveway and slab solutions to get a real sense of what’s possible for your property. Request a quote today and get a written plan, not just a number.
Frequently asked questions
How long does exposed aggregate concrete last in Melbourne conditions?
With proper installation and periodic resealing, exposed aggregate can last 20 to 30 years in Melbourne. Base preparation quality and sealing frequency are the two biggest factors in that lifespan.
What is the best time of year to install exposed aggregate in Melbourne?
Spring and autumn are the preferred seasons because moderate temperatures allow for more controlled curing. Extreme heat in summer or cold snaps in winter directly affect set times, and exposure timing errors are far more likely when conditions are unpredictable.
How can I tell if my contractor understands the exposure process?
Ask specifically about their test wash procedure and how they adjust timing for Melbourne’s weather. According to the National Concrete Authority, different exposure methods carry different technical and safety demands, and a knowledgeable contractor will address both without prompting.
What ongoing maintenance does exposed aggregate need?
Regular washing and resealing every two to five years keeps the surface protected and looking its best. As maintenance guides note, correctly sealed exposed aggregate is generally lower maintenance than many other decorative finishes, though consistency matters.
Leave A Comment