
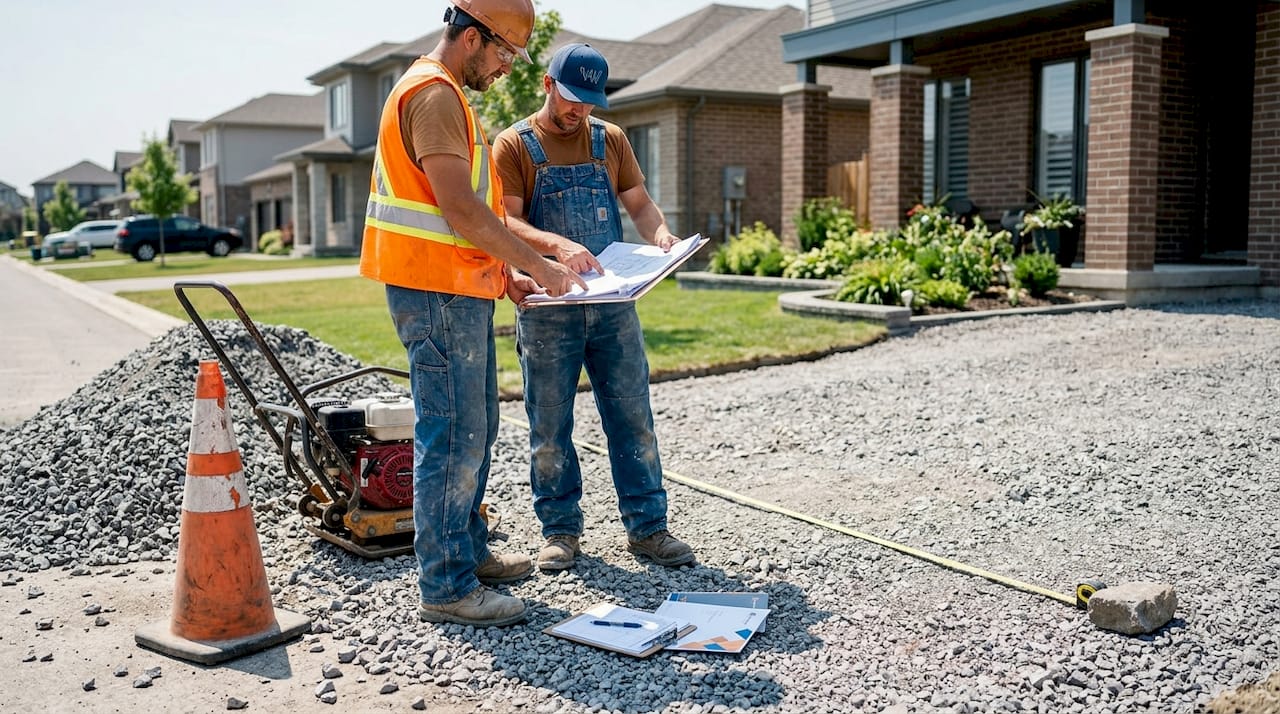
Most homeowners spend hours picking the right concrete finish or paver color for their driveway, then barely think about what goes underneath. That’s a costly mistake. The role of crushed rock base driveways is to carry every load, manage every drop of water, and absorb every freeze-thaw cycle before any stress reaches the surface. Get the base wrong and the surface cracks, ruts, and sinks — no matter how beautiful it looks on day one. This article covers exactly how crushed rock bases work, what they’re made of, and how to build one that actually lasts.
Table of Contents
- Key Takeaways
- The role of crushed rock base driveways: materials and structure
- Compaction and moisture: the engineering behind a stable base
- Water management in crushed rock base driveways
- Crushed rock vs. other base materials
- How to build and maintain a crushed rock base driveway
- What most people get wrong about driveway bases
- Build your driveway right with VW Concreting
- FAQ
Key Takeaways
| Point | Details |
|---|---|
| Base layer controls longevity | The crushed rock base, not the surface, determines how long your driveway survives traffic and weather. |
| Stone grade selection matters | Using the right gradation (#2/#3 for subbase, #57 for base) balances drainage and load distribution. |
| Compaction is non-negotiable | Base layers must reach 95 to 98% Proctor density or settling and rutting will follow within months. |
| Drainage design prevents failure | Open-graded lower layers shed water away from the subgrade, stopping freeze-thaw and saturation damage. |
| Maintenance extends base life | Routine grading, edge control, and drainage checks protect your base investment over the long term. |
The role of crushed rock base driveways: materials and structure
Think of a crushed rock driveway base as a carefully stacked system, not a single layer of gravel. Each layer has a specific job, and swapping materials or skipping a layer breaks the whole chain.
Subbase vs. base layer: what each one does
The subbase sits directly on the prepared native soil (the subgrade). Its job is to spread traffic loads over a wider area and provide drainage below the main base. Most professionals use coarse #2 or #3 stone for this layer. These large angular pieces create significant void space that allows water to move freely and drains quickly without clogging.
The base layer sits on top of the subbase and provides the firm, compactable platform that everything above rests on. #57 crushed stone is the standard choice here because it compacts well while still maintaining enough void space for some drainage. The surface course, whether concrete, asphalt, or loose gravel, then goes on top of this stable base.
Why geotextile fabric belongs between soil and stone
One of the most skipped steps in residential driveway construction is laying geotextile fabric between the native soil and the subbase. Without it, repeated traffic loads push soil fines upward into the aggregate base in a process called pumping. Over time, those fine soil particles fill the voids in your crushed rock base, destroying drainage and reducing load-bearing capacity. A geotextile fabric acts as a filter: it lets water through but keeps soil particles where they belong.
Pro Tip: When purchasing geotextile fabric, specify a non-woven separation grade rather than a woven type. Non-woven fabric has finer filtration and better resists soil fines intrusion under dynamic traffic loading.
Understanding how graded aggregate choices affect load distribution helps clarify why matching stone size to layer function is not optional. The wrong gradation creates weak points that compound over time.
| Layer | Stone Grade | Primary Function |
|---|---|---|
| Subbase | #2 or #3 crushed stone | Drainage and broad load distribution |
| Base | #57 crushed stone | Stable, compactable structural platform |
| Surface (gravel option) | #57 or crusher run | Traffic surface and final load spreading |
Compaction and moisture: the engineering behind a stable base
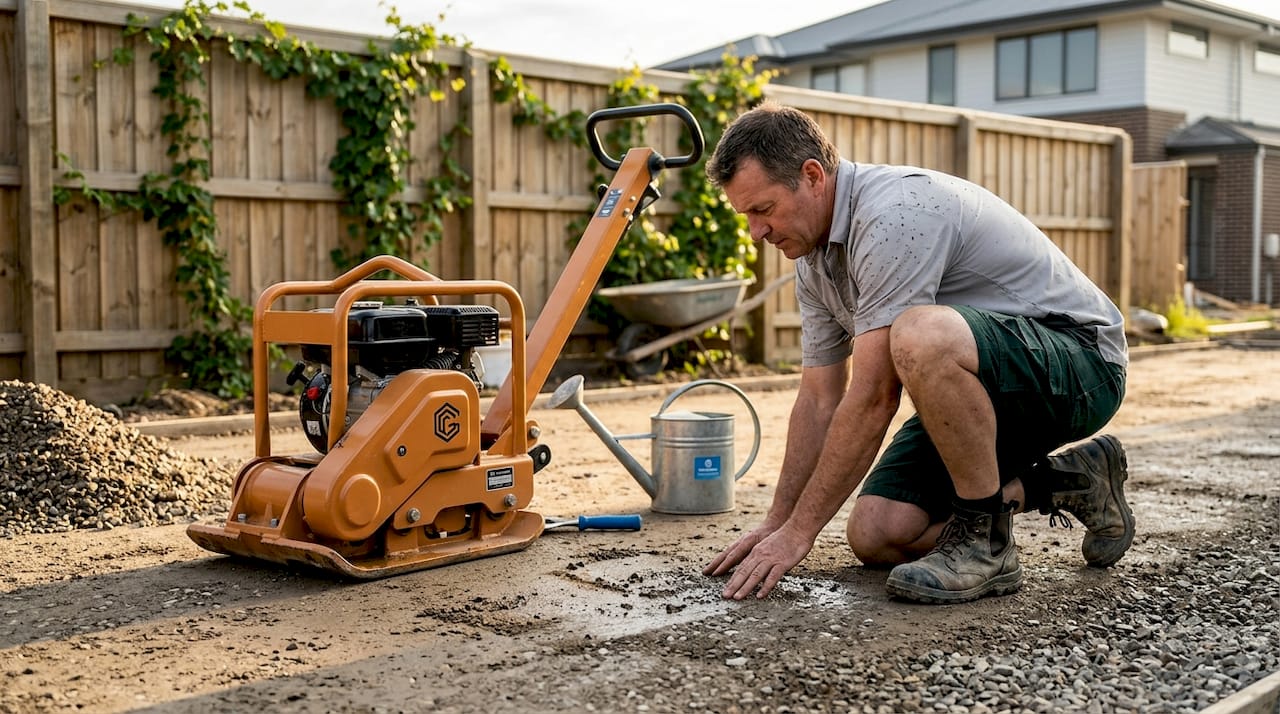
You can source the best crushed stone on the market and still end up with a failed driveway. The reason is almost always compaction. Driveway failures attributed to wrong materials or depth actually originate from under-compaction during installation more often than any other cause.
Why compaction density targets exist
Compaction is measured as a percentage of Proctor maximum dry density, a laboratory standard for how dense a given material can get. The targets matter because they control how much void space remains in the base after installation. Here are the minimum targets for a residential driveway:
- Subgrade (native soil): 90 to 95% Proctor density. The natural ground must be stable before you place any aggregate on top.
- Subbase (#2/#3 stone): At least 95% Proctor density. Achieving this with large-void open-graded stone requires multiple passes with a plate compactor or roller.
- Base layer (#57 stone): 95 to 98% Proctor density. This is the critical compaction target that most residential projects under-achieve.
- Lift thickness: Never compact more than 4 to 6 inches of material at once. Thicker lifts leave the bottom portion under-compacted even when the surface looks fine.
- Equipment check: A hand tamper is not sufficient for anything beyond a small garden path. Plate compactors work for thin residential bases; vibratory rollers are better for deeper commercial-grade work.
Mechanical compaction locks angular particles together, reducing voids from roughly 40% down to 20 to 25%. That reduction is what creates a base that resists shifting under a loaded truck or after a hard frost.
Moisture content and its effect on compaction quality
Here is where many DIY projects go wrong. Crusher run (a blend of crushed stone and stone dust) needs moisture to activate fine particles that bond the material together during compaction. Compact it when it is too dry and the particles never bond properly, leaving a base that looks compacted but breaks apart under load.
Open-graded stone like #57 does not depend on moisture for bonding because it contains very little fine material. But even here, excess water during compaction can reduce effective density by acting as a lubricant between particles.
Pro Tip: Before compacting crusher run, do a simple field test: grab a handful and squeeze it. If it holds a shape and crumbles cleanly when you poke it, the moisture content is about right. If water squeezes out, it is too wet. If it falls apart immediately, it needs a light misting.
Water management in crushed rock base driveways
Water is the single biggest threat to any driveway system. It weakens the subgrade, triggers freeze-thaw cracking, and carries fine particles into your base aggregate. Getting water management right is not a finishing touch. It is part of the structural design.
The strategy works in two directions. Open-graded lower layers maintain drainage pathways even after compaction, allowing water that infiltrates from the surface to move laterally and exit through the edges rather than pooling under the base. The denser base layer above sheds water downward into those drainage voids instead of trapping it against the surface course.
When trapped water reaches the subgrade, saturated soil loses load-bearing capacity rapidly. A subgrade that handles a 10,000-pound load when dry may fail under half that load when wet. Freeze-thaw cycles compound this. Water in saturated soil expands when it freezes, physically lifting and cracking whatever pavement sits above it. This is why preventing driveway cracks starts at the base, not at the surface.
- Slope the subgrade at least 2% toward the edges before placing any aggregate to encourage lateral drainage.
- Install French drains or drainage channels along the driveway edges if you are in a high-rainfall area or working with clay-heavy soil.
- Never place impermeable material directly on top of open-graded subbase without ensuring a lateral drainage exit point.
- Keep surface water from adjacent landscaping from draining onto the driveway edges and into the base system.
The separation between native soil and crushed rock is just as important for water management as for structural reasons. Fines that migrate into base aggregate clog drainage voids and turn what was a free-draining system into a water-retaining one.
Crushed rock vs. other base materials
Not all base materials perform equally, and the differences become obvious within a few years of installation.
| Base Material | Load Capacity | Drainage | Durability | Cost (relative) |
|---|---|---|---|---|
| Angular crushed rock | High | Good to excellent | High | Medium |
| Rounded gravel | Moderate | Good | Moderate | Low |
| Crushed concrete | Moderate-high | Moderate | Moderate | Low |
| Compacted soil only | Low | Poor | Low | Minimal |
Angular crushed stone offers better interlocking and load-bearing than rounded river gravel because the jagged faces lock together under load. Rounded gravel particles roll past each other, which is why roads built on rounded gravel base develop ruts faster under heavy traffic.
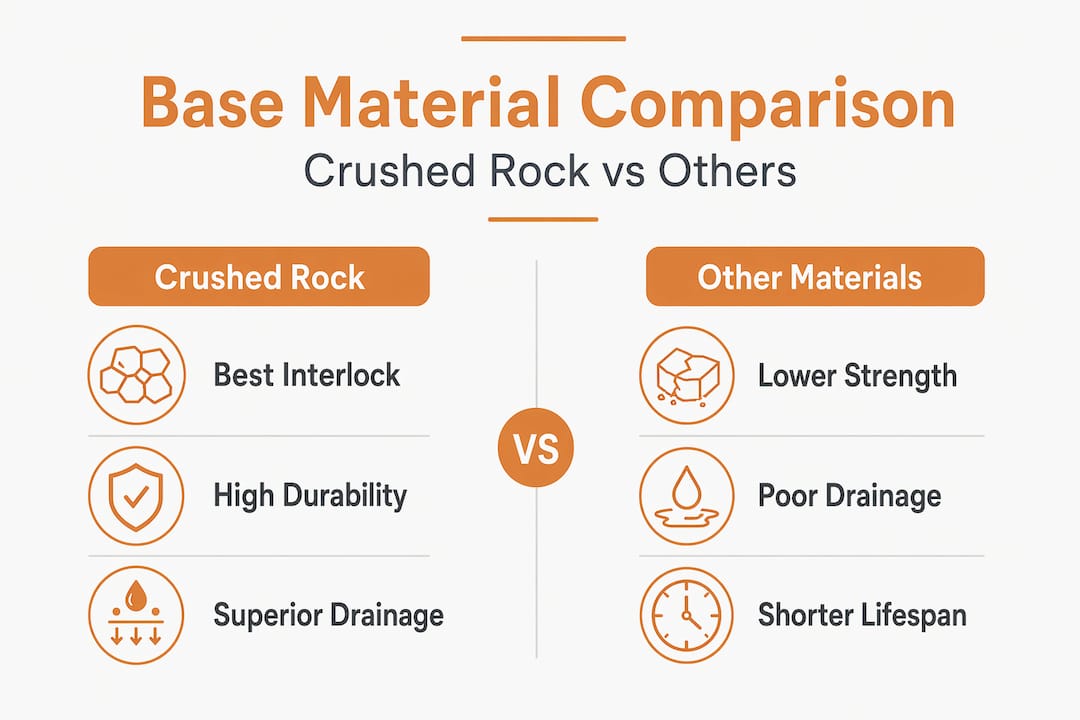
Crushed concrete is a viable budget option but it often contains soil contamination from the original demolition site and has more variable gradation than engineered crushed rock. It works in low-traffic situations but is not the best choice for a driveway that sees trucks or heavy vehicles regularly.
Common installation mistakes that undermine even good materials include:
- Skipping the geotextile separation layer between soil and aggregate
- Using only one layer of base material instead of a subbase plus base system
- Compacting in lifts that are too thick (more than 6 inches)
- Failing to crown or slope the base for drainage
- Placing surface material before the base has been given time to settle and re-compacted after initial traffic
How to build and maintain a crushed rock base driveway
A well-built base follows a clear sequence. Rushing any step transfers the cost to repairs later. Residential driveways generally require 4 to 6 inches of compacted base and 4 to 6 inches of compacted subbase depending on soil type and expected traffic.
- Excavate to depth. Remove enough soil to accommodate subbase, base, and surface layers plus 2 to 4 additional inches for soft or clay-heavy soils.
- Prepare and compact the subgrade. Grade the native soil to a 2% cross slope, remove organic matter, and compact to at least 90% Proctor density.
- Install geotextile fabric. Lay it over the entire subgrade, overlapping seams by at least 18 inches, before placing any aggregate.
- Place and compact the subbase in lifts. Add #2 or #3 crushed stone in 4-inch lifts, compacting each lift fully before adding the next.
- Place and compact the base layer. Add #57 stone or crusher run in 4-inch lifts, targeting 95 to 98% compaction per lift. Check moisture content before compacting crusher run.
- Add surface course. Whether you are finishing with gravel, asphalt, or concrete, place it on a fully compacted and graded base.
For maintenance, inspect the driveway edges annually for erosion or slumping that could undermine the base. Re-grade and top up surface gravel every two to three years. Address drainage issues at the first sign of standing water near the edges. A properly laid driveway slab built on a correctly prepared base rarely needs major repairs in its first decade.
What most people get wrong about driveway bases
I have seen a lot of driveways fail. In my experience, the conversation almost always goes the same way: a homeowner or developer calls because their driveway is cracking or sinking, and when we dig into it, the base is either under-compacted, under-designed in thickness, or missing the geotextile separation layer entirely.
The surface always gets the attention. People see a crack and want to fill it. What they do not see is that the base layer failure was the origin of that crack months or years before it showed up on the surface. Patching the surface without addressing the base is like painting over rust. It buys a little time and then fails again.
What I tell every client: spend money on the base first. A thicker subbase, proper compaction equipment, and a geotextile layer cost a fraction of what a complete driveway rebuild costs five years down the track. The proper base engineering is what makes a driveway a 20-year asset instead of a 7-year maintenance problem.
The one thing that separates professional results from DIY disappointment is almost never the surface material. It is the discipline to compact properly, layer correctly, and manage drainage before any finish goes down.
— Vic
Build your driveway right with VW Concreting

VW Concreting has completed over 145 driveway and concreting projects across Melbourne since 2001, and the base preparation is where every one of those projects starts. Whether you are planning a new residential driveway or a large developer project, getting the crushed rock base engineered correctly from the first shovel makes everything above it perform better and last longer. Explore our driveway and slab projects to see what a properly built base looks like in practice. For a broader look at what a full-service project involves, visit our comprehensive project showcase. Contact VW Concreting to discuss your driveway base requirements with an experienced team that has seen every soil type and traffic condition Melbourne has to offer.
FAQ
What is the role of a crushed rock base in a driveway?
The crushed rock base distributes traffic loads across the subgrade, manages water drainage, and resists freeze-thaw damage to protect the surface course above it. Without a properly designed base, even the most durable surface material will crack and settle prematurely.
How thick should a crushed rock base be for a residential driveway?
Most residential driveways need 4 to 6 inches of compacted base layer plus 4 to 6 inches of compacted subbase, with adjustments for soft or clay soils and heavier vehicle traffic.
What is the best crushed rock for a driveway base?
#57 crushed stone is the standard for the base layer because it compacts well and maintains drainage. Coarse #2 or #3 stone works best for the subbase layer where drainage void space is the priority.
Why does compaction matter so much for a crushed rock driveway base?
Inadequate compaction leaves excessive voids in the base, which allows particles to shift under load and leads to rutting, settling, and surface cracking. Reaching 95 to 98% Proctor density locks angular particles together so the base behaves as a stable structural unit.
How do I maintain a crushed rock base driveway?
Inspect edges annually for erosion, keep drainage channels clear, re-grade the surface every two to three years, and address any standing water immediately to prevent saturation from weakening the subgrade beneath the base.
Leave A Comment