

Fencing installation on new construction sites is defined as the planned placement of perimeter barriers to secure the site, protect the public, and meet regulatory requirements set by bodies like OSHA and local municipal codes. Project managers who skip this step face real consequences. Improper fencing and site preparation cause delays in 30% of construction projects. That figure reflects lost time, failed inspections, and budget overruns that a structured installation process prevents. Whether you are managing a residential subdivision or a commercial development, getting the perimeter right from day one sets the tone for everything that follows.
What are the prerequisites for fencing installation on new construction sites?
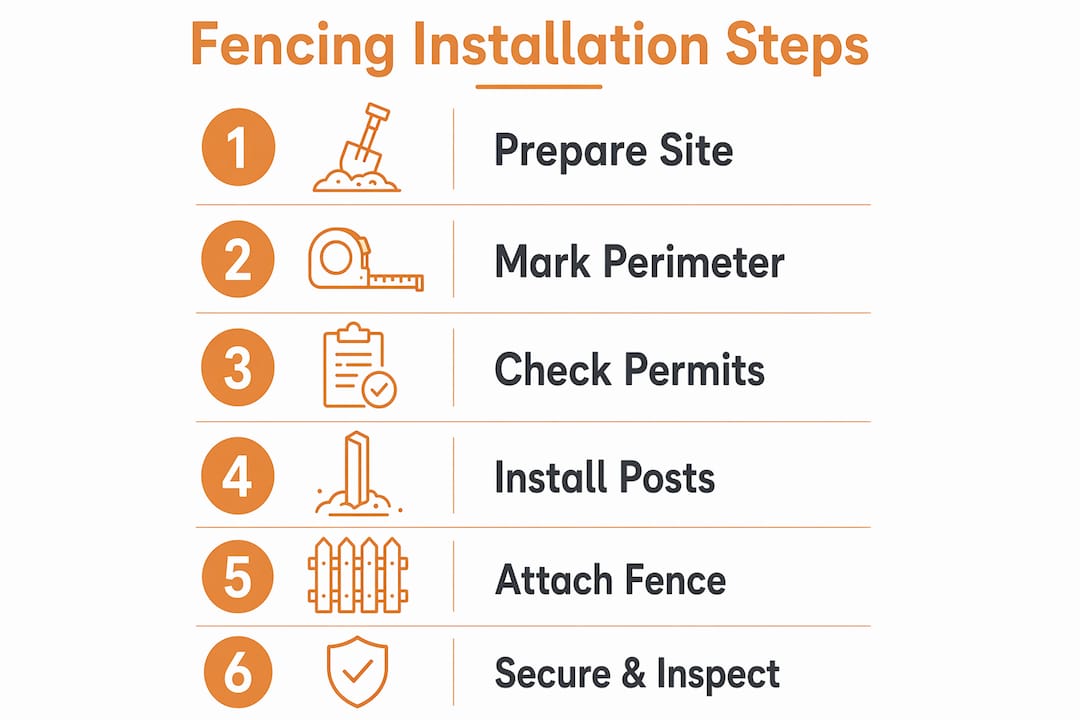
Site preparation is the most skipped and most costly phase of any fencing project. Before a single post goes in the ground, you need to complete three non-negotiable steps: clear the fence line, review local codes, and secure permits.
Start by physically walking the perimeter. Mark the fence line with stakes and string, remove debris, and identify underground utilities using a locating service. A fence post driven through a gas line or conduit creates liability that no insurance policy fully covers.

The regulatory review comes next, and this is where many contractors underestimate the work. Standard temporary fencing requires a minimum height of 6 feet under OSHA guidelines, but local codes frequently exceed that baseline. New York City’s Building Code Section 3307.7, for example, mandates a minimum 8-foot solid fence for new construction and demolition sites. Using a 4-foot residential panel on a site that requires 8 feet triggers an immediate shutdown. Check your municipality’s specific requirements before ordering materials.
Pro Tip: Request written confirmation of local fencing requirements from your municipal building department before submitting permit applications. Verbal guidance changes; written records protect you.
Tools and materials overview
| Item | Purpose |
|---|---|
| Post hole digger or auger | Creates holes for permanent or semi-permanent posts |
| Concrete mix (60 lb bags) | Sets posts for chain link and solid panel systems |
| Panel clamps and tension wire | Secures chain link panels and maintains alignment |
| Spirit level | Confirms vertical alignment during installation |
| Safety signage | Meets OSHA and municipal posting requirements |
| Base feet and ballast blocks | Stabilizes temporary fencing panels on hard surfaces |
Selecting the right fence type before you order materials saves significant rework. Chain link suits open sites with low pedestrian traffic. Solid hoarding, which is a continuous wall of plywood or steel panels, works better near public footpaths and high-traffic zones. Solid hoarding reduces dust and visibility issues compared to chain link, which matters when your site borders a school or retail strip. Avoid basing your fence selection solely on cost. Consider traffic volume, project duration, and compliance requirements before committing to a system.
Step-by-step guide to installing fencing at new construction sites
A structured installation process prevents the two most common failures: posts that shift under load and panels that separate at connections. Follow these steps in order.
-
Mark post positions. Measure and mark post locations along the staked fence line. Standard spacing for chain link is 10 feet between posts. Reduce spacing to 6–8 feet in areas exposed to high wind.
-
Dig post holes. Use a power auger for efficiency. Holes should be one-third the post length in depth. A 6-foot post needs a 2-foot hole minimum.
-
Set posts in concrete. Pour concrete mix into each hole around the post. Check vertical alignment with a spirit level before the concrete sets. Allow 24–48 hours of cure time before attaching panels.
-
Install tension wire or top rail. For chain link systems, run a top rail through the post caps and secure it. This rail carries the load of the mesh and keeps the fence from sagging.
-
Attach panels or mesh. Hang chain link mesh from the top rail and secure it with tension bands at each post. For solid hoarding, bolt panels directly to the post frame. Stabilizing base feet and aligning panels properly prevents wind-load failures that expose the site to security breaches.
-
Close all gaps. Walk the full perimeter after installation. Any gap wider than 4 inches at ground level creates an entry point and a compliance failure. Use infill panels or ground stakes to seal them.
-
Install access gates. Position gates at delivery entry points and pedestrian access zones. Gates must swing outward from the site and include a lockable latch rated for construction use.
-
Post required signage. Attach OSHA-required safety signs, site identification, and emergency contact information at each access point and at regular intervals along the fence line.
Pro Tip: Install a secondary internal barrier around excavation zones. Guardrails at excavations must reach 39–45 inches in height to meet OSHA safety standards, separate from the perimeter fence requirement.
Security fencing does more than mark a boundary. Proper site fencing delineates delivery routes and pedestrian walkways, which reduces accidents and confusion on active sites. A well-planned fence layout is a logistics tool, not just a safety checkbox. For a broader view of how fencing fits into the full project lifecycle, the role of fencing in building projects covers industry-recommended planning approaches in detail.
Common mistakes and troubleshooting during construction site fencing
Most fencing failures on construction sites trace back to four repeatable errors. Knowing them in advance is the fastest way to avoid them.
-
Skipping the site audit. Failing to audit local ordinances causes non-compliance that halts projects. Inspectors do not accept “we didn’t know” as a defense. Pull the local code before you pull the materials.
-
Using the wrong panel height. Residential panels are typically 4 feet tall. Commercial construction sites in most jurisdictions require 6 feet minimum, and many urban sites require 8 feet. Ordering the wrong height means a full replacement, not a patch.
-
Failing to stabilize base feet. Temporary fencing panels on hard surfaces rely on weighted base feet. Skipping ballast blocks or sandbags on exposed panels creates a wind-load failure risk. A fallen fence panel on a public footpath is a liability event.
-
Leaving unauthorized gaps. Gaps appear at corners, gate transitions, and where terrain changes elevation. Each gap is both a security breach and a compliance failure. Inspect the full perimeter after every significant weather event.
-
Ignoring maintenance schedules. A fence installed correctly on day one can degrade over a 12-month build. Panels shift, connections loosen, and signage fades. Schedule a formal perimeter inspection every two weeks.
“A detailed fence installation quote acts as a critical project roadmap, covering materials, labor, and potential extras to avoid budget creep.” — Best Practices for Construction Site Fencing
The quote point matters more than most project managers realize. Contractors who treat the initial quote as a rough estimate routinely face unbudgeted costs when panel heights, concrete volumes, or gate counts change mid-project. Lock in a detailed scope before work begins.
How do you maintain compliance and site security throughout a build?
Fencing compliance is not a one-time event. Site conditions change, boundaries shift, and inspectors return. Your fencing plan needs to adapt with the project.
-
Schedule biweekly inspections. Assign a specific team member to walk the perimeter every two weeks. Document findings with photos and a written log. This record protects you if a compliance dispute arises.
-
Upgrade fencing as phases change. Transitioning from temporary chain link to solid hoarding during high-activity phases is often necessary but frequently unbudgeted. Plan for this transition in your initial fencing budget, not as a reactive expense.
-
Update fence layout for boundary changes. Excavation expansions, crane swing zones, and material laydown areas all affect where your perimeter needs to sit. Treat the fence line as a living document that updates with the site plan.
-
Coordinate with municipal inspectors. Some jurisdictions require a fencing inspection before a building permit progresses to the next stage. Know your local inspection sequence and schedule fencing sign-off proactively.
-
Use clear access control signage. Every gate and access point needs posted rules: authorized personnel only, PPE requirements, and emergency contacts. Signage is both a safety tool and a compliance requirement under most municipal codes.
Fencing also functions as a logistics asset throughout the build. Security fencing is dual purpose: it deters theft and improves site flow through clear boundary demarcation. Sites with well-maintained perimeters report fewer unauthorized access incidents and cleaner delivery coordination. For projects where fencing and concreting work runs in parallel, understanding how fencing complements concreting can prevent scheduling conflicts and improve overall site integrity.
Key takeaways
Proper fencing installation on new construction sites requires regulatory research, correct material selection, structured installation, and ongoing perimeter maintenance to prevent delays, shutdowns, and security failures.
| Point | Details |
|---|---|
| Audit codes before ordering | Check OSHA minimums and local ordinances before selecting fence height or material type. |
| Match fence type to site phase | Use chain link for open phases and solid hoarding near public zones or during high-activity periods. |
| Stabilize and close all gaps | Weighted base feet and sealed panel connections prevent wind failures and unauthorized entry. |
| Treat quotes as project roadmaps | A detailed installation quote covering materials, labor, and extras prevents mid-project budget surprises. |
| Inspect every two weeks | Regular perimeter checks catch shifting panels, loose connections, and signage failures before they become compliance issues. |
What I’ve learned from fencing projects that went sideways
The projects that taught me the most were not the ones that went smoothly. They were the ones where a project manager assumed the fencing contractor had checked the local code, and the contractor assumed the project manager had. Nobody checked. The inspector arrived, found 6-foot chain link where the municipality required 8-foot solid hoarding, and the site went on hold for nine days while replacement panels were sourced and reinstalled.
Nine days of idle labor, delayed concrete pours, and a subcontractor rescheduling fee. All of it traced back to one conversation that never happened.
What I tell every project manager now: treat your fence specification the same way you treat your structural drawings. It is not a commodity decision. The fence type, height, and installation method are determined by your site location, your project phase, and your local code, in that order. Cost comes last.
The other thing I have seen underestimated repeatedly is the transition cost from temporary to permanent fencing. Contractors budget for the initial temporary setup and forget that a 12-month build will almost certainly require a fence upgrade at some point. Solid hoarding costs more than chain link. If that upgrade is not in the original budget, it comes out of contingency, and contingency is never where you want to be spending money.
Plan the full fencing lifecycle at the start. It costs nothing to budget for a transition you might not need. It costs a great deal to fund one you did not see coming.
— Vic
VW Concreting’s approach to fencing and site preparation
Construction projects run better when fencing and concreting are planned together from the start. Com has completed over 145 projects across Melbourne, coordinating perimeter fencing with concrete slabs, driveways, and site preparation work to keep builds on schedule and on budget.

When fencing and concreting scopes overlap, sequencing matters. A concrete slab poured before the perimeter fence is secured creates access control problems and potential damage from unauthorized entry. Com’s team coordinates both scopes to prevent exactly that kind of conflict. For projects that need integrated site solutions, the comprehensive project services page outlines how Com approaches full-site coordination from ground preparation through to finished fencing and concrete work.
FAQ
What is the minimum fence height for a construction site?
OSHA sets the general minimum at 6 feet for temporary construction fencing, but local codes frequently exceed this. New York City, for example, mandates 8-foot solid fencing under Building Code Section 3307.7.
What type of fencing works best for new construction sites?
Chain link suits open sites with low public exposure, while solid hoarding is the better choice near pedestrian zones because it contains dust and limits visibility into the site. The right choice depends on site location, project phase, and local code requirements.
Do I need a permit to install fencing on a construction site?
Most municipalities require a permit for construction site fencing, particularly for solid hoarding or any fence exceeding standard height thresholds. Check with your local building department before installation begins.
How often should construction site fencing be inspected?
A formal perimeter inspection every two weeks is the standard practice. Inspect after major weather events as well, since wind and rain are the most common causes of panel displacement and gap formation.
What causes construction site fencing to fail compliance inspections?
The most common failures are incorrect panel height, unauthorized gaps at corners or gate transitions, and missing or faded safety signage. Failing to audit local ordinances before installation is the root cause in most cases.
Leave A Comment