
Concrete resurfacing is defined as the process of applying a protective overlay to an existing driveway to repair surface wear and restore appearance without removing the original slab. For Melbourne homeowners dealing with faded, pitted, or lightly cracked driveways, this approach delivers real cost savings over full replacement while adding years of functional life. The industry term for this process is concrete overlay application, and it works only when the underlying slab is structurally sound. This guide covers everything from assessing your driveway’s condition to choosing the right materials for Melbourne’s climate.
Is your old driveway a good candidate for concrete resurfacing?
Concrete resurfacing is best suited for worn but structurally sound slabs. It cannot fix major structural defects such as deep cracks or sinking sections. Before you spend a dollar on materials, you need to know whether your driveway qualifies.
Signs your driveway can be resurfaced
These surface conditions respond well to a concrete overlay for driveways:
- Minor surface cracks under 1/4 inch wide
- Fading, discoloration, or staining without underlying damage
- Light pitting or scaling across the surface
- Spalling limited to the top layer with no slab movement beneath
Red flags that point to full replacement
Resurfacing is not suitable for structurally damaged driveways with deep cracks, wide spalling, or drainage failures. These conditions signal the slab itself has failed, and an overlay will simply peel off within months.
Watch for these warning signs:
- Cracks wider than 1/4 inch or running through the full depth of the slab
- Sections that rock, sink, or shift underfoot
- Pooling water that indicates drainage problems beneath the slab
- Widespread spalling that exposes aggregate across large areas
Pro Tip: Walk the full length of your driveway and press firmly on any cracked sections with your foot. If the slab flexes or moves, that section needs structural repair before any overlay is applied.
Spalling commonly results from water issues during the original concrete mix, so identifying the root cause before resurfacing prevents the same problem from recurring. A stable, solid slab is the non-negotiable starting point for any old driveway renovation.
What tools and prep work does concrete resurfacing require?
Preparation quality is the most frequent reason for resurfacing failure. Rigorous cleaning and repair are what separate a surface that lasts 10 years from one that peels within 12 months. This stage is not optional and cannot be rushed.
Tools you will need
Gather these before starting any driveway concrete repair project:
- Angle grinder with a diamond cup wheel for surface profiling
- Pressure washer rated at 3,000 PSI or higher
- Concrete crack filler or hydraulic cement for repairs
- Resurfacer mix (such as Quikrete Concrete Resurfacer or similar polymer-modified product)
- Steel trowel and a long-handled squeegee
- Stiff push broom for texture finishing
- Plastic sheeting or curing blankets
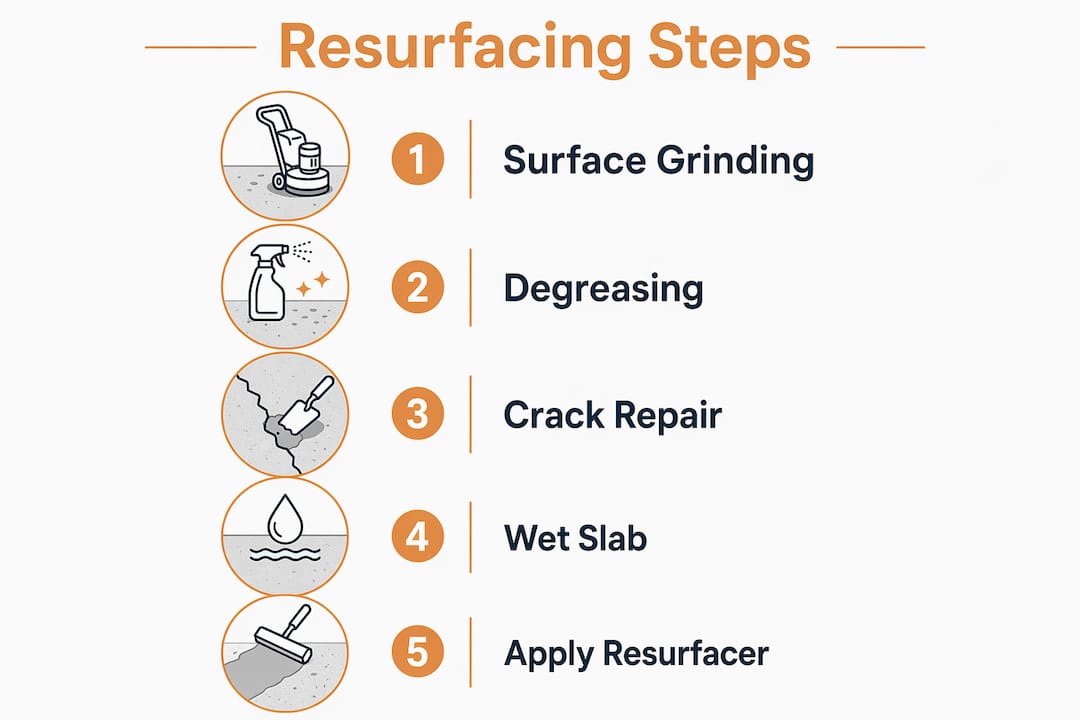
Step-by-step surface preparation
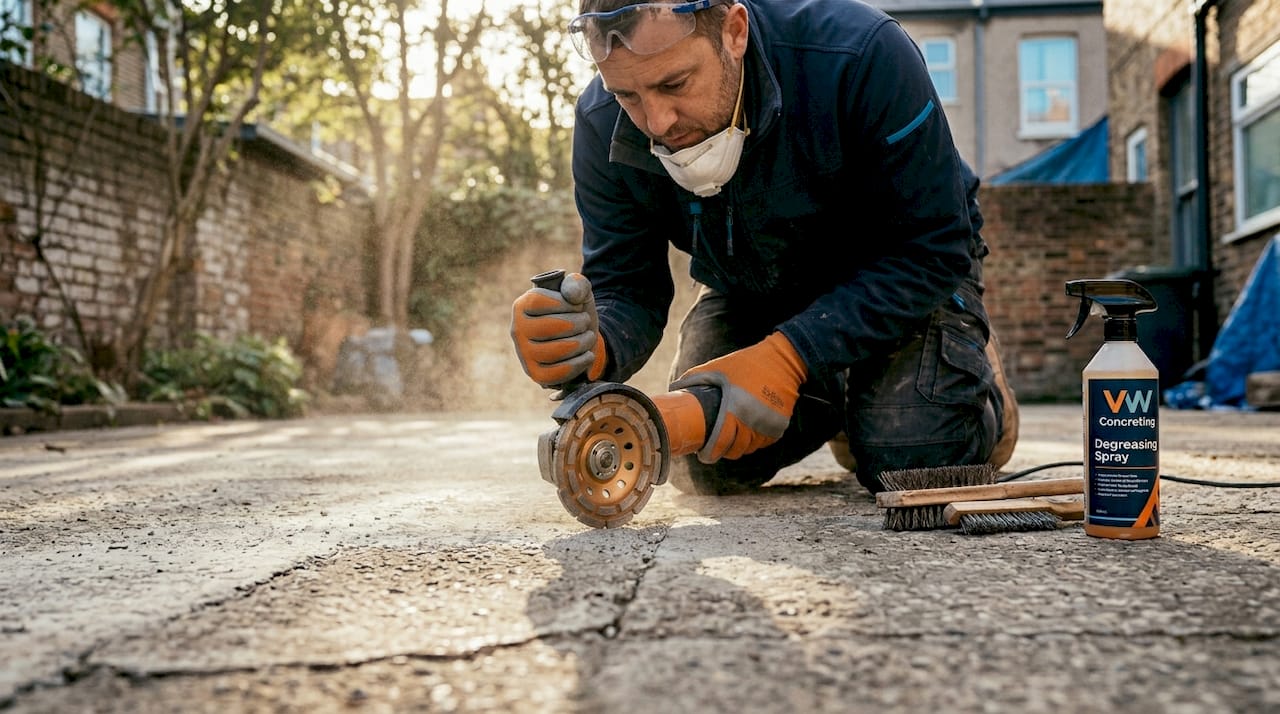
- Profile the surface. Use an angle grinder to open up the concrete pores and remove any existing sealers or coatings. Surface profiling methods vary based on overlay type, and testing for residual moisture prior to application prevents delamination.
- Remove all contaminants. Oil, grease, and previous coatings must be identified and removed before applying primers or overlays to ensure proper bonding. Use a degreaser, scrub thoroughly, and rinse completely.
- Pressure wash the entire slab. Run the pressure washer at full power across every square foot. This removes loose material, dust, and chemical residue that would prevent adhesion.
- Repair cracks and spalls. Fill cracks with a flexible polyurethane crack filler or hydraulic cement. Allow repairs to cure fully before proceeding. For guidance on what causes surface deterioration in the first place, the driveway crack prevention guide from VW Concreting explains the root causes clearly.
- Wet the slab. Dampen the surface with water before applying the overlay, but remove any standing puddles. A saturated surface with no standing water is the target condition.
| Prep step | Why it matters |
|---|---|
| Surface grinding | Opens pores for mechanical bond |
| Degreasing | Removes oils that block adhesion |
| Crack repair | Prevents cracks from telegraphing through overlay |
| Moisture check | Prevents delamination from trapped vapor |
Pro Tip: Do your prep work on a dry day with temperatures between 50°F and 90°F. Applying resurfacer in direct sun on a hot Melbourne summer afternoon causes the mix to skin over too fast, leaving a weak bond.
How to apply concrete resurfacer on old driveways
Applying the overlay correctly determines whether your driveway looks professional or patchy. Work methodically and do not skip any step.
- Mix in small batches. Resurfacer mixes have a workable time of around 20 minutes, so mixing small batches and working in sections prevents inconsistency and partial setting. Follow the manufacturer’s water-to-powder ratio exactly. Too much water weakens the final surface.
- Pour and spread in sections. Work from the back of the driveway toward the street. Pour the mix onto the wet slab and spread it with a steel trowel or long-handled squeegee to an even thickness of 1/8 to 1/4 inch. Applying the overlay in smaller sections with consistent thickness and edge feathering prevents cold joints and creates seamless results.
- Feather the edges. Where one section meets the next, blend the edges while both are still wet. Hard lines between sections become visible once the surface dries.
- Add slip-resistant texture. Using a push broom before final cure improves safety for driveways. Drag the broom in one consistent direction across the surface before the resurfacer skins over. This creates the grip needed for vehicle tires and foot traffic in wet conditions.
- Cure the surface properly. Curing blankets or plastic sheeting retain moisture and prevent cracking during curing. Cover the surface within 20 minutes of finishing and leave it protected for at least 24 hours.
- Respect traffic restrictions. Keep foot traffic off for at least 24 hours and vehicle traffic off for 48 to 72 hours. Melbourne’s variable weather can extend these times, so check the product instructions and err on the side of waiting longer.
- Apply a concrete sealer. Once fully cured, apply a penetrating or film-forming sealer suited to outdoor driveways. A quality acrylic or polyurethane sealer protects the finish from UV exposure, oil stains, and Melbourne’s seasonal rain.
Pro Tip: Never apply resurfacer over a dry slab without wetting it first. The dry concrete will pull moisture out of the overlay too fast, causing it to crack and delaminate within weeks.
Which resurfacing material is right for your driveway?
The material you choose affects durability, appearance, and the cost of driveway resurfacing over the long term. Each option has a distinct performance profile suited to different budgets and goals.
| Material | Lifespan | Best for | Approximate cost |
|---|---|---|---|
| Cementitious overlay | 8 to 15 years | Budget restoration, plain finish | Low to moderate |
| Polymer-modified overlay | 10 to 15 years | Durability, decorative finishes | Moderate |
| Epoxy coating | 5 to 10 years | Garages, light traffic areas | Moderate to high |
| Stamped concrete overlay | 10 to 15 years | Decorative, high curb appeal | High |
| Acrylic texture deck coating | 5 to 8 years | Color, slip resistance | Low to moderate |
Concrete driveway resurfacing typically lasts 8 to 15 years depending on prep quality, materials, and maintenance. That lifespan range reflects the difference between a rushed DIY job and a properly prepared professional application.
For Melbourne’s climate, polymer-modified overlays perform best. They handle the city’s temperature swings between hot summers and cool winters without cracking the way plain cementitious mixes can. Stamped concrete overlays and exposed aggregate finishes add significant curb appeal and are worth considering if you want the driveway to complement a renovated home exterior. VW Concreting’s decorative driveway options show what these finishes look like in real Melbourne projects.
Epoxy coatings work well in garages but are not the best choice for open driveways exposed to UV. They tend to yellow and peel under direct sunlight without UV-stable topcoats. Acrylic texture deck coatings are the most affordable option and apply quickly, but they require recoating more frequently than polymer overlays.
Common mistakes that ruin a resurfaced driveway
Most resurfacing failures trace back to a short list of avoidable errors. Knowing them in advance saves you from redoing the job.
- Skipping surface prep. Applying overlay to a dirty, oily, or unground surface is the single fastest way to cause peeling. No primer or bonding agent compensates for a contaminated substrate.
- Mixing too much at once. Batching a full bag when you can only spread half of it in 20 minutes leaves you with a partially set mix that creates texture inconsistencies and weak spots.
- Applying too thick. Resurfacer applied over 1/4 inch in a single coat shrinks unevenly as it cures, causing surface cracking. Multiple thin coats outperform one thick application.
- Driving on it too soon. Vehicle weight on an under-cured overlay causes permanent impressions and surface fractures. The 48 to 72 hour wait is not a suggestion.
- Skipping the sealer. An unsealed resurfaced driveway absorbs oil, water, and UV damage immediately. Sealing is what protects the color and surface integrity over time.
For long-term maintenance, reseal the driveway every 2 to 3 years using a product compatible with your overlay type. Clean the surface with a pH-neutral cleaner and a stiff brush rather than harsh acids, which degrade the sealer. Watch for early signs of trouble including hairline cracks at section edges or areas where the overlay sounds hollow when tapped. Hollow spots indicate delamination and need repair before water gets underneath and causes larger failures.
Pro Tip: Tap the resurfaced area with a coin or screwdriver handle six months after application. A solid thud means good adhesion. A hollow click means the overlay has separated and needs attention before it lifts completely.
Key takeaways
Concrete resurfacing old driveways delivers lasting results only when the slab is structurally sound, the surface is properly prepared, and the right material is selected for Melbourne’s climate.
| Point | Details |
|---|---|
| Assess before you resurface | Check for cracks wider than 1/4 inch, sinking sections, or drainage failures before committing to an overlay. |
| Prep determines success | Grinding, degreasing, pressure washing, and crack repair are what make an overlay bond and last. |
| Match material to climate | Polymer-modified overlays handle Melbourne’s temperature swings better than plain cementitious mixes. |
| Respect curing times | Keep vehicles off for 48 to 72 hours and apply a sealer once fully cured to protect the finish. |
| Reseal every 2 to 3 years | Regular resealing extends driveway lifespan and protects color and surface integrity long term. |
What working on Melbourne driveways has taught me
After years of seeing both DIY attempts and professional jobs across Melbourne’s suburbs, the pattern is consistent. The homeowners who get a great result are not the ones who spent the most money on materials. They are the ones who spent the most time on preparation.
Melbourne’s weather adds a real variable that interstate guides do not account for. The UV intensity in summer accelerates sealer breakdown faster than in cooler climates, which means the 2 to 3 year resealing schedule is not conservative. It is genuinely necessary here. I have seen polymer-modified overlays on well-prepped slabs still looking sharp after 12 years in Melbourne’s eastern suburbs, and I have seen budget acrylic coatings peeling within 18 months on driveways where the prep was rushed.
DIY resurfacing is viable for small areas under 100 square feet with surface-level damage, but larger projects or decorative finishes are best left to professionals. A standard Melbourne driveway runs 40 to 60 square meters. That is not a small project, and the margin for error on mixing, timing, and edge feathering is narrow. If you are doing it yourself, practice your mixing and spreading technique on a small section at the back before committing to the full surface.
The sustainability argument for resurfacing also deserves more attention than it gets. Replacing a structurally sound slab generates significant concrete waste and costs two to three times more than resurfacing. When the slab is good, resurfacing is the smarter choice on every measure.
— Vic
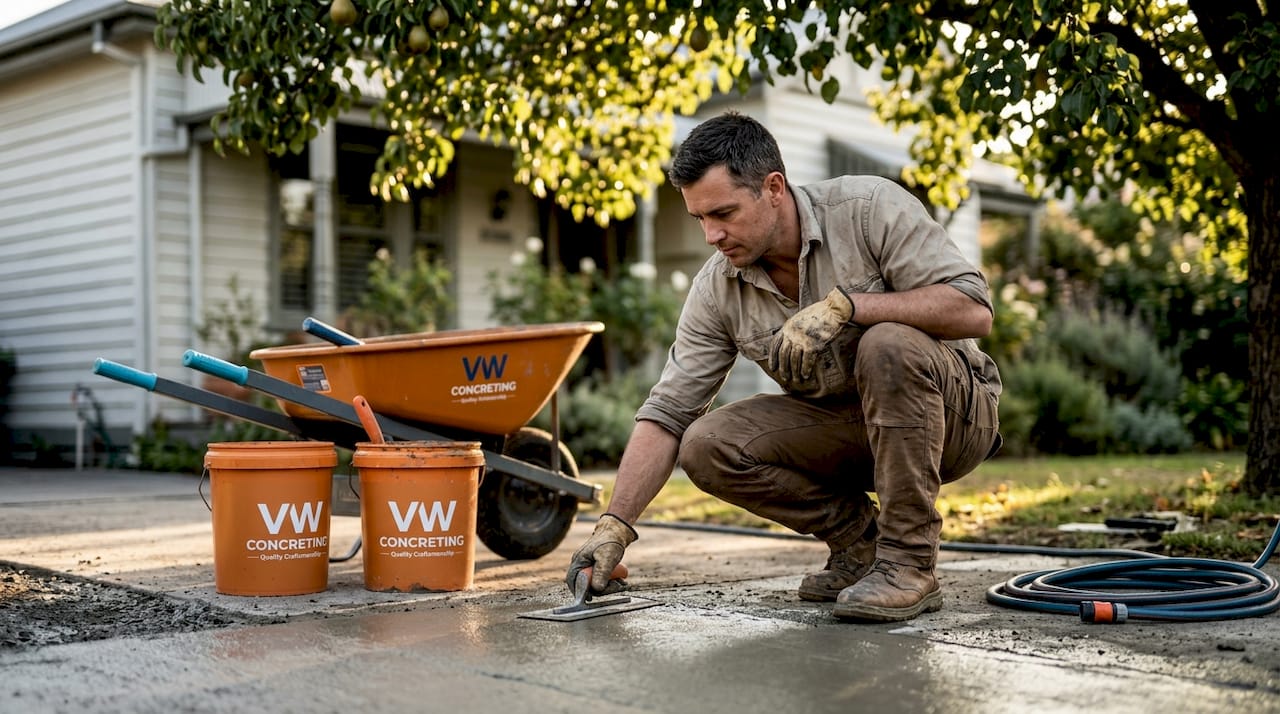
Restore your driveway with VW Concreting in Melbourne
VW Concreting has been delivering quality concrete work across Melbourne since 2001, with over 145 completed projects covering driveways, slabs, and decorative outdoor surfaces. The team understands Melbourne’s specific climate demands and uses polymer-modified overlays and decorative finishes that hold up through the city’s full seasonal range.

Whether you need a straightforward concrete overlay for a worn driveway or a decorative stamped finish to match a renovated home, VW Concreting brings the preparation discipline and application skill that separates a 15-year surface from a 2-year one. Browse completed driveway and slab projects to see the quality of work firsthand, or contact the team directly to discuss your driveway’s condition and get a quote tailored to your property.
FAQ
What is concrete resurfacing for driveways?
Concrete resurfacing is the application of a thin overlay, typically 1/8 to 1/4 inch thick, over an existing structurally sound slab to repair surface wear and restore appearance. It is the industry-standard alternative to full slab replacement when the underlying concrete is still stable.
How long does a resurfaced driveway last?
A resurfaced driveway lasts 8 to 15 years depending on preparation quality, material choice, and maintenance. Regular resealing every 2 to 3 years extends the upper end of that range.
Can I resurface a driveway with deep cracks?
No. Deep cracks, sinking sections, and drainage failures indicate structural damage that an overlay cannot fix. Those conditions require slab repair or full replacement before any resurfacing is considered.
How soon can I drive on a resurfaced driveway?
Vehicle traffic should stay off a freshly resurfaced driveway for 48 to 72 hours. Foot traffic is safe after 24 hours, but cooler or humid Melbourne weather conditions may require waiting longer than the minimum.
Is DIY concrete resurfacing worth it for a full driveway?
DIY resurfacing works well for areas under 100 square feet with minor surface damage. For a full Melbourne driveway of 40 to 60 square meters, professional application delivers better adhesion, finish consistency, and long-term durability than most DIY attempts.
Leave A Comment