
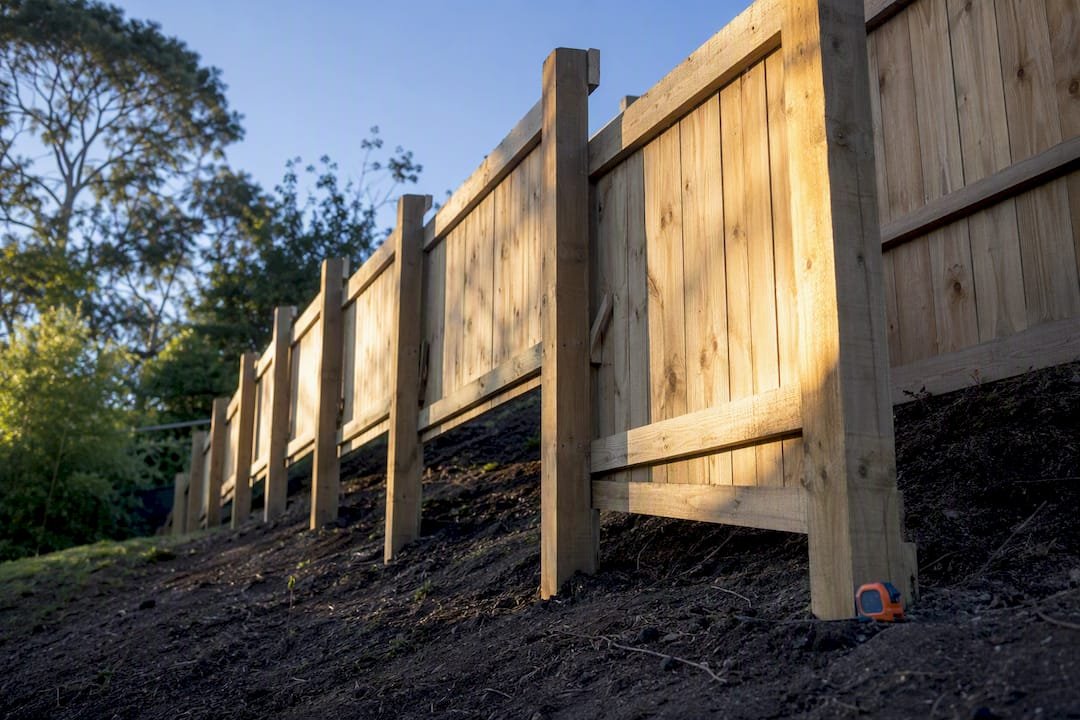
Yes, you can install a timber fence on a slope, and it’s often the most flexible material for the job. Choose a racked or contour design for gentle grades, and switch to stepped panels or a retaining wall for steep hills. Measure your slope and check local permits before you touch a shovel.
TL;DR:
- Racked fencing is suitable for gentle slopes and maintains a uniform top line, but becomes less effective beyond moderate grades.
- Stepped panels are easier to install on steep terrain and tend to leave gaps under each section, which can be problematic for pets or small children.
- Correct slope measurement using stakes, a string line, and soil testing is essential before fence installation to ensure proper method selection.
- Use rot-resistant timber like cedar or redwood, and install gravel boards or metal post sleeves to prolong fence lifespan in uneven, moist ground.
- For slopes steeper than 30 to 35 percent or with erosion issues, professional assessment and possibly retaining walls are recommended over DIY fencing.
Table of Contents
- Timber Fence on Slope Installation Methods: Racked, Stepped, or Contoured
- How Do You Measure a Slope Before Building a Fence?
- Best Timber and Hardware for a Fence on Uneven Ground
- Getting Post Depth and Footings Right on a Slope
- Step-by-Step Checklist for Installing a Timber Fence on a Hill
- Closing Gaps, Containing Pets, and Handling Steep Drops
- Keeping a Sloped Timber Fence From Rotting
- Should You DIY or Hire a Pro for a Sloped Fence?
- A Contractor’s Honest Take on Sloped Fencing
- Get Professional Help With Your Sloped Fence Project
- Sources
Timber Fence on Slope Installation Methods: Racked, Stepped, or Contoured
Every sloped timber fence installation boils down to three approaches, and picking the wrong one is the most common reason a fence looks crooked or fails early. Trade guidance on stepping, racking, and contouring breaks the choice down by how steep the ground actually is, not by personal preference.
Racked (contour) fencing angles the rails to follow the slope, keeping the top line parallel to the ground while posts stay plumb. It works best on gentler grades, and industry guidance puts the practical ceiling at moderate slopes before the design starts fighting gravity.
Stepped fencing builds level panel sections that drop in stair-step increments down the hill. It suits steeper terrain and rigid prebuilt panels, though it leaves triangular gaps under each section.
Contouring custom-cuts each board so the top edge follows the exact ground contour. Timber handles this better than any other fencing material because it can be trimmed on site, board by board.
- Racked: best for smooth, moderate slopes; clean sightline; no gaps
- Stepped: best for steep or irregular ground; faster with panel kits; leaves gaps
- Contoured: best for a custom look; labor intensive; ideal for uneven, rocky ground
How Do You Measure a Slope Before Building a Fence?
Before buying a single board, you need real numbers, not a guess based on standing at the top of the yard and squinting.
- Drive a stake at the top of the slope and another at the bottom, then run a string line between them, a method Home Depot recommends for laying out any hillside fence line.
- Use a level or a smartphone clinometer app to find the rise (vertical drop) over the run (horizontal distance), then divide rise by run and multiply by 100 for percent grade.
- Dig a test hole or probe the soil at a few points along the line. Clay holds water and swells; sandy soil drains fast but shifts; rocky ground may require different anchoring altogether.
- Watch the yard during or right after a rainstorm to see where water pools or channels. Downhill posts sitting in a natural runoff path will rot faster.
- Call your local building department and check your HOA’s covenants. Many jurisdictions measure fence height from the downhill grade and may restrict how large a gap can be under a panel.
Best Timber and Hardware for a Fence on Uneven Ground
Material choice matters more on a slope, because water runs toward your posts and pools at low points along the fence line. Get this wrong and you’re replacing boards in five years instead of fifteen.
- Cedar and redwood resist rot naturally and need less chemical treatment, though both cost more and availability varies by region.
- Pressure-treated pine costs less upfront and holds up fine when installed correctly, but it needs more consistent resealing over time.
- Fasteners should be hot-dip galvanized or stainless steel; standard zinc screws corrode fast in wet, low-lying soil pockets.
- Gravel boards (also called kickboards) run along the bottom of each panel and keep timber off bare soil, which cuts down rot dramatically on the downhill run.
- Sealant or stain should go on before installation and get reapplied every 1 to 2 years, more often on boards sitting closest to grade.
Metal post sleeves or a concrete collar around the base add extra protection on posts sitting in the wettest part of the slope.
Getting Post Depth and Footings Right on a Slope
Post failure is the number one reason sloped fences lean or collapse, and it almost always traces back to shallow footings or bad drainage.
Measure post length from the lowest side of the slope, then bury a substantial portion of that total length below grade. On a steep run, that means your uphill post holes end up considerably deeper than they’d be on flat ground, simply to keep every post bottom at a consistent depth.
- Tighten post spacing on slopes compared to that typical on level ground to maintain structural integrity, since shorter spans resist sag better under angled loads.
- Pour a gravel sub-base in the bottom of each hole before adding concrete, so water has somewhere to go besides sitting against the post.
- Crown the top of each concrete footing so it slopes away from the post, shedding rainwater instead of trapping it against the wood.
- On loose fill, shallow bedrock, or unstable soil, helical anchors or steel piers work better than a deep concrete pour and avoid unnecessary excavation.
Pro Tip: Check every post with a level before the concrete sets, not after. A post that’s out of plumb by even a few degrees on a slope compounds into a visibly crooked fence line by the time you reach the bottom.
Step-by-Step Checklist for Installing a Timber Fence on a Hill
- Plan the line. Set stakes at each corner and gate location, run string between them, and calculate percent grade using your rise and run measurements.
- Call before you dig. Get utility locates done and confirm your permit or HOA approval, especially height rules measured from the downhill side.
- Dig and set posts. Excavate each hole to the depth calculated for that spot on the slope, add gravel, set the post plumb with braces, then pour and crown the concrete. Let it cure as recommended by the product manufacturer before applying any load.
- Attach rails or panels. For racked designs, angle the rails to match the slope and cut boards to a consistent parallel top line. For stepped designs, build each level section separately and let the drop between sections handle the grade change.
- Handle the gate. Gates need a level threshold, so plan for a small retaining detail or a stepped landing pad if the gate sits mid slope.
- Finish and check. Trim board tops to a uniform line, recheck every post for plumb, and regrade soil around the base of each post so water drains away rather than toward it.
Closing Gaps, Containing Pets, and Handling Steep Drops
Triangular gaps under stepped panels are the biggest complaint homeowners raise after installation, especially with dogs in the yard.
- Gravel boards or custom-cut bottom boards close most gaps cleanly.
- Racked panels naturally eliminate the triangular gap problem, which is why installers favor them for yards with pets.
- Buried wire mesh or a short gravel ledge under the fence line adds a backup barrier for determined diggers.
- Grades steeper than roughly 30 to 35 percent, or ground showing erosion, usually call for a retaining wall or terrace paired with the fence rather than fencing alone.
- Retaining structures add cost but solve both the erosion problem and the fence’s structural challenge at once.
Keeping a Sloped Timber Fence From Rotting
Slopes concentrate water at specific points, so maintenance can’t be a once-a-decade afterthought.
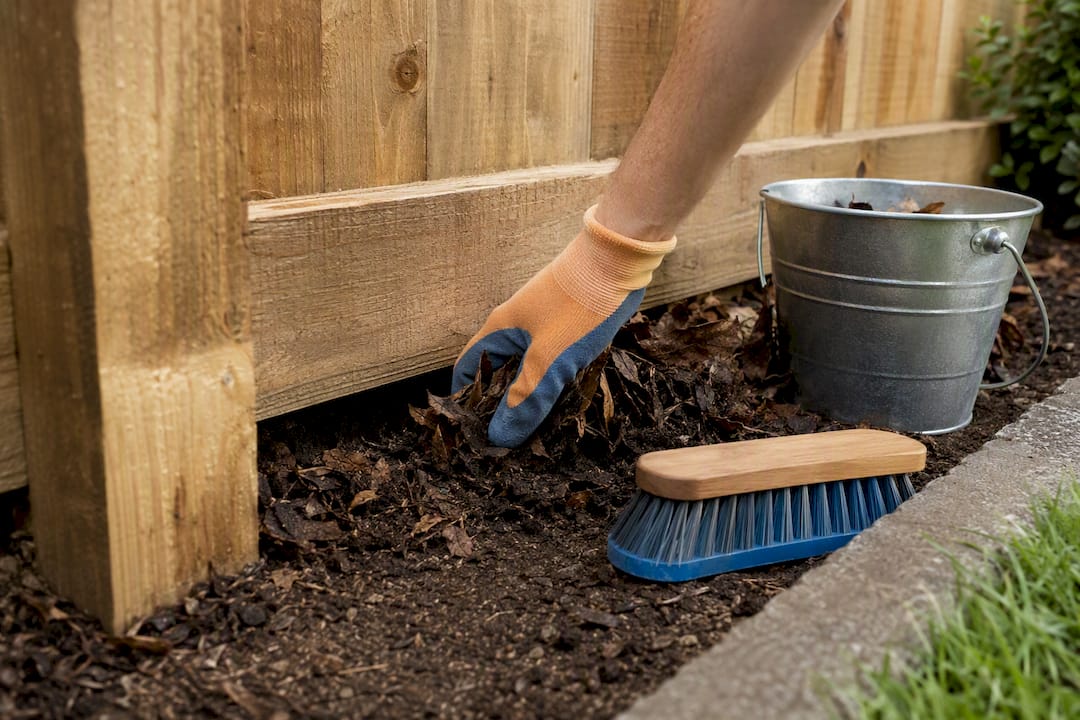
Keep at least a couple of inches of clearance between the bottom of each board and the soil, and clear leaves, mulch, or grass clippings that pile against posts after mowing. Walk the fence line after any heavy rain and once a year overall, checking for posts that have started to lean and concrete crowns that have cracked or pulled away from the wood. Reseal or repaint on the schedule your finish calls for, usually every 1 to 2 years, and patch small rot spots before they spread into a full board replacement.
Should You DIY or Hire a Pro for a Sloped Fence?
A short, gentle slope with a straightforward racked design is a reasonable weekend DIY project if you’re comfortable with a post hole digger and a level. Steep grades, drainage problems, retaining wall needs, long fence runs, or anything involving a gate on uneven ground is where professional installation earns its cost.
- Common DIY failure points: posts buried too shallow, ignoring drainage until water pools against footings, and picking the wrong method (stepped panels on a gap-sensitive pet yard, for example).
- A local contractor brings site grading experience that catches soil and drainage issues before they become expensive fixes.
- Com has delivered outdoor construction projects across Melbourne for over two decades, with experience spanning fencing, retaining walls, and site preparation on difficult terrain.
A Contractor’s Honest Take on Sloped Fencing
Most fence failures on slopes trace back to skipped drainage planning, not bad timber. Get the water management right first, and the fence itself becomes the easy part. On anything steeper than a gentle backyard grade, get a professional site assessment before you commit to a design.
— Vic
Get Professional Help With Your Sloped Fence Project
A sloped yard punishes shortcuts. Com brings over two decades of Melbourne outdoor construction experience to fencing projects where drainage, footing depth, and post spacing actually decide whether the fence lasts. The team works with timber and Colorbond fencing solutions built for the specific terrain each property presents, including sites where retaining walls or regrading need to happen alongside the fence itself.

If your yard has a grade steep enough to make you nervous about DIY, or you’ve already run into drainage issues with a previous fence, request a project estimate through Com’s site preparation and outdoor construction services and get a plan built around your actual slope, not a generic install.
Sources
- How to Install a Fence on a Slope: Stepping, Racking & Contouring Methods
- Installing Wood Fence on a Slope: Conquer 2025!
- Building a Fence on a Hill or Slope – Fence Guys – Pro Fence Contractor
- How to Build a Fence on a Slope
Leave A Comment