
Yes, in most cases, you can pave over an existing concrete slab, but only if it passes three checks first. This is the fastest, cheapest way to get a new paved surface without demolition and disposal costs. Skip the checks, and you’re setting up drainage failures, cracked pavers, or a rocking surface within a season or two.
Before you buy a single bag of sand, do this:
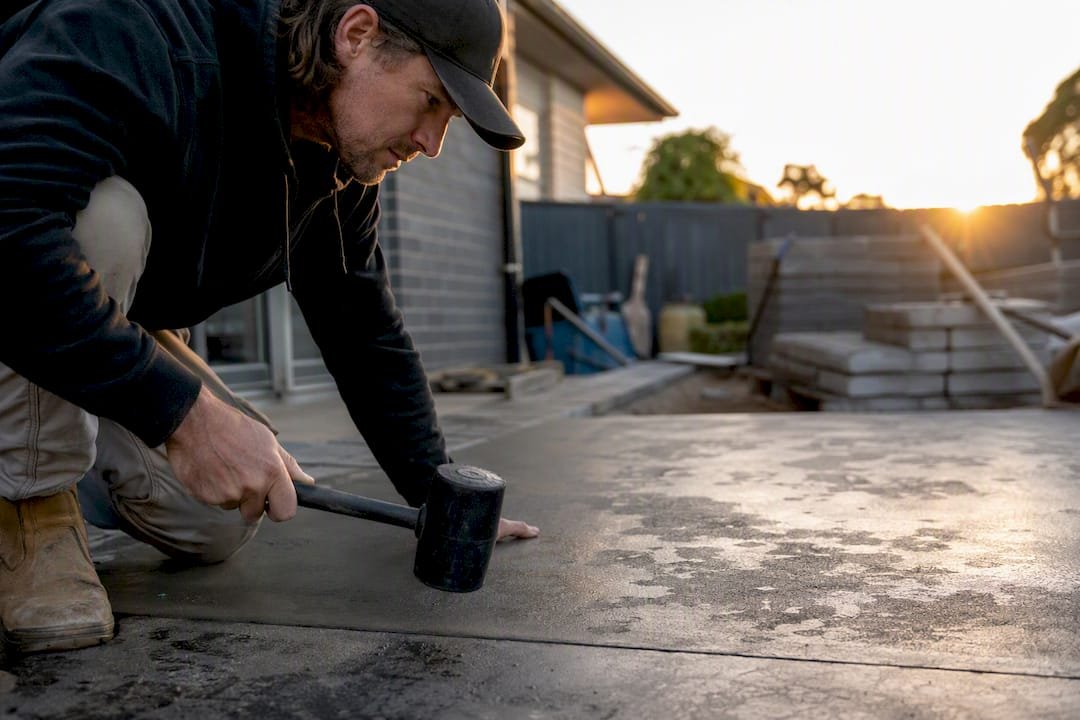
- Hammer-tap test: tap the slab with a hammer or mallet across the whole surface. A sharp, solid ring means sound concrete. A dull thud means a hollow or delaminated spot underneath.
- Slope check: water needs somewhere to go. Confirm the slab already sheds water away from the house.
- Clearance check: measure from the slab surface to the bottom of any door threshold or weep holes. Paving over concrete typically adds 40 to 50mm of height once bedding and pavers are factored in, which can crowd doorways or the damp proof course.
A hollow slab needs patching or removal. A slab with no fall needs drainage work before anything else goes down. Tight clearance means thinner pavers or a different plan entirely.
Key Takeaways
Paving over concrete works reliably when the slab passes a hammer-tap soundness test, drains with adequate slope, and leaves enough clearance at doorways.
| Point | Details |
|---|---|
| Run the three checks first | Tap-test for hollow spots, measure slope, and confirm door and damp-course clearance before buying materials. |
| Drainage drives long-term success | Drill 1/2 inch drain holes every 12 to 18 inches where slope is marginal to prevent frost heave and efflorescence. |
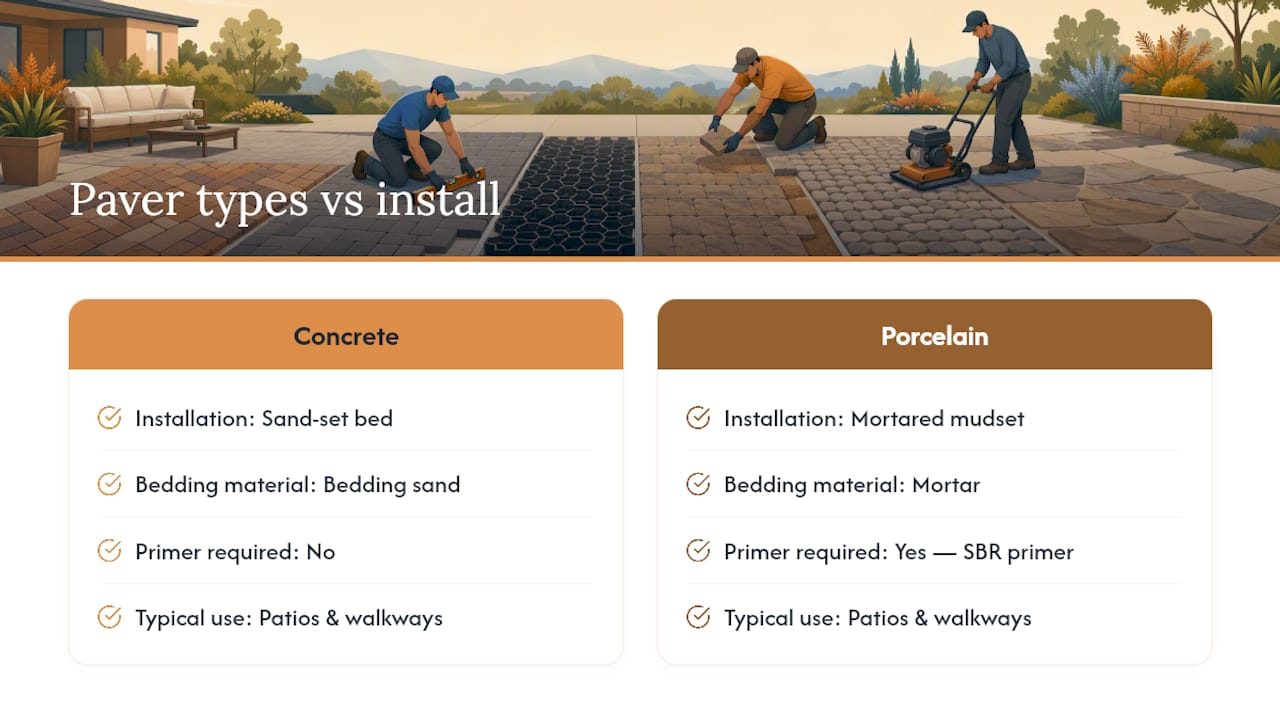
| Match method to paver type | Use sand-set for standard pavers, bitumen-sand for light vehicle areas, and mortared mudset for porcelain. |
| Edge restraint isn’t optional | Concrete offers little lateral grip, so secure mechanical or mortared edging before laying field pavers. |
| Know your limits | Com offers slab inspection, repair, paver installation, and full rebuilds for Melbourne homeowners who want a professional check before committing. |
Table of Contents
- How to Evaluate the Existing Concrete Slab
- Is Paving Over Concrete a Good Idea?
- Which Overlay Method Should You Use?
- Step-by-Step: Installing Pavers Over Concrete
- Materials and Tools You’ll Actually Need
- Troubleshooting and How Long an Overlay Lasts
- What Does It Cost, and When Should You Remove the Slab Instead?
- Frequently Asked Questions
- Sources
How to Evaluate the Existing Concrete Slab
Not every slab deserves a second life under a layer of pavers. The inspection takes twenty minutes and saves you from a rebuild later.
- Tap-test the whole surface. Walk a grid pattern and tap every couple of feet. Hollow sections usually mean the slab has separated from its base and won’t support pavers reliably.
- Measure the slope. A minimum fall away from structures keeps water moving instead of pooling under your new surface. Check for standing water after a hose test or the next rain.
- Inspect cracks. Hairline cracks under roughly 2mm are generally fine to overlay. Wide cracks, stepped cracks, or slabs with visible movement between sections are a different story.
- Check door thresholds and any damp course. Confirm you have room for added height before committing to a method.
Run those four checks and you land in one of three buckets: proceed with an overlay, patch and repair first, or remove the slab and start fresh. Structurally sound concrete with good drainage and no major cracking is a legitimate base for pavers, and it’s often more stable than a freshly compacted stone bed because it’s already settled in place.
Pro Tip: Do the tap test after a light rain. Wet concrete telegraphs hollow spots more clearly than dry, dusty slabs do.
Is Paving Over Concrete a Good Idea?
An overlay saves you the labor, dumpster fees, and disposal cost of tearing out a slab, and it uses the existing concrete’s compaction to your advantage. That’s the upside, and it’s real. The downside shows up months later if you ignore drainage.
Trapped moisture between the paver bedding and the old slab is the single biggest cause of overlay failure. Water that can’t escape freezes and expands in cold climates, a process called frost heave, and it also drives efflorescence, the white mineral haze you see on masonry and grout. Left unmanaged, that same trapped water washes joint sand out from underneath your pavers over a few wet seasons.
- Cold climates with freeze-thaw cycles carry the highest risk.
- Slabs with flat or reverse slope need intervention before anything else.
- Existing cracks that move seasonally will often telegraph through to the new surface.
The fix is straightforward: drill 1/2 inch drain holes every 12 to 18 inches where slope is marginal, install proper edge restraint, and seal joints once the pavers are set.
Which Overlay Method Should You Use?
The bedding method you choose depends on paver type, foot versus vehicle traffic, and how much added height you can afford. Three main approaches cover almost every residential job.
- Sand-set overlay. A roughly 1 inch bedding layer of leveling sand under standard concrete pavers. This is the most common DIY approach, works well for patios and walkways, and keeps things flexible if a section ever needs to come up.
- Bituminous (bitumen-sand) overlay. A binder mixed into the sand bed adds cohesion and some flex, which holds up better under light vehicle traffic than plain sand alone. It’s a step up in complexity and usually a job better suited to a contractor.
- Mortar or dry mudset overlay. A full mortar bed, typically 20 to 30mm, bonds the pavers directly to the slab. This is the method required for porcelain and other thin pavers, since they can’t tolerate the flex a sand bed allows.
Thin porcelain pavers pair naturally with mudset because they minimize added height and resist staining, but they demand the mortared approach or adhesion will fail within a year.
Step-by-Step: Installing Pavers Over Concrete
- Clean the slab. Pressure wash at 3,000 to 4,000 PSI to strip contaminants, oil, and loose material. Let it dry fully.
- Repair what needs repair. Fill hairline cracks. If you find hollow spots or crumbling edges during cleaning, stop and reassess before spending money on materials.
- Confirm drainage. Flood-test with a hose. Where slope is marginal, drill the escape holes at 12 to 18 inch spacing, angled slightly downward.
- Lay the setting bed. For a sand-set job, screed a 1/2 to 1 inch layer of leveling sand. For mortared overlays, prime with an SBR or slurry primer and trowel a 20 to 30mm mortar bed in small, workable sections so you never lose wet-to-wet contact.
- Install edge restraints first. Concrete offers almost no lateral grip compared to compacted stone base, so mechanical edging or a mortared border isn’t optional here. Set it before laying field pavers.
- Lay and compact. Place pavers to pattern, then compact with a plate compactor fitted with a protective pad to avoid chipping.
- Joint and finish. Sweep in polymeric sand, activate it per the product instructions, and clean excess residue off the surface immediately.
- Seal and monitor. Give joints their first season to settle before applying sealer, and watch closely after the first few rains.
Pro Tip: Never rush the mortar bed. Work in patches you can finish while the mortar is still wet, or you’ll get patchy adhesion that fails within a year.
Materials and Tools You’ll Actually Need
Buy the right product class for your method, not just whatever’s cheapest at the yard.
- Leveling/bedding sand: coarse, washed sand for sand-set overlays, screeded to 1/2 to 1 inch.
- Polymeric sand: for joint fill on sand-set jobs; hardens when activated with water and resists washout better than plain sand.
- SBR primer or slurry primer, plus dry mudset mortar: required for mortared overlays and porcelain pavers.
- Edge restraints: rigid plastic or metal edging, or a mortared border for mudset jobs.
- Rental gear: plate compactor with a protective pad, pressure washer, angle grinder for cutting pavers.
- Safety gear: gloves, eye protection, knee pads. Cutting pavers kicks up fine dust, so wear a respirator mask too.
For paver selection and available styles, our paver installation options page covers the range most Melbourne homeowners choose from.
Troubleshooting and How Long an Overlay Lasts
Watch for a few early warning signs after your first wet season: rocking pavers usually mean a bedding or compaction problem, joint sand washout points to a drainage issue you haven’t solved yet, and efflorescence signals trapped moisture underneath.
- Rocking or loose pavers: lift, check the bed, and reset rather than ignoring it.
- Washed-out joints: re-sand and check that your drain holes are actually clear.
- White mineral haze: usually cosmetic, but repeated efflorescence means water isn’t escaping.
A well-executed overlay on a sound slab typically lasts 10 to 20 years, depending on climate and how consistently you re-sand and reseal joints.
What Does It Cost, and When Should You Remove the Slab Instead?
Cost swings on four things: disposal fees if any demolition is needed, labor hours, the paver grade you choose, and how easy the site is to access with equipment. A sand-set DIY job on a clean, accessible slab costs far less than a mortared porcelain overlay that needs professional installation.
Removal is the smarter long-term call when the slab is sinking, shows major structural cracks, holds a reverse slope that won’t drain no matter what you do, or when added height would conflict with the damp proof course. Saving money upfront on a bad slab usually costs more later in repairs, re-laid pavers, and water damage. Our driveway and slab project examples show what a full rebuild involves when overlay isn’t the right fit.
Field Notes From 20+ Years of Concrete Work
Most overlay failures we get called out to trace back to two things: skipped drainage checks and cheap edge restraint. A full mortar bed with SBR primer costs more upfront, but it’s the difference between a patio that lasts fifteen years and one that’s rocking within eighteen months.
Com has completed 145+ concreting and outdoor construction projects across Melbourne. Structural movement, vehicular-rated overlays, and anything involving complex drainage work are jobs we recommend handing to a professional.
A Contractor’s Honest Take on Overlays
Overlaying a sound slab is one of the smartest shortcuts in outdoor construction, but only if you respect the drainage checks first. Do the tap test before you buy a single paver.
When It’s Time to Call In a Pro
If your slab fails the tap test, holds standing water no matter how you grade it, or you’re dealing with vehicular traffic loads, that’s the point where a DIY overlay stops being the cheaper option. Com handles the full range: site inspection to confirm whether your slab qualifies for overlay, crack and hollow-spot repair, paver installation using sand-set, bitumen-sand, or mortared methods, and full slab removal and rebuild when the concrete underneath can’t be saved.

Getting an accurate read on your slab before you spend a weekend and a truckload of pavers on it is worth the phone call. Request a site visit through our comprehensive project page and we’ll walk your slab, run the same checks covered above, and give you a straight answer on overlay versus rebuild before you buy a single bag of sand.
Frequently Asked Questions
Can you pave over concrete without removing it?
Yes, as long as the slab is structurally sound, drains properly, and clearance at doorways allows for the added height. A hollow or cracked slab needs repair or removal first.
Do pavers over existing concrete need drainage holes?
Only where slope is marginal. Drilling 1/2 inch holes every 12 to 18 inches lets trapped water escape to the subgrade instead of pooling under the pavers.
What’s the best material for paving over a concrete slab?
Standard concrete pavers work well with a sand-set bed for patios and walkways. Thin porcelain pavers need a mortared mudset with SBR primer instead.
How much height does paving over concrete add?
Roughly 40 to 50mm once bedding sand or mortar and the paver thickness are accounted for, which can crowd door thresholds if you don’t plan for it.
How long does a paver overlay on concrete last?
A properly installed overlay on a sound slab typically lasts 10 to 20 years, longer with regular joint maintenance and resealing.
Sources
- Laying pavers over concrete
- Installing Pavers Over Concrete
- Installing Pavers Over Existing Concrete: Evaluation and Step-by-Step Methods
Leave A Comment