
You move into your brand new Melbourne home and walk out the back door to find… compacted clay, a strip of patchy turf, and a fence held up by concrete posts with no panels. Sound familiar? Integrating landscaping in new home builds is one of the most overlooked parts of the entire construction process, and the homeowners who skip the planning phase pay for it twice: once in repairs and once in regret. This guide gives you the practical, phased approach to getting your outdoor space right from day one.
Table of Contents
- Key Takeaways
- Integrating landscaping in new home builds: what you’re starting with
- Planning your landscape design during construction
- Executing a phased plan year by year
- Common mistakes that cost Melbourne homeowners money
- What good landscaping integration actually delivers
- My honest take after years on Melbourne builds
- Get your outdoor space built right from the start
- FAQ
Key Takeaways
| Point | Details |
|---|---|
| Start with soil assessment | New build soil is almost always compacted and poor quality; test and remediate before planting anything. |
| Read your contract first | Your purchase contract’s external works spec tells you exactly what the developer provides and what you fund. |
| Plan before slabs are poured | Irrigation, drainage, and lighting rough-ins must go in before hardscapes are finished, or costs multiply fast. |
| Use a phased perennial approach | A 3-year phased plan beats trying to finish everything in year one and producing a yard that fails. |
| Keep plants foundation-safe | Shrubs need at least 5 feet clearance and trees at least 20 feet to prevent foundation damage costing thousands. |
Integrating landscaping in new home builds: what you’re starting with
Most new home lots in Melbourne hand you a blank canvas that is far less forgiving than it looks. During construction, heavy machinery compacts subsoil to the point where roots physically cannot penetrate it. The thin layer of topsoil spread on top is often mixed with rubble, sand, and construction debris. Before a single plant goes in the ground, you need to understand what you are actually working with.
Soil testing is not optional. A basic soil pH and composition test tells you whether you are dealing with clay-heavy ground (common in Melbourne’s outer suburbs), sandy loam, or something more problematic. New build topsoil is routinely minimal and poor quality, with compacted subsoil sitting just centimeters below the surface. The fix is double digging or mechanical cultivation to break up that lower layer before planting begins.
Beyond soil, you need to clarify what your developer is actually providing. Here is what basic developer landscaping typically covers versus what it leaves for you:
- Minimal turf laid over thin topsoil (not premium lawn-grade preparation)
- Concrete fence posts without panels in many cases
- A basic concrete patio or path, often without drainage consideration
- No irrigation, no garden beds, no feature planting
Pro Tip: Pull out your purchase contract and locate the “external works” or “landscaping specification” section before settlement. This document tells you precisely what the builder is responsible for so you are not caught off guard when you receive a bare block.
Reading your external works spec is one of the most practical things you can do before the build wraps up. Homeowners who assume developers will deliver finished soil or complete lawn coverage are almost always disappointed. Know what you are getting, and plan your budget for the rest.
Planning your landscape design during construction
This is the window most homeowners miss entirely. Once your slab is poured and your home is framed, the opportunity to cheaply run irrigation lines, conduit for lighting, and drainage infrastructure disappears. Landscaping should be planned during the design phase of your home, because adding utility rough-ins after construction is complete multiplies the cost dramatically.
Here is the planning sequence that works for new Melbourne builds:
- Engage a landscape designer before frame stage. Share your site plan and ask them to mark drainage flow, irrigation zones, and any services that need to go underground before hardscapes are laid.
- Coordinate with your concreting contractor early. Driveways, slabs, and paths should be designed knowing where garden beds, trees, and water features will sit. See how landscaping integrates concreting for better long-term outcomes.
- Mark foundation exclusion zones. Shrubs need a minimum 5-foot clearance from your home’s walls, and trees need at least 20 feet. Violating these distances leads to foundation repair costs of $2,000 to $8,000 or more.
- Plan for hardscape-to-softscape ratios. A yard that is 70% concrete and 10% garden feels harsh and offers no cooling benefit. Aim for a balance that gives you usable paved areas while retaining planting space for shade and privacy.
- Select your plant palette before planting season. With 52% of homeowners choosing native species and 70% prioritizing low-maintenance varieties, Melbourne gardens benefit most from drought-tolerant natives like kangaroo paw, lomandra, and grevillea.
Pro Tip: If vines appeal to you for wall coverage or shade, install a trellis with an air gap rather than planting directly against the wall. Trellises with vines protect your foundation from moisture and root intrusion while still giving you the look you want.
Compare the two most common approaches Melbourne homeowners take at build completion:
| Approach | Year 1 Cost | Year 3 Result | Risk Level |
|---|---|---|---|
| Rush to finish (annuals, full planting) | High ($15,000+) | High failure rate, replanting needed | High |
| Phased perennial plan | Moderate ($5,000 Y1) | Mature, established yard | Low |
The phased approach wins every time, not just on cost, but on outcome.
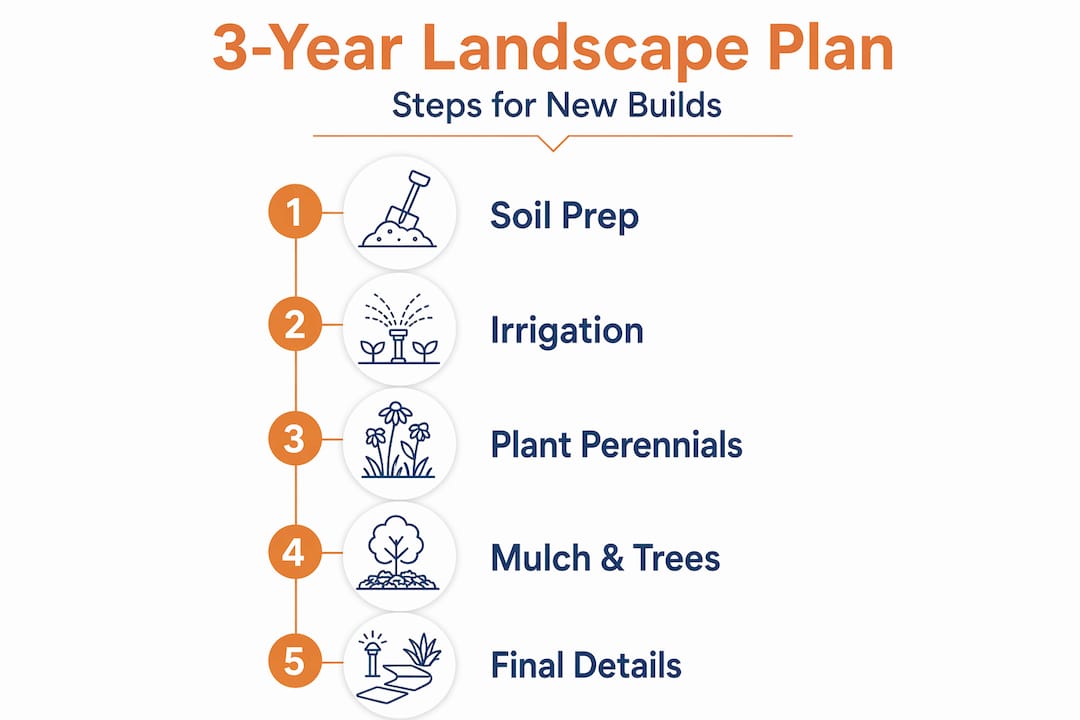
Executing a phased plan year by year
The most common mistake Melbourne homeowners make is treating landscaping like an interior fit-out: something to be completed before move-in. Gardens do not work that way. Layering features over multiple years creates natural, sustainable yards that perform well long-term. Here is how to structure those years:
Year 1: Foundation work
Your first year is entirely about preparation and structure. Focus on:
- Deep cultivation and soil remediation across all garden beds
- Installing irrigation infrastructure and lighting conduit if not done during construction
- Laying mulch beds (with a 6-inch gap from your foundation walls) using gravel borders near masonry instead of organic mulch
- Planting structural perennials and ornamental grasses to establish root systems over winter
- Seeding or laying a quality lawn where the developer’s turf is patchy. Poor developer turf can be lifted and replaced with better soil preparation underneath
Year 2: Expansion and definition
Once your perennials are established, you have a clearer picture of how the yard actually lives. Use year two to:
- Expand planting beds with flowering perennials and low shrubs
- Add small ornamental trees (at safe foundation distances)
- Install concrete edging to define garden borders cleanly. Concrete edging separates lawn from garden beds and reduces long-term maintenance
- Complete any remaining hardscape features like retaining walls or stepped paths
Year 3 and beyond: Maturity and detail
This is when the yard starts to look like the inspiration images you saved during the build. Canopy trees begin to provide real shade. Perennials fill in naturally. You add the finishing details: outdoor seating areas, feature lighting, water features if desired.
Pro Tip: Keep a watering log in years one and two. New plants in Melbourne’s hotter months need consistent moisture to establish roots. A drip irrigation system on a timer eliminates the guesswork and reduces plant loss significantly.
| Year | Priority Tasks | Investment Level |
|---|---|---|
| Year 1 | Soil prep, irrigation, structural perennials, lawn fix | Moderate |
| Year 2 | Tree planting, expanded beds, hardscape completion | Moderate-High |
| Year 3+ | Ornamental layering, features, mature maintenance | Low-Moderate |
Common mistakes that cost Melbourne homeowners money
Integrating gardens in builds sounds straightforward until real-world conditions intervene. These are the errors that consistently show up on new build properties across Melbourne:
- Planting too close to the home. Trees and large shrubs planted without adequate clearance cause roots to penetrate drainage lines and foundations within five to ten years. The repair bill is never worth the shortcut.
- Ignoring drainage. Compacted new build soil does not absorb water the way established garden soil does. Poor drainage leads to waterlogging, root rot, and in serious cases, structural moisture problems in your slab.
- Skipping the mulch gap. Mulch against your foundation retains moisture and attracts termites. Maintain a minimum 6-inch gap and use gravel near masonry.
- Over-investing in annuals in year one. Annuals look great immediately and fail within a season, leaving bare patches and wasted money. Perennials take longer to establish but deliver compounding visual returns.
- Assuming all contractors understand your site. Not every landscaping or concreting contractor will proactively flag soil, drainage, or access issues before they become your problem.
“Transparency about backyard site challenges — soil conditions, drainage problems, access limitations — is essential for successful landscaping integration. Homeowners who bring those conditions to their contractor’s attention early get better results and fewer surprises.”
One practical move: before any contractor starts work, walk the site together after heavy rain. You will see exactly where water pools, where drainage is inadequate, and where plant placement needs rethinking.
What good landscaping integration actually delivers
A properly planned, phased yard does not just look better. It works harder for you. Within three years, homeowners who follow a structured approach consistently report a yard that requires less maintenance, not more. Perennial-led designs yield mature-looking results within that timeframe while high-maintenance annual-heavy approaches frequently need replanting and rework.
From a practical standpoint, integrated landscaping delivers real functional benefits. Canopy trees reduce summer cooling loads. Dense plantings along boundaries create privacy without fencing costs. Native groundcovers suppress weeds better than bare soil or poorly chosen annuals. When you look at the best outdoor landscaping options for Melbourne’s climate, drought tolerance and low maintenance rank above visual novelty for good reason.
The financial case is equally strong. Avoiding foundation damage through correct plant placement and mulch management means you never spend $2,000 to $8,000 on repairs that were entirely preventable. A well-executed outdoor space also adds measurable resale value, with buyers consistently responding to homes where the landscaping looks intentional and mature rather than like an afterthought.
My honest take after years on Melbourne builds
I have seen hundreds of new build sites in Melbourne, and the pattern is almost always the same. Homeowners spend months obsessing over kitchen finishes and bathroom tiles and walk out the back door on move-in day genuinely shocked by what they find. The outdoor space was an afterthought from day one, and it shows.
In my experience, the biggest issue is not budget. It is timing. By the time most homeowners think about landscaping, the slab is already poured and the opportunity to run irrigation or drainage infrastructure cheaply is gone. Then they are quoted $3,000 to core drill and retrofit what would have cost $400 during framing. That is a painful lesson.
What I have found actually works is treating the outdoor space with the same design discipline you give the interior. That means a site-specific plan, a phased budget, and contractors who understand both the concreting and landscaping sides of the equation. When those two trades work together from the start, the results are noticeably better and more cohesive.
My top piece of advice: do not let a landscaping decision be driven by what looks good in the nursery on a Saturday morning. Let it be driven by what works for Melbourne’s conditions, your soil type, and a realistic three-year plan. The homeowners I see genuinely satisfied with their outdoor spaces five years later are almost always the ones who planned well and planted patiently.
— Vic
Get your outdoor space built right from the start
If you are planning a new home build in Melbourne, getting your concreting and landscaping working together from the beginning makes a real difference. VW Concreting has been delivering quality outdoor construction across Melbourne since 2001, with over 145 completed projects spanning driveways, slabs, turf, fencing, and full outdoor builds.

When hardscaping and landscaping are planned together, the results speak for themselves: better drainage, cleaner finishes, and an outdoor space that grows into something genuinely impressive. Whether you need a comprehensive outdoor build or expert driveway and slab work designed to complement your landscape plan, VW Concreting brings the experience to get it right. Talk to our team early in your build process. The planning conversation costs nothing. The rework does.
FAQ
What does a developer usually provide in new build landscaping?
Developer landscaping typically includes minimal turf over thin topsoil, basic concrete paths or a small patio, and fence posts without panels. Garden beds, irrigation, quality soil preparation, and feature planting are almost always the homeowner’s responsibility.
How far should trees be planted from a new home’s foundation?
Shrubs should sit at least 5 feet from your home’s walls, and trees require a minimum of 20 feet clearance. Planting too close leads to root and moisture damage that costs between $2,000 and $8,000 to repair.
Why are perennials better than annuals for new build gardens?
Perennials establish root systems that survive Melbourne’s seasonal variation and return year after year without replanting. A phased perennial approach consistently outperforms annual-heavy designs in both survival rate and visual maturity over three years.
When should I plan landscaping for a new home build?
Landscaping planning should start during the home’s design phase, before framing begins. This is the only cost-effective window to install irrigation, drainage, and lighting infrastructure underground before slabs and paths are laid.
How do I protect my new home’s foundation from landscaping damage?
Keep mulch at least 6 inches from foundation walls and use gravel borders near masonry instead of organic mulch. For vines or wall coverage, install a trellis with an air gap rather than planting directly against the structure to prevent moisture buildup and root intrusion.
Leave A Comment