
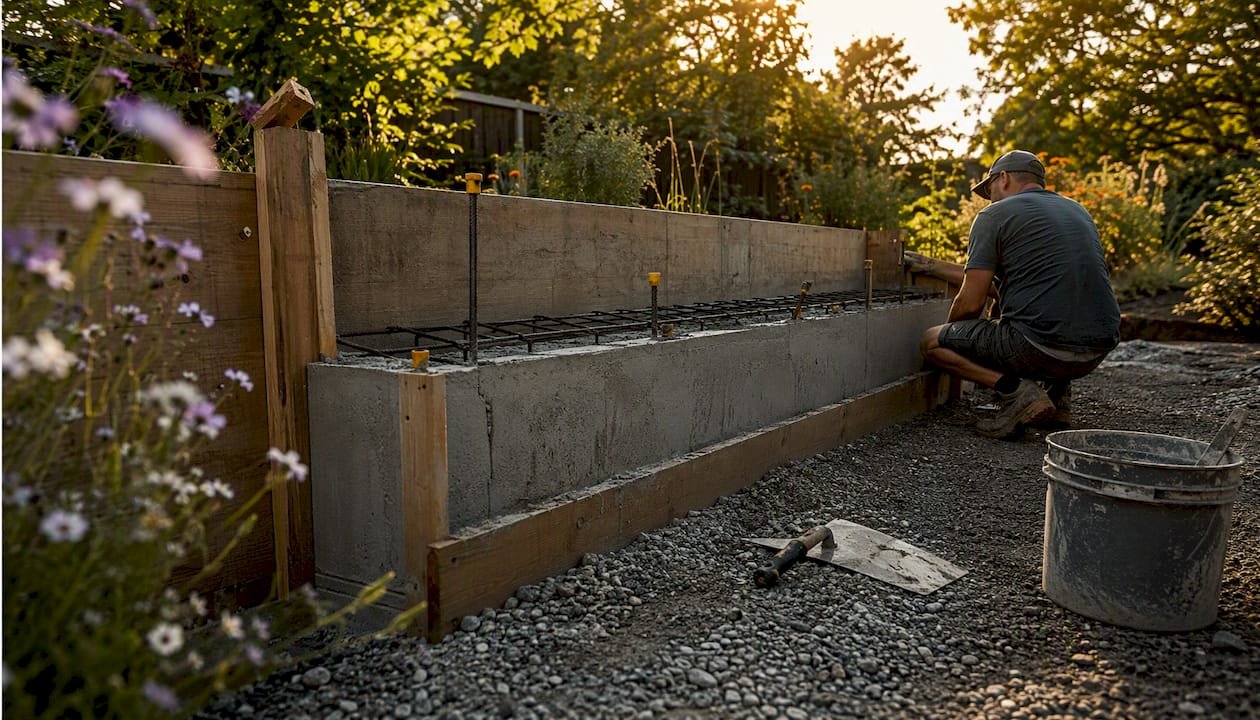
Built-in seating means permanently installed concrete or masonry benches and seat walls integrated directly into your hardscape. Not furniture. Not a DIY weekend project. These are structural elements poured, cast, or laid by a qualified concreting or landscaping contractor, designed to last 30–50+ years with minimal upkeep.
Your fastest path to an accurate quote: choose a construction type, then request a site visit, shop drawings, and material samples before any contract is signed. For durability and low maintenance, poured concrete or GFRC (glass fiber reinforced concrete) are the strongest choices. If your soil moves or you want modular flexibility, segmental block with a cap stone performs better long-term. All cement-based products should reference ASTM C150 Portland cement as the baseline quality standard.
- Poured-in-place concrete: best for custom shapes, high-traffic areas, and seamless hardscape integration
- GFRC precast: factory-controlled quality, lighter weight, excellent finish options
- Segmental block with cap: modular, budget-friendly, good in shifting soils
- Natural stone or masonry: premium aesthetic, higher cost, requires skilled labor
Pro Tip: Ask your contractor to confirm which construction type they have built before, not just which ones they can build. Portfolio photos of completed seat walls tell you more than any sales conversation.
Key Takeaways
Permanent outdoor built-in seating requires the right construction type, proper footings and drainage, and a contractor who delivers shop drawings and samples before a single unit is produced.
| Point | Details |
|---|---|
| Choose construction type first | Match poured concrete, GFRC, segmental block, or stone to your site conditions and budget before requesting bids. |
| Insist on shop drawings and samples | Require dimensioned shop drawings and two 6-inch finish samples before production or pouring begins. |
| Verify footings and drainage | Confirm footing locations are staked before base compaction and that drainage outlets are specified in the scope. |
| Budget $150–$300+ per linear foot | Costs vary by method and cap choice; soft costs (permits, engineer, drawings) add $500–$2,000 on complex jobs. |
| Seal and maintain on schedule | Apply a penetrating silane/siloxane sealer and recoat every 2–3 years to protect concrete from weather and extend service life. |
| VW Concreting | Delivers fixed-scope seat wall and hardscape projects in Melbourne with shop drawings, samples, and drainage coordination included. |
Table of Contents
- What types of built-in seating suit your site and budget?
- What dimensions make outdoor seating actually comfortable?
- What materials and finishes hold up best outdoors?
- What does a professional installation actually involve?
- What does built-in seating cost, and how long does it take?
- How long will built-in seating last, and what maintenance does it need?
- When do you need a permit or an engineer?
- How do you vet and hire the right contractor?
- What should a GFRC specification include?
- What should homeowners do before and after installation?
- What contractors see that causes rework
- VW Concreting delivers permanent outdoor seating in Melbourne
- Sources
What types of built-in seating suit your site and budget?
Matching the right construction type to your site conditions, aesthetic goals, and budget is the decision that shapes everything downstream.
| Type | Best For | Cost Drivers | Durability & Maintenance | Installation Complexity | Finish Options |
|---|---|---|---|---|---|
| Poured-in-place concrete | Custom curves, fire pit surrounds, pool decks | Formwork, rebar, footing depth | 50+ years; seal every 2–3 years | High; requires forming, rebar, curing time | Board-formed, exposed aggregate, colored, smooth |
| Precast GFRC | Clean modern lines, faster site time, lighter units | Factory production, transport, installer qualifications | Long lifespan per manufacturer spec; UV-stable finishes | Medium; units delivered, set, and grouted | Wide range of textures and colors from mold |
| Segmental block with cap | Sloped sites, expansive soils, budget-conscious projects | Block type, cap material, base prep | 30–50 years with good drainage; caps replaceable | Low-medium; modular, no curing wait | Cap stone, porcelain, concrete cap, brick |
| Natural stone/masonry | High-end residential, heritage aesthetics | Stone sourcing, skilled labor, mortar joints | 30–50+ years; mortar repointing every 10 years | High; requires skilled mason | Natural variation, custom profiles |
| Board-formed concrete | Industrial or textural aesthetic, bespoke design | Custom formwork, finish labor | 50+ years; same sealing schedule as poured | High; formwork is labor-intensive | Rough timber texture, stained, sealed |
Segmental wall systems outperform rigid poured concrete in soils that shift or drain poorly, because the modular interlocking units flex slightly rather than crack. In Florida and similar climates with expansive soils, contractors consistently prefer them for exactly this reason.
Pro Tip: When your seat wall will sit adjacent to a fire pit or paver field, coordinate the cap layout with the paver module before production starts. A 12" paver grid and a 14" cap stone create awkward cuts at every corner.
What dimensions make outdoor seating actually comfortable?
Seat height is the single dimension most homeowners get wrong. Too low and guests struggle to stand up. Too high and feet dangle.
Recommended seat height is within a range that suits adult comfort without cushions and works well with a cushion pad. That range covers adult comfort without cushions and still works well with a 2" cushion pad. Seat depth should be sufficient for comfortable seating with a slight forward pitch to shed water.
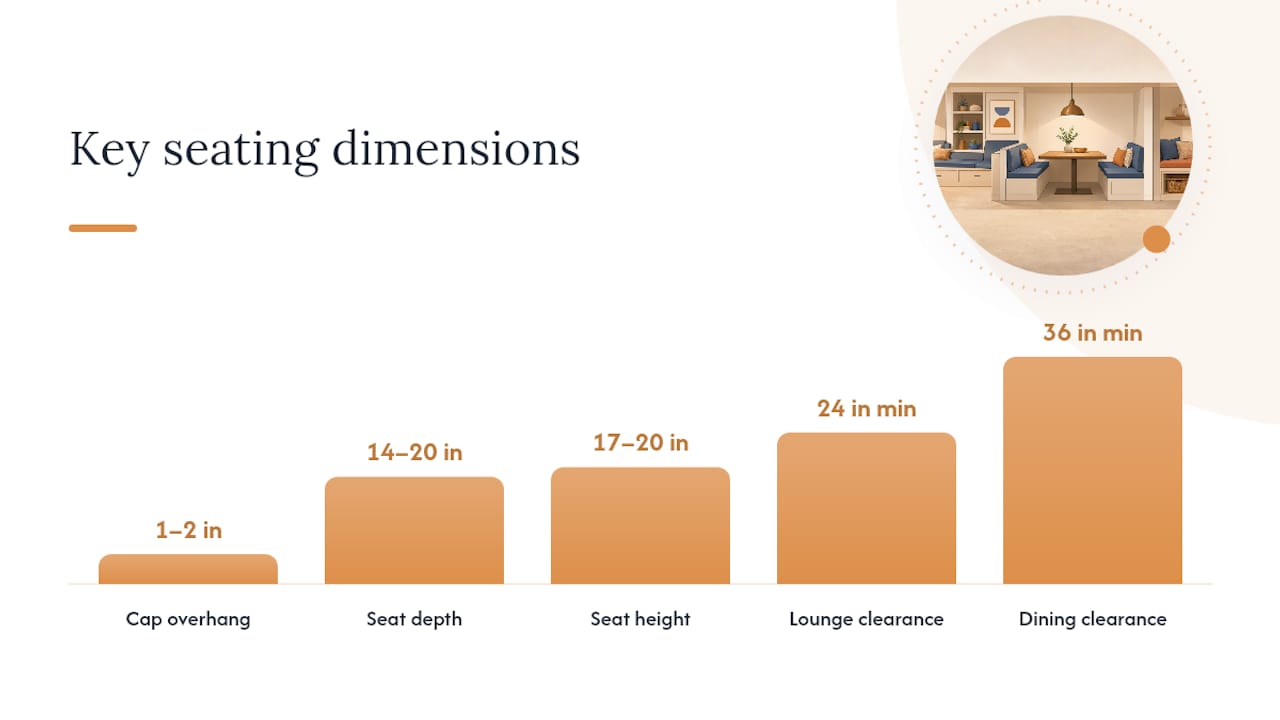
| Dimension | Recommended Range | Notes |
|---|---|---|
| Seat height | 17–20 in | Measure to top of cap; lower end suits cushion use |
| Seat depth (cap) | 14–20 in | 16 in is the practical sweet spot for most adults |
| Cap overhang (front) | 1–2 in | Prevents shin contact with wall face |
| Circulation clearance (dining) | 36 in minimum | From seat edge to nearest obstruction |
| Circulation clearance (lounge) | 24 in minimum | Tighter acceptable for fire pit surrounds |
For a typical 12-foot fire pit surround, a 17-inch seat height with a 16-inch cap and 24 inches of clearance to the pit edge gives comfortable seating for six adults. Poolside benches often drop to 17 inches to make entry and exit from the water easier.
- Corner treatments: radius or chamfer exposed corners at 1" minimum to prevent chipping and injury
- Cap overhang at the front edge keeps shins clear of the wall face
- For dining configurations, 36 inches of clearance from seat edge to table or adjacent structure is the workable minimum
What materials and finishes hold up best outdoors?
Poured concrete is the most versatile base material. Board-formed finishes create a raw, textural surface. Exposed aggregate adds slip resistance, which matters on poolside or wet-area seating. Colored concrete using integral pigment holds color better than surface-applied stains, though UV exposure will gradually fade any pigment over years.
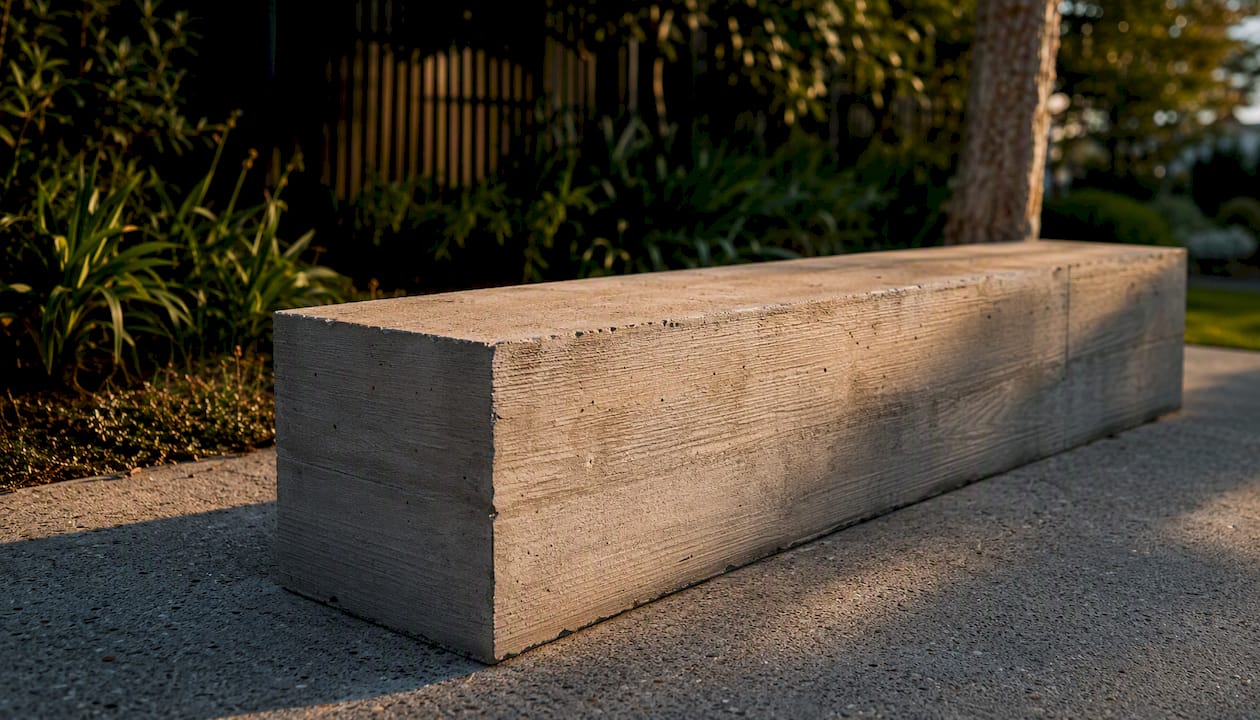
GFRC delivers a factory-controlled surface finish that poured-in-place work rarely matches on site. The mix references ASTM C150 Portland cement and incorporates alkali-resistant glass fibers for tensile strength. Finishes range from smooth polished to rough stone-look, all cast from molds.
For caps, porcelain tile adds a clean, contemporary look but requires a flexible adhesive and grout rated for exterior use. Natural stone caps (bluestone, travertine, granite) are durable but need sealing in freeze-thaw climates. Concrete caps are the most cost-effective and can be color-matched to adjacent paving.
Pro Tip: Before signing off on any finish, request two 6-inch physical samples per finish type and hold them next to your paving or coping material in natural light. Colors read very differently on a screen than on a cured concrete surface outdoors.
What does a professional installation actually involve?
A qualified contractor follows a specific sequence. Skipping steps here is what causes seat walls to shift, crack, or drain poorly within two or three seasons.
- Stake footing locations before any gravel base is placed. Footings must be coordinated with the patio base depth so the wall base and patio base don’t conflict.
- Excavate and compact the subgrade. Minimum 4 inches of compacted crushed stone base for segmental systems; deeper for poured footings depending on frost depth and load.
- Pour or form footings for poured concrete walls and GFRC leg systems. Rebar placement and cover must match the structural design.
- Install drainage behind the wall: drainage fabric, clean gravel backfill, and weep holes or a perforated pipe outlet at the base. Skipping this step is the most common cause of wall failure.
- Set units or build formwork, place reinforcement, and pour or grout per manufacturer instructions.
- Install caps with appropriate adhesive or mortar. Check for level, overhang, and joint alignment.
- Cure and protect: poured concrete needs a minimum 7-day cure before cap installation and 28 days before full load. Protect fresh concrete from rain, direct sun, and foot traffic.
- Clean and seal per the sealer manufacturer’s schedule.
Good site preparation sequencing reduces rework significantly. Field dimension verification, substrate cleaning, and staging protection before base placement are the steps most often rushed on residential jobs.
Typical on-site durations vary by method; segmental block systems install quickly for standard runs, poured concrete walls require multiple days including curing, and precast GFRC units involve factory lead time plus on-site setting.
Pro Tip: Ask your contractor to show you where drainage outlets will exit the wall before any base material goes down. Moving a drainage outlet after compaction is expensive.
What does built-in seating cost, and how long does it take?
Costs vary by method, site conditions, and cap choice. The figures below reflect U.S. market ranges; your local market may differ.
Seat wall costs commonly run $150–$300 per linear foot, with tile caps adding $30–$50 per linear foot on top. Soft costs — shop drawings, engineer-reviewed footings, and permit fees — typically add $500–$2,000 depending on jurisdiction and project complexity.
- Site access and excavation difficulty are the biggest swing factors in final price
- Engineer-reviewed footings are required when a seat wall also functions as a retaining structure
- Permit costs vary by municipality; always ask who files and who pays
How long will built-in seating last, and what maintenance does it need?
Concrete benches and seat walls last 30–50+ years with proper installation and basic maintenance. GFRC has a comparable lifespan when installed per manufacturer specification. Masonry longevity depends heavily on cap drainage and mortar joint quality.
Sealing concrete benches is the single highest-impact maintenance task. Penetrating silane/siloxane sealers work best in wet climates because they allow vapor transmission while blocking water ingress. Topical film-forming sealers give a richer appearance but need more frequent recoating. Coastal installations need salt-resistant sealers and periodic freshwater rinses to prevent chloride attack.
- Reseal every 2–3 years, or per manufacturer recommendation
- Inspect cap adhesion annually; re-bed any loose caps before water infiltrates the joint
- Clean efflorescence (white mineral deposits) with a diluted acid wash, then reseal
- Hairline cracks under 1/16" wide are cosmetic; fill with a matching concrete caulk and reseal
- Replace cracked or spalled caps individually; they are the most replaceable component of any seat wall
Pro Tip: In freeze-thaw climates, apply sealer in fall before the first frost, not in spring after damage has already occurred. Sealer applied to a wet or cold surface bonds poorly.
When do you need a permit or an engineer?
Most seat walls under 30 inches in height don’t require a structural engineer, but that threshold varies by jurisdiction. Any wall that also retains soil — even partially — crosses into retaining wall territory and typically triggers permit requirements and engineering review.
Confirm locally before breaking ground. Key triggers to watch for:
- Wall height over 30 inches (measured from base to top of cap)
- Wall attached to or within 5 feet of a building foundation
- Terraced retaining systems where combined height exceeds local thresholds
- Surcharge loads: walls near driveways, parking areas, or heavy planters
Pro Tip: Confirm in writing who is responsible for filing the permit and who carries public liability insurance during construction. A contractor who hesitates on either question is a red flag.
How do you vet and hire the right contractor?
The bid process is where most homeowners lose money. A complete bid protects you; a vague one protects the contractor.
- Verify current contractor license and insurance (general liability and workers’ compensation).
- Request a portfolio of at least three comparable completed seat wall or bench projects.
- For GFRC work, confirm the installer holds manufacturer authorization or has documented GFRC installation experience.
- Ask for references from jobs completed in the last 24 months and call them.
- Require a written scope that specifies footing dimensions, reinforcement, drainage method, cap material, sealer product, and warranty terms.
- Request a staged payment schedule tied to milestones, not calendar dates.
Red flags: vague scope ("concrete seat wall, approx. A clear concrete specification with shop drawings, material specs, and installation instructions reduces disputes and rework on every outdoor concreting project.
- Evaluate bids on completeness of scope, not just price
- A lower bid with missing line items almost always costs more at final invoice
- Ask each bidder the same set of questions so you can compare answers directly
What should a GFRC specification include?
GFRC requires more documentation than standard concrete work because units are factory-produced and custom-finished. The Stromberg Architectural GFRC bench specification sets the industry standard for what to request.
Before production starts, require:
- Product data sheets covering mix composition, reinforcement type, and finish options
- Shop drawings showing unit dimensions, joint locations, interface details, and anchor points
- Two 6-inch finish samples per custom finish, approved in writing before production
- Installer qualifications and references for comparable GFRC projects
- Written confirmation that units meet the specified composition and reference ASTM C150 cement
During and after installation, verify field dimensions against shop drawings, confirm substrate cleaning and prep per manufacturer instructions, and protect units from site traffic until adhesive or grout has cured. Ask about fiber reinforcement approaches if you’re comparing GFRC to reinforced precast options.
Pro Tip: Include acceptance criteria in the contract: what constitutes a rejected unit (dimensional tolerance, surface defects, color variation). Without written criteria, disputes over finish quality are nearly impossible to resolve.
What should homeowners do before and after installation?
Pre-install, your job is to make the site ready and the scope unambiguous.
- Clear a staging area at least 10 feet wide adjacent to the work zone
- Confirm finished grades and drainage direction with the contractor before base work begins
- Mark all utilities (call 811 before any excavation)
- Agree on material laydown areas and protection of adjacent lawn, paving, or planting
At handover, walk the finished work against the shop drawings. Check seat height at multiple points, confirm caps are fully bedded with no hollow spots (tap with a knuckle), verify sealed surfaces are uniform, and confirm the site is clean with no adhesive or grout residue on adjacent paving.
Pro Tip: Take photos of the finished work from multiple angles on handover day. If a cap lifts or a crack appears in year two, dated photos showing the condition at completion make warranty claims straightforward.
What contractors see that causes rework
The most expensive mistakes on seat wall jobs are almost always preventable, and they cluster around three decisions made early in the project.
Footings staked after gravel placement is the most common sequencing error. Once the base is compacted, adjusting footing locations means tearing out work. Stake footing locations first, every time.
Cap decisions made late create a different problem. If the cap material isn’t confirmed before the wall is built, the contractor may set the wall height without accounting for cap thickness, leaving the finished seat height outside the 17–20 inch comfort range. Confirm cap thickness and seat height target before the first block is laid.
Drainage is the quiet failure. A wall with no drainage outlet behind it will push forward or crack within a few freeze-thaw cycles. Weep holes at 4-foot centers or a continuous perforated pipe outlet at the base are non-negotiable on any wall taller than 12 inches.
Post-install, check for cap adhesion at 30 days and again at 90 days. Thermal movement in the first season can break mortar bonds on caps that were set in cold or wet conditions.
VW Concreting delivers permanent outdoor seating in Melbourne
VW Concreting has completed over 145 concreting and landscaping projects across Melbourne since 2001. For homeowners and builders who want permanent outdoor built-in seating done right, the difference is a contractor who coordinates footings, drainage, and cap layout as a single scope, not three separate trades.

From poured concrete seat walls to integrated landscaping and hardscape packages, VW Concreting brings shop drawings, material samples, and a written scope to every project. No vague bids. No late cap decisions. No drainage surprises. See the completed project portfolio and then contact the team to arrange a site visit and get a fixed-scope quote.
Sources
- Seat Walls & Built-In Outdoor Seating for LA Homes (2026) | NP Line De
- How to seal and protect concrete benches from weather damage — Outdoor Furniture Street
Leave A Comment