
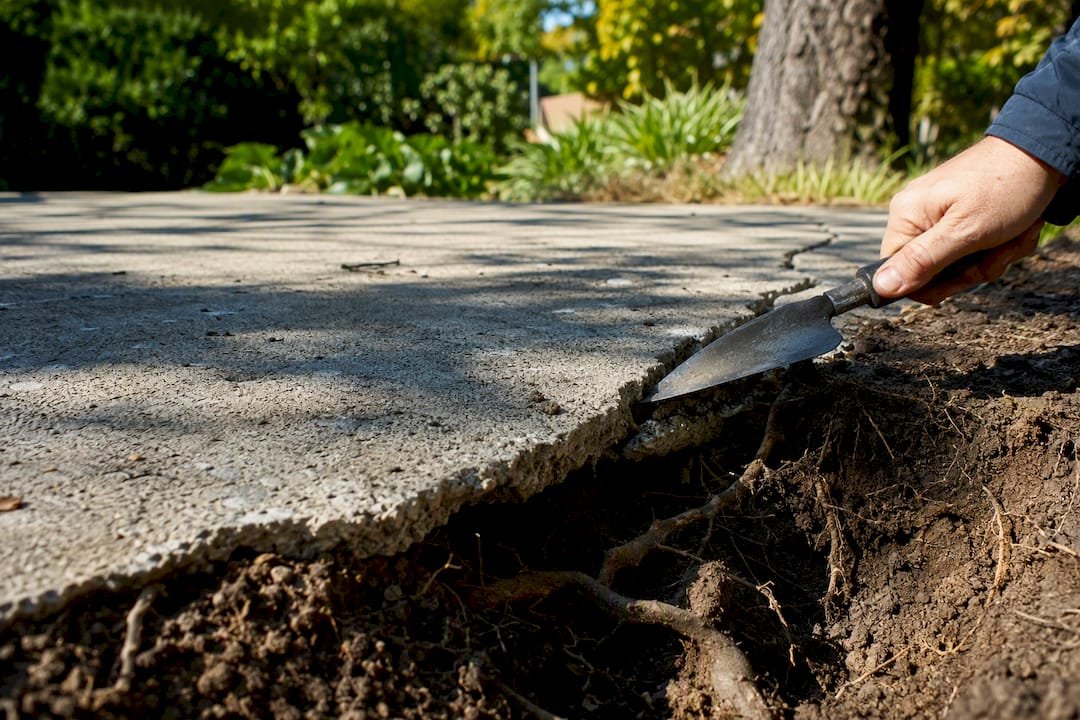
Yes, tree roots are a common cause of driveway cracks, and if you’re seeing raised slabs or a bulging surface, they’re the likely culprit. The good news: most root damage stays confined to the surface layer of your driveway rather than threatening your home’s foundation, since most tree roots occupy the top 30 centimeters of soil, right where your slab or asphalt sits.
Here’s what to do this week, before the damage spreads further:
- Mark the affected area with spray paint or stakes so you can track changes.
- Stop parking cars, trailers, or anything heavy on the cracked section.
- Shut off nearby sprinklers or irrigation lines feeding the tree; excess moisture speeds up root swelling and soil softening.
- Snap photos with a tape measure or coin in frame for scale, and note the date.
Call an arborist first if a tree is involved. They’ll tell you whether the tree is healthy enough to survive root pruning, or whether it needs to come out entirely. Then bring in a concrete or paving contractor for a repair quote. Active root growth can lift asphalt noticeably over time in bad cases, so waiting rarely helps.
Key Takeaways
Tree roots cause most driveway heave by growing within the top 30 centimeters of soil, and lasting repairs require pairing surface work with root management.
| Point | Details |
|---|---|
| Confirm the cause first | Use a 4-foot level to measure heave; over half an inch signals active root movement worth addressing soon. |
| Match urgency to severity | Damage under 30% of the surface often takes targeted repair; beyond that, resurfacing is usually more cost-effective. |
| Never skip root management | Pruning, grinding, or barriers must accompany any repair, or the same crack tends to return within a year or two. |
| Call an arborist before cutting | Tree health assessment should come before excavation, since major root cuts can’t be undone. |
| Get a proper site assessment | Com evaluates root damage, base condition, and repair scope during on-site driveway quotes across Melbourne. |
Table of Contents
- How to Check for Tree Roots Under Your Driveway
- What Roots Actually Do to Your Driveway
- How Urgent Is the Damage, and Who Should Fix It?
- Repair Options: From Patching to Full Replacement
- Preventing Root Damage Before It Starts
- Who to Call: Arborist, Contractor, or Both
- Why Pairing Repair With Root Control Matters More Than Speed
- Getting a Professional Assessment for Root-Damaged Driveways
- Sources
How to Check for Tree Roots Under Your Driveway
You don’t need special tools to figure out whether roots are behind your driveway’s problems. A flashlight, a 4-foot level, and twenty minutes will tell you most of what a contractor needs to know before they even show up.
Start by walking the full length of the driveway and looking for these signs:
- Serpentine or wavy cracks that curve rather than run straight. Roots snake beneath the surface, and the cracks above tend to follow their path.
- Raised or tilted slabs, especially near the edges closest to a tree trunk or planting bed.
- Alligator cracking, a web of small interconnected cracks that usually shows up on asphalt where the base has been disturbed from below.
- Pooling water after rain in spots that used to drain fine. A root swelling under the surface changes the slope enough to trap water.
- Gaps or voids at the edges, where you can slide a screwdriver or thin stick several inches under the slab without resistance.
Once you’ve spotted a suspect area, lay a 4-foot level across it and measure the gap underneath with a ruler. A rise of more than half an inch over that 4-foot span usually points to active movement rather than old, settled damage. Anything less is worth watching but rarely urgent.
Pro Tip: Take a photo of the level and ruler together every few months, dated in your phone’s camera roll. Contractors and arborists both work faster with a visual timeline than with your memory of “it’s gotten worse lately.”
Gently probe along any crack edges with a garden trowel or screwdriver. If it sinks into loose soil or an air pocket instead of hitting solid base material, that’s a void, and it’s a sign the sub-base has been disturbed, whether by roots or erosion. Homeowners who run a seasonal check like this catch roughly 80% of root-related asphalt problems early, back when a patch job is still enough.
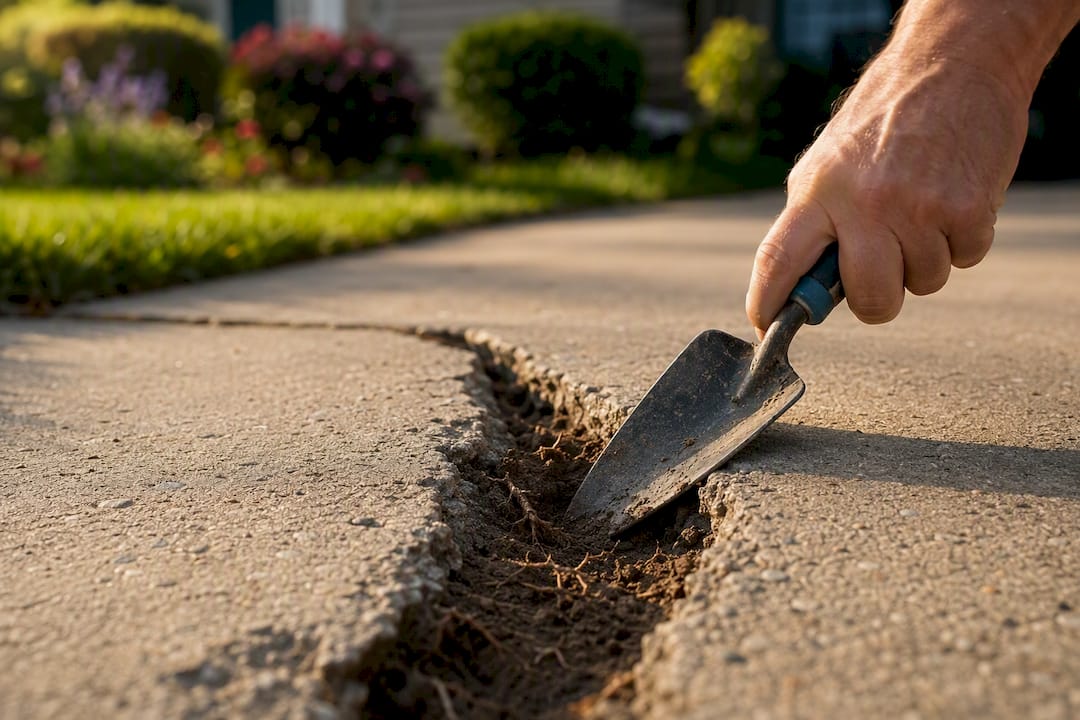
Not every raised slab is a root problem, though. Soil settlement, poor compaction, and frost heave can mimic the same symptoms, so don’t assume a tree is guilty until an inspection confirms it. Cutting down a healthy tree over a drainage issue is a mistake you can’t undo.
What Roots Actually Do to Your Driveway
Two separate forces are at work when a root meets a driveway, and understanding both explains why the damage rarely stays the same size for long.
The first is mechanical: as a root grows in diameter, it pushes outward and upward with steady, sustained pressure. A root doesn’t need to be thick to cause a problem. Even a two-inch root running directly beneath a slab edge generates enough force over a growing season to crack concrete or shove asphalt upward. The second is moisture-driven: roots pull water from the surrounding soil, and depending on the season, that either shrinks the soil (causing settling and gaps) or saturates it after rain (causing softening and heave). Freeze-thaw cycles in colder climates make this worse, expanding trapped water in cracks and widening them further each winter.
Not all trees are equal offenders. Species with aggressive, shallow root systems, like willows, poplars, and silver maples, are notorious for surface roots that spread well beyond the tree’s canopy, often 2 to 3 times the height of the tree. Deeper-rooting species like oaks and many conifers tend to send roots downward first, causing less surface disruption near pavement, though a mature oak planted too close will eventually cause problems too.
Materials respond differently to the same root pressure:
- Asphalt flexes before it cracks, which buys time but also hides the problem until it’s advanced. It’s also more porous, so it absorbs moisture and softens faster around root intrusion.
- Poured concrete is rigid and cracks more visibly and sooner, but it resists moisture penetration better once the surface is intact.
- Pavers handle root pressure best of the three because individual units can shift and settle without a coordinated crack pattern, though they’ll still tent or gap over a growing root.
How Urgent Is the Damage, and Who Should Fix It?
Not every crack demands a same-week phone call, but some do. Here’s how to triage what you’re looking at.
- Small, isolated cracks under a quarter-inch wide with no measurable heave: monitor monthly, no immediate action needed beyond sealing to keep water out.
- Cracks between a quarter-inch and half-inch, with mild surface unevenness: schedule an assessment within a few weeks. This is the window where targeted repair is cheapest.
- Heave exceeding half an inch over a 4-foot span, or cracks spreading across more than 30% of the driveway’s surface area: treat this as urgent. At this scale, patching one section usually isn’t enough, and resurfacing or replacement often becomes the more cost-effective path.
- Pooling water combined with any of the above: prioritize this even if the crack itself looks minor. Trapped water accelerates every kind of damage listed here, and it can seep toward your home’s foundation if the slope has shifted toward the house.
- Cracks near utility lines, gas meters, or a shared driveway with a neighbor: call a professional regardless of size. Root removal near buried lines carries real risk, and shared driveways often involve legal or insurance questions you don’t want to navigate solo.
A rough rule of thumb: if you can cover the entire damaged area with a car hood, a small patch job likely handles it. If the damage spans multiple sections or keeps reappearing after a patch, you’re looking at root management, not just surface repair. Skipping that step is the single most common reason homeowners end up paying for the same fix twice.
Repair Options: From Patching to Full Replacement
Once you know how bad the damage is, the repair conversation splits into three realistic paths, and the right one depends on both the extent of the cracking and whether the root causing it is still growing.
Targeted repair works for isolated damage, usually less than 20% of the driveway’s surface. The typical process: a contractor marks a margin roughly 6 inches beyond the visible crack, saw-cuts the material, excavates down to about 12 inches, removes the offending root, compacts new aggregate base to around 95% density, and repaves the section. Done right, this is the cheapest option and can look nearly seamless if the new material is matched well.
Resurfacing or full replacement becomes the smarter call once damage covers more than about 30% of the driveway, or when heave keeps recurring across multiple spots. At that point, patching individual cracks is throwing money at symptoms while the base underneath stays compromised. Full replacement also gives you the chance to fix drainage grading and install root barriers before new material goes down, which is difficult to retrofit into an existing slab.
Root management should accompany either repair path, not follow it as an afterthought:
- Selective pruning removes the specific roots causing pressure, done by a certified arborist who can judge how much removal the tree can tolerate without destabilizing it.
- Root barriers, rigid vertical panels installed alongside the repaired edge, redirect new root growth downward and away from the pavement.
- Root grinding removes stubborn root mass mechanically when a tree is already gone or scheduled for removal.
- Full removal of the tree is the last resort, reserved for cases where the root system has already compromised a large section and the tree is too close to ever coexist safely with a driveway.
| Repair Method | Typical Cost Range | Best For |
|---|---|---|
| Infrared patching | $150 per spot | Small, isolated cracks under 20% of surface |
| Full-depth section replacement | $3 per square foot | Localized heave with active root growth |
| Full driveway resurfacing | Varies by size and material | Damage exceeding 30% of surface area |
Pro Tip: Ask any contractor bidding on the job whether their quote includes root removal and base rebuild, or just a surface patch over the same compromised sub-base. A cheaper bid that skips the root work almost always costs more within a year or two. A well-prepared base matters just as much as the surface material you choose.
Preventing Root Damage Before It Starts
If you’re planting new trees or repairing a driveway from scratch, the smartest money you’ll spend is on prevention, because it’s dramatically cheaper than the repair cycle you just read about.
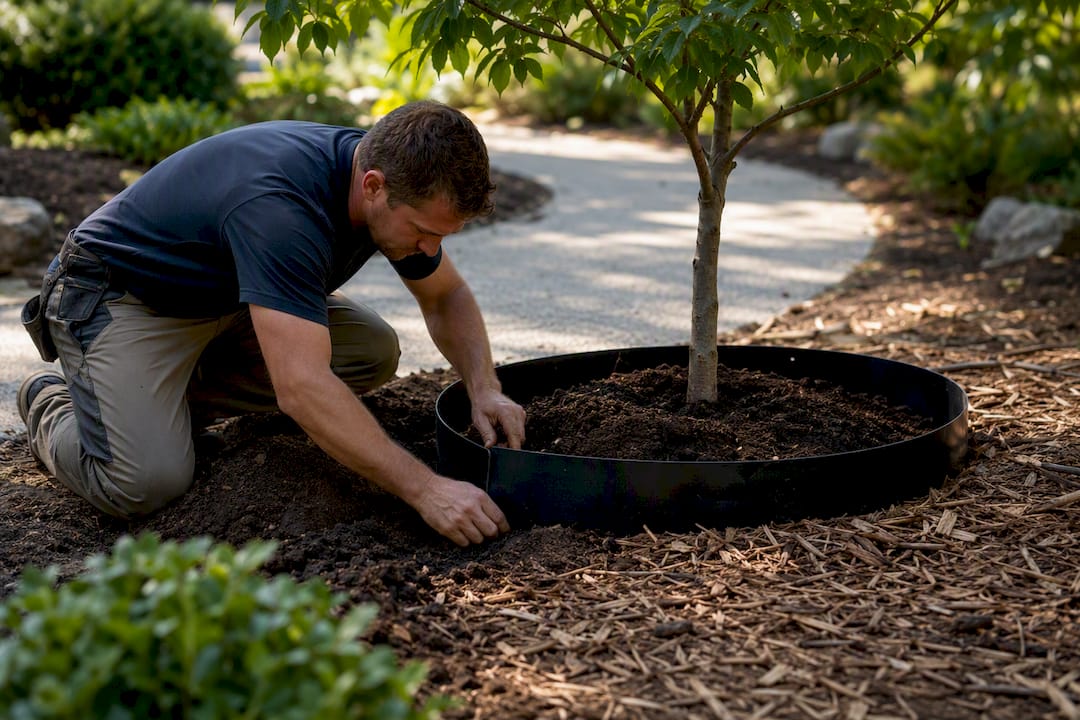
Distance is your first line of defense. A rough guideline: plant large, aggressive-rooting species at least 15 to 30 feet from any paved surface, scaling the distance up with the tree’s expected mature size. For tight side yards or narrow verges, choose species with naturally compact or deep root systems, such as columnar hornbeam, crepe myrtle, or dwarf varieties bred specifically for small urban lots.
Root barriers matter whether you’re planting a new tree near an existing driveway or repairing one damaged by an old one. Vertical barriers made from rigid HDPE panels, installed 24 to 36 inches deep and set 6 to 12 inches from the pavement edge, physically redirect roots downward instead of letting them travel laterally under the slab. Horizontal barriers, typically 12 to 18 inches deep, work well in combination with vertical panels for mature trees with an already-established root system nearby.
| Prevention Method | Specification | When to Use |
|---|---|---|
| Vertical root barrier | 24–36 inches deep, 6–12 inches from edge | New plantings or repairs near existing trees |
| Horizontal root barrier | 12–18 inches deep | Mature trees with established shallow roots |
| Planting distance rule | 15–30 feet from pavement | Any new tree near a future or existing driveway |
Site design choices matter just as much as what you plant. A few habits worth building into any repair or new install:
- Grade the driveway and surrounding soil so water flows away from both the pavement and the tree’s root zone.
- Choose paver or segmented systems over rigid slabs in areas with known root activity nearby, since they tolerate minor shifting without a visible crack pattern.
- Insist on proper base compaction. A well-compacted aggregate base resists root intrusion far longer than a thin, poorly prepared sub-base, regardless of what material goes on top.
- Add control joints during a concrete pour to direct where cracking happens, rather than leaving the slab to crack wherever pressure builds. Our guide on preventing driveway cracks covers joint spacing in more detail.
Who to Call: Arborist, Contractor, or Both
Getting the right professional involved early saves you money and, occasionally, a tree that didn’t need to die.
An arborist handles anything related to the tree itself: judging its overall health, assessing whether root pruning will destabilize it, identifying the species and its typical growth pattern, and recommending safe pruning limits. A concrete or paving contractor handles everything below and above the surface: excavation, base rebuild, drainage correction, and the actual repaving or resurfacing work. For most root-related driveway jobs, you’ll want both, in that order. Cutting roots without an arborist’s input risks killing or destabilizing a tree that a professional could have saved with careful, partial pruning.
Before hiring either, ask for and keep on file:
- Photos and a simple sketch of where roots run relative to the driveway, ideally from the arborist’s assessment.
- A written repair plan spelling out excavation depth, base material, and whether root barriers are included.
- Confirmation of utility locates before any digging starts. Roots and buried lines share the same soil, and hitting a line turns a driveway repair into a much bigger problem.
- Any required local permits for tree removal or significant excavation.
When you’re comparing estimates, ask each contractor these questions directly: Does this quote include root removal, or just resurfacing over the existing base? What’s the warranty on the repaired section, and does it cover new root intrusion within that period? How many days will the driveway be unusable? A contractor who can’t answer the warranty question clearly is worth a second opinion.
Evidence Behind This Guide
The core claims here rest on established arboricultural and paving research, not guesswork.
Most tree roots and fine absorbing roots stay within the top 30 centimeters of soil, which is exactly where driveway bases sit, and it’s why surface root expansion, not foundation subsidence, explains the vast majority of driveway heave homeowners report.
That framing comes from the Arbor Day Foundation’s tree care guidance, and it matters because it separates a manageable surface repair from a much scarier structural concern. Supporting cost and mechanism detail draws from asphalt-specific research on root impact, including lift rates, moisture effects, and repair thresholds. Additional field guidance on root pruning and barrier installation comes from contractor-published repair resources.
- Root depth data anchors the diagnosis and prevention sections.
- Asphalt lift-rate and cost figures anchor the repair-options cost table.
- Field repair sequencing anchors the step-by-step targeted repair description.
Why Pairing Repair With Root Control Matters More Than Speed
The instinct after seeing a cracked driveway is to get it patched fast and move on. That instinct is understandable and usually wrong. The research behind this guide points to one consistent theme: repairs done without addressing the root itself tend to fail again, often within a year or two, because the thing that caused the damage is still growing under the new surface.
Conventional advice leans hard on urgency, patch it now, worry about the tree later. I’d flip that order. An arborist’s assessment of whether the tree can tolerate root pruning should come before any excavation begins, because once a contractor cuts a major root to rebuild the base, that decision can’t be undone. A tree that could have been saved with partial, careful pruning might not survive an aggressive cut made without that context.
What actually matters most: treat the crack as a symptom, not the problem. If your contractor’s quote doesn’t mention root barriers, root grinding, or coordination with an arborist, ask why. A driveway repair that ignores the root underneath isn’t a fix. It’s a deposit on a second repair bill.
— Vic
Getting a Professional Assessment for Root-Damaged Driveways
Diagnosing root damage yourself gets you most of the way there, but a proper fix needs someone who can excavate, rebuild the base correctly, and pair the repair with real root management, not just a patch that looks fine until next spring.

Com has been handling driveway repairs and replacements across Melbourne since 2001, and root-damaged sections are one of the more common jobs our team walks onto. What sets a proper repair apart isn’t the surface finish, it’s what happens underneath: full root removal, a rebuilt and compacted base, and drainage correction so the same problem doesn’t resurface in two years. On a typical site visit, we measure the extent of the heave, check for voids at the slab edges, and give you a straight answer on whether a targeted repair will hold or whether concrete installation or resurfacing makes more financial sense given how much surface area is affected. If you’re weighing a patch against a full replacement, our driveways and slabs service page shows completed projects and outlines what an on-site assessment covers. Get in touch to schedule a quote and find out exactly what your driveway needs.
Sources
- Impact Of Tree Roots on Asphalt Driveways – Asphalt Calculator USA
- Tree roots lifting your driveway? Causes & fixes — TreeCareExtraordinaire
Leave A Comment