
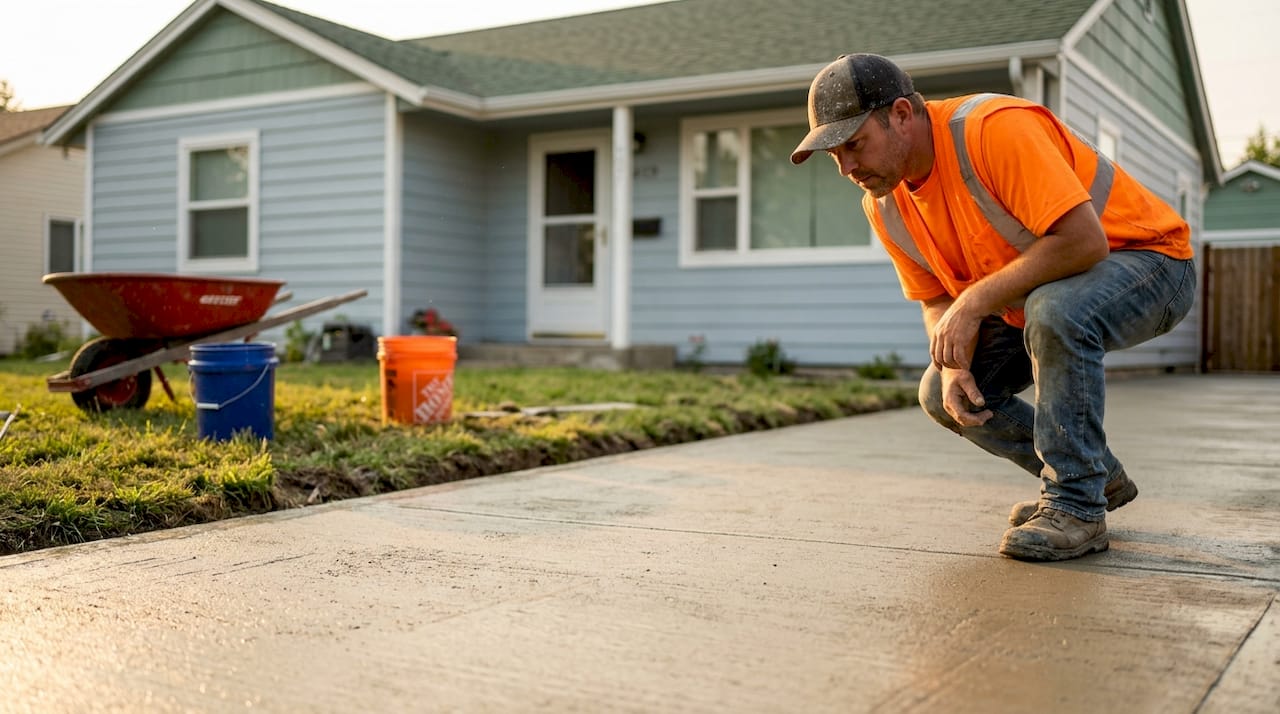
Most homeowners don’t think twice about concrete specifications until cracks appear, surfaces start flaking, or the driveway sinks after just a few years. Getting the residential driveway concrete specification right from the start is what separates a slab that lasts 30 years from one that needs replacing in a decade. This guide covers everything you need: the right mix design, correct thickness, subgrade preparation, reinforcement choices, and installation practices that actually hold up under real-world use.
Table of Contents
- Key takeaways
- Residential driveway concrete specification basics
- Concrete thickness and structural design
- Subgrade preparation and drainage
- Installation best practices and curing
- Common mistakes to avoid
- My honest take on modern driveway standards
- Get your driveway done right with VW Concreting
- FAQ
Key takeaways
| Point | Details |
|---|---|
| Use 4000 PSI minimum | A 4000 PSI mix delivers better strength and waterproofness than cheaper 3000 PSI alternatives. |
| Thickness matters for modern vehicles | EVs and heavier SUVs require 5 to 6 inches of concrete, not the old 4-inch standard. |
| Subgrade prep is non-negotiable | Compacting to 95% Modified Proctor Density prevents settling and cracking over time. |
| Slope controls water damage | A minimum slope of 1/4 inch per foot keeps water moving away from your slab. |
| Curing determines final strength | Proper wet curing for at least 7 days gives concrete time to reach its design strength. |
Residential driveway concrete specification basics
The first decision you make, choosing your concrete mix, sets the ceiling for everything else. No amount of good finishing or curing can recover from a weak mix design.
Compressive strength: why 4000 PSI is the floor
The industry standard mix for residential driveways is 4000 PSI. That’s the minimum you should accept in your specification. A 4000 PSI mix resists surface abrasion, handles vehicle loads without deflecting, and repels water far better than a 3000 PSI mix. Lower-grade mixes are cheaper upfront, but they scale, crack, and wear faster. The savings disappear fast once repairs start.
Your driveway concrete requirements should also address water-cement ratio. A mix with a lower water-cement ratio produces denser, stronger concrete. This is why adding water on site is so damaging: even a small addition reduces compressive strength and creates a weaker, more porous slab. Specify that no water additions are permitted after the truck leaves the plant.
Air entrainment for freeze-thaw conditions
If your property experiences freezing temperatures, air entrainment is not optional. Air-entrained concrete with 4 to 7% air content is required to prevent cracking from ice expansion inside the slab. The microscopic air bubbles act as pressure relief valves when water freezes and expands inside the concrete’s pores. Without them, repeated freeze-thaw cycles cause surface scaling and eventual spalling that no sealer can reverse.
The driveway concrete mix design should specify air entrainment as a concrete admixture, not an afterthought. Your ready-mix supplier handles this at the batch plant, which is another reason to use a certified supplier with documented mix records.
Here are the key material specification points every homeowner should confirm before signing off on a pour:
- Compressive strength: 4000 PSI minimum, tested at 28 days
- Water-cement ratio: 0.45 or lower for durability and waterproofness
- Air content: 4 to 7% for freeze-thaw climates; 2 to 4% for mild climates
- Slump: 4 to 5 inches maximum; do not allow on-site water addition to increase it
- Admixtures: Use only plant-added water reducers or air-entraining agents, not job-site additions
- Supplier certification: Confirm the supplier follows ACI 332-20 residential concrete standards
Pro Tip: Ask your ready-mix supplier for a batch ticket on delivery. It confirms the actual mix design delivered, including water content, PSI design, and air content. Keep it on file. It’s your proof that the concrete met specification if problems arise later.
Concrete thickness and structural design
Thickness is where many driveway specs fall short. The old 4-inch standard made sense for light sedans in the 1980s. It no longer reflects how driveways are actually used.

Standard vs. upgraded thickness
For standard passenger cars and light SUVs, 4 inches is technically acceptable as a minimum. But 5 to 6 inches is now recommended for modern residential use. The reason is straightforward: vehicles are heavier than they used to be. Electric vehicles, in particular, weigh around 30% more than their gas-powered equivalents due to battery packs. Under-spec thickness with these loads creates fatigue cracking far sooner than expected.
If you park an EV, a full-size pickup truck, or an RV in your driveway, go to 6 inches. It adds modest cost but dramatically extends service life.
| Vehicle type | Recommended thickness | Reinforcement recommendation |
|---|---|---|
| Standard sedan or light SUV | 4 inches (minimum) | Wire mesh at mid-depth |
| Heavy SUV or electric vehicle | 5 inches | #3 rebar on 18-inch grid |
| Pickup truck or work vehicle | 5 to 6 inches | #3 rebar on 18-inch grid |
| RV or trailer storage area | 6 inches | #4 rebar on 12-inch grid |
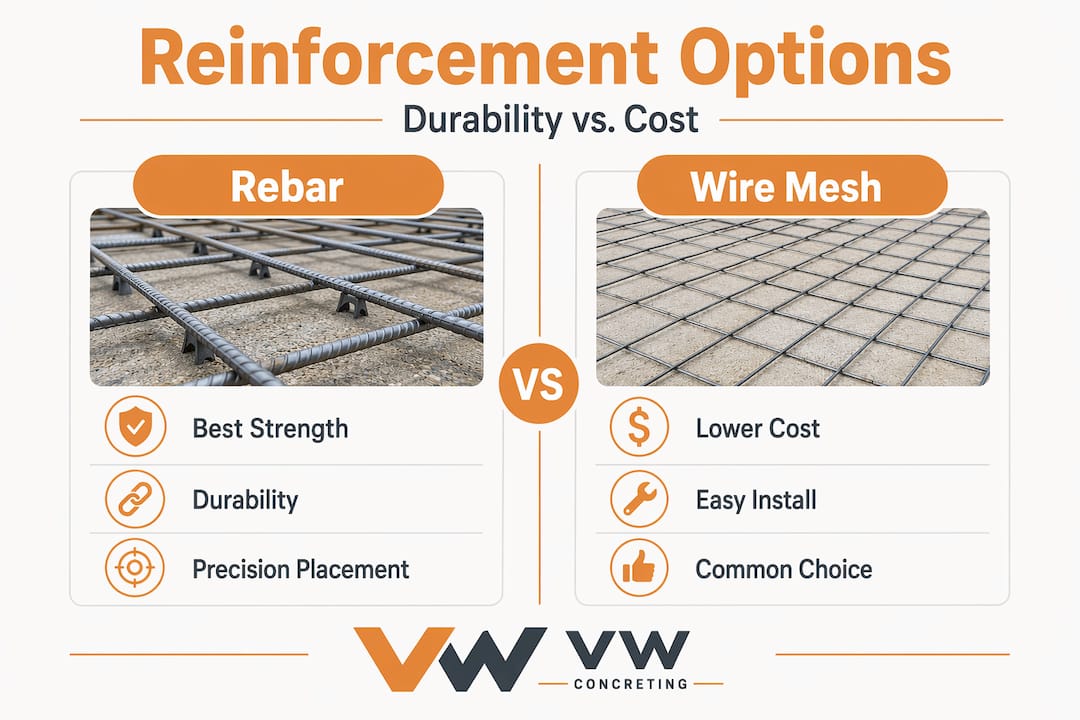
Reinforcement: rebar versus wire mesh
Wire mesh is cheap and common, but it’s often placed on the ground and ends up at the bottom of the slab where it does almost nothing. Rebar performs better when placed correctly. A #3 rebar grid centered in the slab thickness handles tensile stresses that concrete alone cannot resist. The key word is “centered.” Rebar must be held at the neutral axis using plastic chairs or bar supports. Rebar sitting on the subgrade is not reinforcement; it’s decorative.
You can read more about optimizing slab thickness for durability to understand how thickness and reinforcement work together under load.
Control joints and crack management
Concrete shrinks as it cures. That shrinkage causes cracking if it’s not managed. Control joints spaced every 8 to 10 feet for a 4-inch slab create predictable weak points where cracking happens on your terms, not the concrete’s. Cut joints to one-quarter of the slab depth within 12 to 24 hours of finishing. Do it too late and the slab has already cracked randomly.
Pro Tip: If you plan to add a carport, garage extension, or EV charger in the next 10 years, spec your driveway at 5 to 6 inches now. Retrofitting a thicker slab costs far more than upgrading the spec before the pour.
Subgrade preparation and drainage
The concrete slab is only as good as what sits beneath it. Poor subgrade preparation is the most common cause of driveway failure, even when the concrete itself meets specification.
Here’s the correct preparation sequence for a residential driveway:
- Strip and excavate to a minimum depth of 8 inches below the finished surface level to allow for base and slab thickness.
- Remove organic material completely. Soil with organic matter compresses over time and causes uneven settling.
- Add a crushed rock base of at least 4 inches, compacted in lifts. The crushed rock base distributes load, improves drainage, and creates a stable platform for the slab.
- Compact the subgrade to at least 95% Modified Proctor Density. Use a plate compactor or roller. Do not skip this step or substitute visual inspection for measured compaction.
- Check grade and slope before forming. The finished surface must slope away from structures at a minimum of 1/4 inch per foot for drainage. Maximum slope before traction becomes an issue is about 1/2 inch per foot.
- Install drainage infrastructure where needed. Trench drains at the base of a sloped driveway or at garage entries prevent water from pooling and penetrating the slab edge.
| Subgrade requirement | Standard |
|---|---|
| Minimum compaction | 95% Modified Proctor Density |
| Base layer material | Crushed rock or gravel, 4 inches minimum |
| Minimum drainage slope | 1/4 inch per foot (2%) |
| Maximum slope | 1/2 inch per foot (4.2%) |
Engineered drainage solutions like trench drains and proper edge restraints are now considered part of good residential pavement specifications rather than optional upgrades. Edge loading, where vehicles repeatedly drive over the slab edge, is a leading cause of corner cracking. Proper footers and thickened edges at the slab perimeter address this directly. Proper driveway edge design is often overlooked but makes a measurable difference in long-term performance.
Pro Tip: Ask your contractor to provide compaction test results before the pour. A reputable crew won’t hesitate. If they push back, that’s your signal to find someone else.
Installation best practices and curing
Even a perfect mix design can fail if placement and curing are handled poorly. Concrete is a time-sensitive material, and the decisions made in the first 24 hours have consequences that last decades.
- Reject high-slump deliveries. If the mix arrives too stiff and the crew wants to add water, reject the load or demand a replacement. Adding water on-site reduces the compressive strength of the finished slab and voids any strength guarantees.
- Vibrate during placement. Use a mechanical vibrator to consolidate concrete around reinforcement and eliminate air pockets. Poor vibration leaves honeycombing inside the slab that weakens it structurally.
- Finish for function, not just appearance. A broom finish adds texture that improves traction and is the correct choice for most driveways. Avoid over-troweling, which seals the surface too tightly and can cause delamination.
- Begin curing immediately after finishing. Cover the slab with wet burlap and plastic sheeting, or apply a chemical curing compound. Wet curing for a minimum of 7 days allows the concrete to reach design strength. Letting it dry out in the first week is one of the most damaging things you can do.
- Cut control joints on time. Saw-cut joints within 12 to 24 hours of the pour. Mark the joint locations before the pour so the crew isn’t guessing.
Pro Tip: Avoid foot traffic for 24 hours and vehicle traffic for at least 7 days after the pour. Full design strength takes 28 days. If a contractor tells you to drive on it after 3 days, that’s a red flag.
Common mistakes to avoid
Most driveway failures trace back to a short list of preventable errors. Knowing what they are puts you in a better position when reviewing quotes and supervising work.
- Accepting a 3000 PSI mix to save money. The cost difference between 3000 and 4000 PSI is small. The durability difference is not.
- Skipping or rushing compaction. Insufficient compaction is the fastest route to a cracked driveway, regardless of concrete quality.
- Ignoring slope and drainage. Water sitting on a slab accelerates deterioration, especially in freeze-thaw conditions.
- Using wire mesh without confirming placement depth. Mesh at the bottom of the slab contributes nothing. Check that it’s elevated to mid-slab before the pour begins.
- Skipping curing entirely. Many contractors finish the slab and move on. Curing is not optional; it’s part of the concrete driveway installation guidelines.
- Allowing heavy vehicles on early. A delivery truck or concrete pump truck parked on a new slab before 28 days can cause permanent damage.
Pro Tip: Schedule a walkthrough with your contractor before the pour. Review the subgrade, forming, and rebar placement together. Problems caught before concrete is placed cost nothing to fix.
My honest take on modern driveway standards
I’ve watched hundreds of driveways go down over the years, and the pattern is consistent. The ones that fail share the same problems: minimum-code thinking applied to above-minimum-code conditions.
The honest reality is that minimum standards were written for conditions that no longer reflect how people use their driveways. A 4-inch slab designed for a 1980s sedan is now supporting a 6,000-pound electric pickup truck. The ACI 332-20 code provides a starting point, but I’d treat it as a floor, not a ceiling.
What I’ve seen cause the most expensive failures isn’t the concrete itself. It’s the subgrade work. Contractors who rush compaction, skip the crushed rock base, or don’t test compaction before forming are setting the slab up for failure. The concrete above it can be perfect, and it still cracks when the ground beneath it moves.
My recommendation to any homeowner planning a driveway: build for what you’ll have in 10 years, not what you have today. If there’s any chance you’ll own an EV, increase the thickness now. If drainage is even slightly questionable, add a trench drain. These upgrades cost a fraction of what a replacement slab will cost. Invest in the specification, and the slab takes care of itself.
— Vic
Get your driveway done right with VW Concreting

VW Concreting has completed over 145 residential and commercial projects across Melbourne, with driveways and slabs representing a core part of that work. Every job follows the full specification process covered in this guide, from subgrade compaction and base preparation through to mix design, reinforcement, and curing. You can browse our completed driveway and slab projects to see the standard of work firsthand. If you want a driveway built to last, not just built to minimum code, reach out for a consultation. We’ll walk you through the right specification for your site, your vehicles, and your long-term goals.
FAQ
What PSI concrete is best for a residential driveway?
A 4000 PSI mix is the recommended standard for residential driveways, offering better durability and water resistance than 3000 PSI alternatives. Lower PSI mixes wear faster and are more prone to surface cracking.
How thick should a concrete driveway be?
Four inches is the minimum for light vehicles, but 5 to 6 inches is recommended for heavier vehicles including electric vehicles, which weigh approximately 30% more than standard gas-powered cars. Thicker slabs resist fatigue cracking significantly better.
Why does subgrade preparation matter so much?
Compacting the subgrade to at least 95% Modified Proctor Density is fundamental because insufficient compaction causes settling and cracking regardless of concrete quality. The base is what holds the slab stable over time.
When can you drive on a new concrete driveway?
Light foot traffic is acceptable after 24 hours, but vehicle traffic should wait at least 7 days. Concrete reaches its full design strength at 28 days, so heavy vehicles should stay off longer if possible.
What slope does a concrete driveway need for drainage?
A minimum slope of 1/4 inch per foot (approximately 2%) is required to prevent water ponding. Slopes above 1/2 inch per foot start to create traction concerns and are generally avoided in residential driveway design.
Leave A Comment