

For predictable, job-site color consistency, use an integral pigment system with strict batching controls, no on-site water additions, and a job-site mock-up approved before any production pour begins.
The non-negotiables are straightforward: lock down your water-to-cement ratio, source cement and aggregate from a single supplier for the entire job, and cure with a compatible liquid membrane compound rather than plastic sheeting or wet burlap.
TL;DR — Three checks before every pour:
- Confirm w/c ratio is set within a target range and no site water additions are permitted
- Verify pigment is pre-weighed and the drum has been cleaned of any previous color
- Confirm the mock-up panel is approved by the client under the actual lighting conditions
Table of Contents
- How do you choose the right color system for your project?
- What pigment dosages and materials give you reliable color?
- How to batch and mix colored concrete for consistent results
- Placement and finishing techniques that protect color uniformity
- Why a job-site mock-up prevents color disputes
- Curing, sealing, and the 30-day color stabilization timeline
- Troubleshooting: mottling, efflorescence, streaking, and fading
- Tools, quantities, and a quick estimating checklist
- Safety, environmental handling, and pigment disposal
- Key Takeaways
- What the field actually teaches you about colored concrete
- Authoritative references for deeper technical detail
- VW Concreting delivers consistent colored concrete in Melbourne
How do you choose the right color system for your project?
The four main systems each suit different project types, durability needs, and budgets. Picking the wrong one creates mixing and application headaches that no amount of finishing skill can fix.
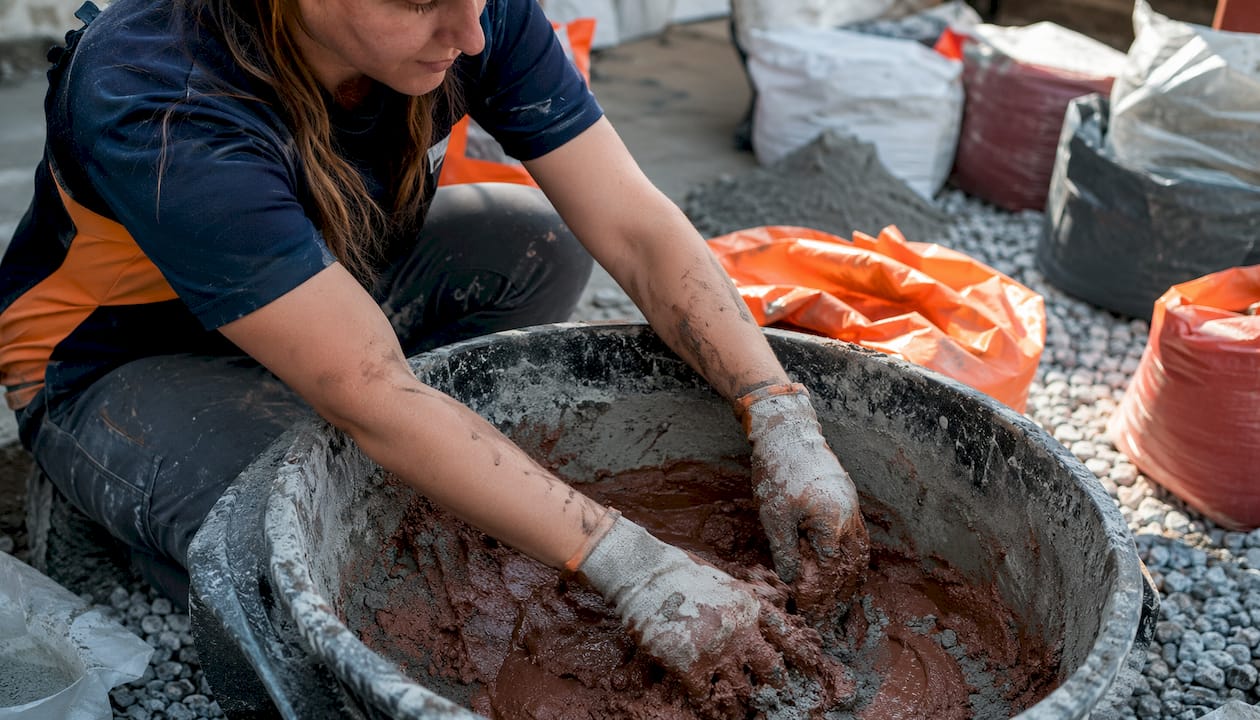
Integral pigments are iron-oxide colorants added during mixing. They color the full depth of the slab, so chips and surface wear don’t expose a gray core. They require the tightest batching controls of any system, but they deliver the most consistent results on large exterior flatwork like colored concrete driveways.
Color hardeners (dry-shake) are broadcast onto the surface after screeding. They produce richer, more saturated tones than integral pigments alone and add surface density. The trade-off: color lives only in the top layer, so repairs are harder to match.
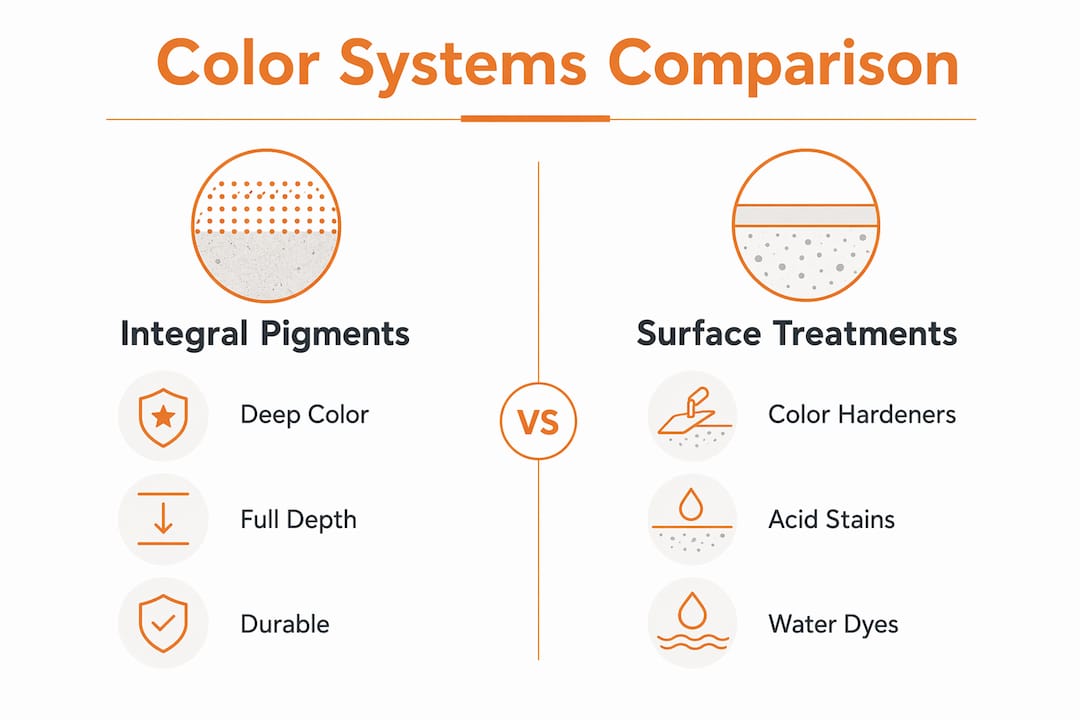
Acid-reactive and penetrating stains work on cured concrete. They don’t require any mixing changes, but surface prep is critical. Contamination, form-release residue, or inconsistent porosity will produce blotchy results.
Water-based dyes penetrate quickly and offer a wide color palette, but UV stability is lower than iron-oxide systems. Best suited for interior slabs.
Topical coatings and sealers don’t color the concrete themselves but dramatically affect how the final color reads. Solvent-based sealers typically deepen color more than water-based products.
Pro Tip: For large exterior slabs where uniformity matters most, use factory-measured bagged integral pigments. Pre-measured bags eliminate the single biggest source of batch-to-batch variation: inconsistent weighing on site.
What pigment dosages and materials give you reliable color?
Pigments are typically dosed between 0.75% and 8% of cementitious weight. Starting at 2% or above gives reliable color development; above 8% is the saturation point where adding more pigment produces no deeper shade.
Pigment forms and trade-offs:
- Powdered iron oxide: most economical, widest color range, but dusty and requires careful weighing
- Granular color admixtures: easier to handle than powder, less airborne dust, good dispersion
- Liquid dispersions (such as CHROMIX® L): fast dispersion, can be pumped directly into the mixer, ideal for ready-mix plant integration
Compatibility rules that affect final color:
- Avoid calcium chloride accelerators; they cause mottling and can bleach pigment
- Treat supplementary cementitious materials (SCMs) like fly ash and slag as part of the total cementitious weight when calculating dosage. SCMs can unpredictably shift final color, so apply them uniformly across every load or leave them out of colored mixes entirely
- Use the same cement brand and type for every load on a job. Gray cement produces cooler, muted tones; white cement opens up the full pigment palette
- Target a controlled w/c ratio for colored flatwork. Higher w/c dilutes pigment concentration at the surface and lightens the finished shade
Dosage reference table:
| Dosage (% of cementitious weight) | Expected color strength |
|---|---|
| 0.75–8% | Light tint, low saturation |
| 2–4% | Medium color, reliable development |
| 4–8% | Deep, saturated color |
| Above 8% | Saturation limit — no further gain |
The INCRETE COLOR-CRETE technical data sheet recommends a minimum of 5 sacks of cement per cubic yard and prefers Type II/V cement for colored work.
Pro Tip: Use SikaColor-100 P pre-measured bags when mixing on site. Each bag is sized for a standard sack of cement, which removes the weighing step and cuts handling error to near zero.
How to batch and mix colored concrete for consistent results
Follow a fixed sequence every load. Deviation from the sequence is the fastest route to streaking.
- Clean the drum completely. Remove any residue from previous loads, retarders, or different-colored batches.
- Size the load so the drum is at least one-third full. Undersized loads don’t develop enough shear to disperse pigment evenly.
- Introduce the pigment (liquid dispersion or pre-measured bag) before adding aggregates and cement.
- Add water, sand, coarse aggregate, and admixtures in your standard order.
- Add cement last, then mix at mixing speed for a minimum of 5 minutes or 130 drum revolutions — whichever comes later.
- Record batch data for every load: cement batch number, aggregate source, slump reading, and pigment lot number.
Controls to lock in before discharge:
- Never add water after discharge to loosen a stiff load. Adding water after discharge lightens color and introduces variation between loads
- For split loads, place both portions as close together in time as possible to minimize temperature and moisture differences
- Prime pump lines with a sacrificial wheelbarrow load before placing colored concrete; pump priming mortar will pull pigment and produce a lighter first section if not discarded
Pro Tip: When slump is too low on site, use a water-reducing admixture or plasticizer rather than adding water. This maintains workability without diluting pigment concentration or shifting the w/c ratio.
Placement and finishing techniques that protect color uniformity
Finishing is as important to final color as pigment dosing. Two slabs mixed identically can look different if one was finished wet and the other dry.
Before and during placement:
- Do not place colored concrete over a bone-dry subbase; lightly dampen it to prevent rapid moisture loss from the slab bottom
- Place and consolidate quickly. Delays between loads allow the first section to stiffen, creating a visible color line at the joint
- Use vibrating screeds and magnesium floats for initial passes. Steel trowels increase surface density and darken color; use them only where a harder, denser finish is specified
Finishing rules that prevent streaking:
- Stop floating when bleed water is present on the surface. Working wet tools into bleed water dilutes the cement-pigment ratio at the surface and leaves light, washed-out patches
- Keep all finishing tools dry. Wet brooms and damp floats deposit water that permanently alters surface color
- Never spray water on the surface to extend the finishing window
- Avoid overworking: excessive troweling changes sheen and can darken or mottle the surface unevenly
For stamped finishes, apply color hardener in two broadcast passes before stamping. For exposed aggregate work, the aggregate color dominates the final appearance, so aggregate selection matters more than pigment dosage.
Why a job-site mock-up prevents color disputes
A cured mock-up panel using the exact materials, tools, finishing sequence, and curing compound planned for the job is the single most effective quality-control step on any colored pour. Skip it and you’re negotiating color acceptance after the slab is in the ground.
Mock-up workflow:
- Cast the panel using the production mix design, same pigment lot, same cement source.
- Apply all planned finishing techniques in sequence: float, trowel passes, texture tools.
- Cure with the specified liquid curing compound.
- Allow the panel to dry fully and photograph it in the actual job-site lighting conditions, both wet and dry.
- Tag the panel with the mix design details, pigment lot number, and date.
- Get written client sign-off on the panel before any production pour begins.
Documentation checklist:
- Wet and dry photos with timestamps
- Pigment lot number and dosage recorded on the tag
- Signed acceptance form referencing the panel, not a color chart
- Note any finish variations tested (e.g., broom vs. trowel) so the client approves the exact texture
Curing, sealing, and the 30-day color stabilization timeline
Use a compatible liquid membrane-forming curing compound. Plastic sheeting and wet burlap trap moisture unevenly and cause mottling on colored surfaces.
Curing and sealing sequence:
- Apply liquid curing compound immediately after final finishing, per the manufacturer’s product data sheet
- Wait 24–36 hours before applying a decorative sealer on most flatwork; confirm with the sealer manufacturer’s guidance for your specific product
- Color continues to evolve as concrete cures and typically stabilizes around 30 days after placement. Early darker or lighter appearances are normal and will shift
For exterior work, solvent-based acrylic sealers generally deepen color and provide better UV resistance than water-based products. Interior slabs often use penetrating densifiers followed by a topical sealer. Check manufacturer compatibility before combining products.
Pro Tip: Run the full cure and seal sequence on the mock-up panel so the client sees the final sealed appearance before approving production. Schedule the formal color acceptance inspection at or after the 30-day mark when color has stabilized.
Troubleshooting: mottling, efflorescence, streaking, and fading
| Problem | Root cause | Field fix |
|---|---|---|
| Mottling / blotchy patches | On-site water addition, wet tools, inconsistent batching | Grind surface and apply color-matched overlay; replicate mock-up conditions for repair |
| Efflorescence (white deposits) | High w/c, inconsistent curing, high-salt aggregate | Clean with dilute acid wash; improve curing on future pours; switch aggregate source |
| Light streaks | Bleed water worked into surface, pump priming not discarded | Localized grinding and color-matched patch; document repair mix for future reference |
| Fading / uneven color | UV exposure, wrong sealer, inconsistent aggregate source | Reapply UV-stable sealer; for severe fading, grind and re-seal or replace section |
Pro Tip: Document every repair mix with the same detail as the original mock-up: pigment lot, cement source, w/c, and finishing tools. Color-match repairs fail most often because the repair crew doesn’t have that data.
Tools, quantities, and a quick estimating checklist
Tools and PPE every colored job needs:
- Mixer truck or site mixer with clean drum
- Vibrating screed, magnesium floats, steel trowels
- Wet/dry vacuum (for cleanup; never use water to rinse tools mid-pour)
- N95 respirator or P100 half-face respirator for powdered pigments
- Chemical-resistant gloves and eye protection
- Pump and sacrificial wheelbarrow for pump priming
Quick quantity reference:
| Item | Rule of thumb |
|---|---|
| Cement content | 5 sacks minimum per cubic yard |
| Pigment dosage start point | 2% of cementitious weight |
| Pigment saturation limit | 8% of cementitious weight |
| Minimum mixing revolutions | 100–130 per load |
Typical flatwork timeline:
- Day 0: Pour, finish, apply liquid curing compound
- Day 1–2: Apply decorative sealer (confirm with product PDS)
- Day 7: Form strip, light foot traffic
- Day 30: Final color inspection and client acceptance
Good site preparation before the pour reduces color problems significantly. A well-compacted, uniformly damp subbase prevents the differential moisture loss that causes color banding. For detailed placement scheduling, a concrete placement plan keeps sequencing tight across multiple loads.
Safety, environmental handling, and pigment disposal
Use an N95 or P100 respirator when handling powdered iron-oxide pigments. The particles are fine enough to reach the lower respiratory tract. Chemical-resistant gloves and safety glasses are required for both pigment handling and acid-based stain application.
On-site handling rules:
- Store pigments in sealed containers away from moisture; clumped pigment won’t disperse evenly
- Follow the product Safety Data Sheet for each pigment and admixture before use
- Never pour washout water or pigment slurry into storm drains; contain washout in a designated pit or lined container per local environmental regulations
- Avoid placing colored concrete in heavy rain; dilution at the surface is impossible to control and will produce permanent color variation
- In hot weather (above 90°F), water demand increases. Use chilled mix water or ice to maintain your target w/c without adding extra water at the truck
Concrete washout and solid waste disposal must comply with local environmental rules. Check with your municipality or state environmental agency for current washout containment requirements before setting up the site. Crews working on specialized construction projects benefit from staying current on both equipment practices and environmental compliance requirements.
Key Takeaways
Consistent colored concrete comes down to five controls: locked w/c ratio, single-source materials, pre-weighed pigment, no on-site water additions, and a signed mock-up before production pours.
| Point | Details |
|---|---|
| Mock-up first, always | Cast a panel with production materials and get signed client approval before any pour. |
| Lock w/c at — | Every water addition on site lightens color and creates load-to-load variation. |
| Dose pigment at 2–8% | Start at 2% of cementitious weight; above 8% is saturation with no color gain. |
| Use liquid curing compounds | Plastic sheeting and wet burlap cause mottling; compatible membrane compounds preserve color. |
| Expect 30-day stabilization | Final color acceptance should happen at or after 30 days, not at the day-of pour. |
What the field actually teaches you about colored concrete
The mock-up step is where most colored-concrete problems get caught before they become disputes. Crews that skip it because “the client already picked the color chip” are setting themselves up for a conversation nobody wants after the slab cures. A color chip under fluorescent lighting in a showroom looks nothing like a broom-finished slab in afternoon sun.
The other thing the field teaches quickly: batching discipline is not optional. A single truck driver who adds a half-bucket of water to ease discharge can produce a section that reads two shades lighter than the rest of the job. Locking down the no-water-addition rule with every driver, every load, is the difference between a uniform result and a patchwork.
VW Concreting has been delivering coloured and plain concrete across Melbourne since 2001, with over 145 completed projects. That volume of work makes the patterns clear: the jobs that go smoothly are the ones where the mix design, the mock-up, and the curing sequence were locked in before the first truck arrived.
Authoritative references for deeper technical detail
The following primary sources back the technical guidance in this article and are worth bookmarking for project-specific specifications:
- For Construction Pros — Pigment Integration Guide: Dosage ranges, batching sequence, and finishing practices for on-site pigment integration
- CHROMIX® L Product Data Sheet (Sika USA): Mixing sequence, minimum revolutions, split-load procedures, and mock-up requirements
- SikaColor-100 P: Pre-measured bagged pigment guidance and recommended mixing revolutions
- INCRETE COLOR-CRETE TDS: Cement content minimums, SCM compatibility warnings, and preferred cement types
- CHROMIX Placement Guide (Kuert): No-water-addition rules, split-load scheduling, and placement sequencing
- ACI 310R-19 / 310-25: The authoritative ACI guides to decorative concrete flatwork, covering integral color, color hardeners, stains, and post-placement techniques
VW Concreting delivers consistent colored concrete in Melbourne

Getting the mix right on paper is one thing. Executing it across multiple loads, in real weather, with real crews, is where experience counts. VW Concreting has completed driveways and slabs across Melbourne since 2001, including colored flatwork where mock-up approval, single-source batching, and compatible curing are standard practice on every job. If you’re planning a colored concrete project and want a crew that treats batching discipline as non-negotiable, get in touch with VW Concreting for a quote.
Leave A Comment