
A retaining wall that collapses doesn’t just damage your yard. It can undermine your neighbor’s fence, destabilize a driveway, or trigger a costly council dispute that takes months to resolve. Melbourne homeowners frequently start retaining wall projects with solid intentions but skip the planning steps that matter most, whether that’s soil testing, drainage design, or getting the right approvals. This guide walks you through every stage of the process, from regulatory requirements to the final backfill, so you build a wall that holds for decades.
Table of Contents
- Understanding site planning and regulatory requirements
- Site assessment and planning: Soil, drainage, and location
- Choosing materials and budgeting: Concrete vs timber walls
- Step-by-step construction process
- Ensuring drainage and preventing common failures
- Our perspective: The planning step most Melbourne homeowners underestimate
- Plan your retaining wall project with VW Concreting
- Frequently asked questions
Key Takeaways
| Point | Details |
|---|---|
| Regulations are strict | Obtaining council approvals and neighbor consent is crucial before building retaining walls in Melbourne. |
| Site conditions dictate design | Soil type, drainage, and location are key in choosing materials and construction method. |
| Drainage prevents failure | Most retaining wall collapses are caused by poor drainage, so a robust system is essential. |
| Material impacts cost and longevity | Concrete offers long life and lower maintenance, but timber may save up front while needing more replacement. |
| DIY carries risks | Without proper engineering, DIY retaining walls often fail, incurring higher costs and repairs. |
Understanding site planning and regulatory requirements
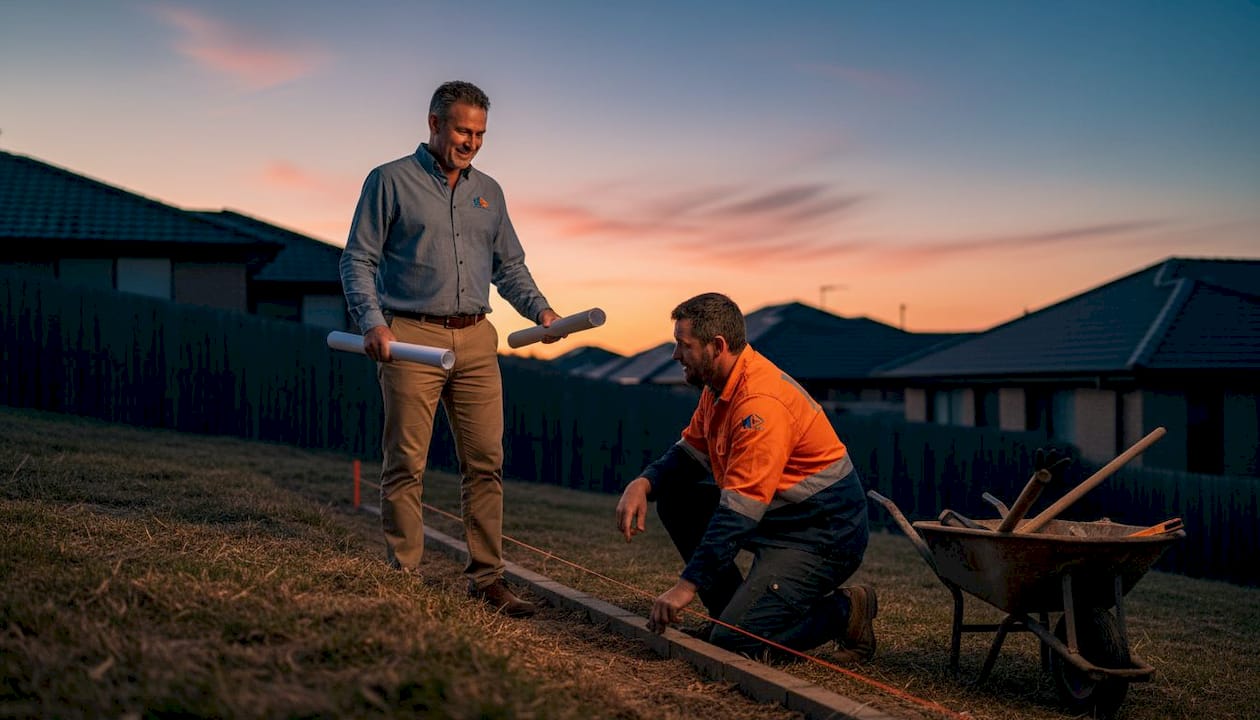
After establishing why site planning is vital, let’s look at the regulations and paperwork you simply can’t skip in Melbourne.
Before a single shovel hits the ground, you need to understand what Melbourne’s councils actually require. The rules aren’t one-size-fits-all. They vary by suburb, slope, proximity to boundaries, and wall height. Getting this wrong means fines, forced demolition, or an uninsurable structure on your property.
Council approval for retaining wall regulations make clear that site planning must account for setbacks from property boundaries, the impact on neighboring properties, maximum allowable wall heights, and drainage discharge points. Boundary walls specifically require neighbor consent and shared responsibilities between adjoining owners.
Here’s what typically triggers a permit requirement in Melbourne:
- Walls exceeding 1 meter in height generally require council approval
- Walls within 1.5 meters of a property boundary almost always require assessment
- Any wall near easements, stormwater lines, or overlays (such as vegetation or flooding overlays)
- Walls that affect drainage flow to adjacent properties
Regulatory compliance checklist before you build:
- Confirm your council’s specific height threshold (some set it at 800mm)
- Check if your site sits within an overlay zone under the Planning and Environment Act
- Get written confirmation from your neighbor if the wall falls on or near a shared boundary
- Lodge a planning permit application if required and wait for approval before construction begins
- Ensure your builder holds the correct registration under the Building Act 1993 in Victoria
| Regulatory factor | What to check | Who decides |
|---|---|---|
| Wall height | Is it over 800mm or 1m? | Local council |
| Boundary setback | Within 1.5m of a boundary? | Council/surveyor |
| Neighbor consent | Shared boundary involvement? | Adjoining owner |
| Drainage discharge | Where does water flow? | Council/engineer |
| Overlay zones | Flooding, vegetation, heritage? | State planning scheme |
Pro Tip: Call your local council’s planning department before you draw up any plans. A five-minute conversation can save you weeks of rework and give you clarity on exactly which permits your project needs.
Site assessment and planning: Soil, drainage, and location
Once regulation basics are covered, the next step is understanding your site’s unique challenges and how they affect wall choices.
No two Melbourne backyards are alike. A gently sloping block in Werribee with sandy loam behaves completely differently from a steep clay-heavy site in the Dandenong Ranges. Soil type and drainage patterns are the two biggest variables that shape everything from your wall design to your engineering requirements.
Why soil type is a game changer:
Clay soils are notoriously problematic for retaining walls. According to retaining wall guides, clay soils exert 40% more lateral pressure on a wall than granular soils, which means you need deeper footings, additional reinforcement, and far more attention to drainage behind the wall. Sandy soils drain freely but can shift, meaning different structural concerns. Sloping sites require stepped walls or benching (creating flat terraced sections) to achieve global stability, which is the resistance of the entire slope to sliding as a single mass.
Key questions to answer during site assessment:
- What is the soil type and what is its bearing capacity?
- Where does stormwater flow during heavy Melbourne rain events?
- How close is the wall to the boundary, an existing structure, or a driveway?
- Is there a surcharge load (such as a vehicle path or building) within 1.5 meters of the wall?
- What is the slope angle and total retained height?
Walls near boundaries closer than 1.5 meters, or subject to surcharge loads from driveways or buildings, require engineering input regardless of height. This is non-negotiable. Engaging a geotechnical engineer early saves money because it eliminates guesswork from the design phase. Good retaining wall foundations always start with an accurate picture of what the soil beneath will and won’t support.
| Soil type | Key challenge | Recommended approach |
|---|---|---|
| Clay | High lateral pressure, poor drainage | Deep footings, gravel drainage layer, engineering required |
| Sandy loam | Prone to shifting and erosion | Concrete sleepers, compacted base, geotextile |
| Rocky ground | Difficult excavation | Jack-hammer access, potentially lower cost on footings |
| Expansive clay | Swells and shrinks seasonally | Over-engineered drainage, flexible jointing |
| Fill (imported soil) | Unstable, unpredictable settlement | Always requires engineering assessment |
Pro Tip: If your site has a mix of soil types across the wall’s length (common on Melbourne properties that have had prior landscaping), get a soil test at multiple points, not just one. Variations along the wall line can mean different footing depths in different sections.
Working with experienced retaining wall experts during the assessment phase means you get these variables documented before they become expensive surprises mid-build.
Choosing materials and budgeting: Concrete vs timber walls
Once you grasp the site realities, you can weigh up which retaining wall material best fits your budget and site needs.
The two most common choices for Melbourne residential retaining walls are concrete sleepers and timber sleepers. Both are widely used, but they are not interchangeable. Your soil conditions, wall height, aesthetic preferences, and long-term plans all shape which one makes sense.
Concrete sleeper walls are precast panels that slot between steel or concrete posts. They are dense, resistant to moisture, and rated to last 50 years or more without significant maintenance. They handle clay soils better because they resist warping and water absorption. Council assessors and engineers tend to prefer them for structural applications.

Timber sleeper walls use treated pine posts and horizontal sleepers to create a more natural look. They are typically faster to install and can cost less upfront in some configurations, but they have a service life of only 20 to 30 years. Over time, timber softens, particularly in Melbourne’s wet winters, and requires periodic inspection and replacement of individual sections.
| Feature | Concrete sleepers | Timber sleepers |
|---|---|---|
| Lifespan | 50+ years | 20 to 30 years |
| Maintenance | Very low | Moderate, regular inspection |
| Appearance | Modern, clean lines | Natural, rustic |
| Moisture resistance | Excellent | Moderate (depends on treatment) |
| Suitability for clay | High | Low to moderate |
| Council preference | High | Moderate |
Realistic cost estimates for Melbourne projects:
According to Australian retaining wall costs, concrete sleeper walls range from $150 to $350 per linear meter for walls up to 2 meters high, while timber walls can cost $250 to $450 per square meter. Engineering fees add $800 to $2,500 to the total, and drainage installation adds $30 to $60 per linear meter. Overall, expect to budget $250 to $700 per square meter depending on height, material, and site complexity.
The hidden cost nobody talks about: DIY attempts on structural retaining walls carry a high failure risk without engineering input. A wall that fails after two winters costs far more to remediate than the professional build would have cost in the first place. Factor in potential damage to neighboring property and you’re looking at a liability issue, not just a landscaping one.
Key insight: The cheapest quote isn’t always the cheapest outcome. A $4,000 timber wall that lasts 15 years and needs full replacement will cost more over 30 years than a $7,000 concrete wall that needs nothing except the occasional wash down.
Step-by-step construction process
With your material chosen and plans approved, it’s time to break ground. Here’s exactly how to build your wall from start to finish.
Building a concrete retaining wall
The concrete cantilever or block wall process follows a clear sequence that must not be shortcut:
- Conduct a geotechnical soil test to determine bearing capacity and soil classification
- Engage a structural engineer to design the footing, reinforcement layout, and drainage specification
- Excavate the footing trench to the depth specified by the engineer (often 600mm to 900mm for a 1.5m wall)
- Place a blinding concrete layer (a thin, lean mix) to create a clean, level working surface
- Install steel reinforcement bars (rebar) as per the engineer’s drawings, including vertical bars for the wall panels
- Set drainage pipe at the base of the footing zone before the concrete pour
- Pour the footing concrete and allow full cure time, usually a minimum of three days before loading
- Install the concrete sleeper panels between posts as work progresses upward
- Backfill in 200mm compacted layers using free-draining material such as crushed rock, never clay
Pro Tip: Support posts for concrete sleeper walls should be set with a slight lean, approximately 1 degree back into the retained soil. This counteracts the natural tendency for loaded walls to tilt forward over time. For walls on sloped sites, step the wall design rather than building a single tall vertical face.
Building a timber retaining wall
For timber walls, the installation process involves these key steps:
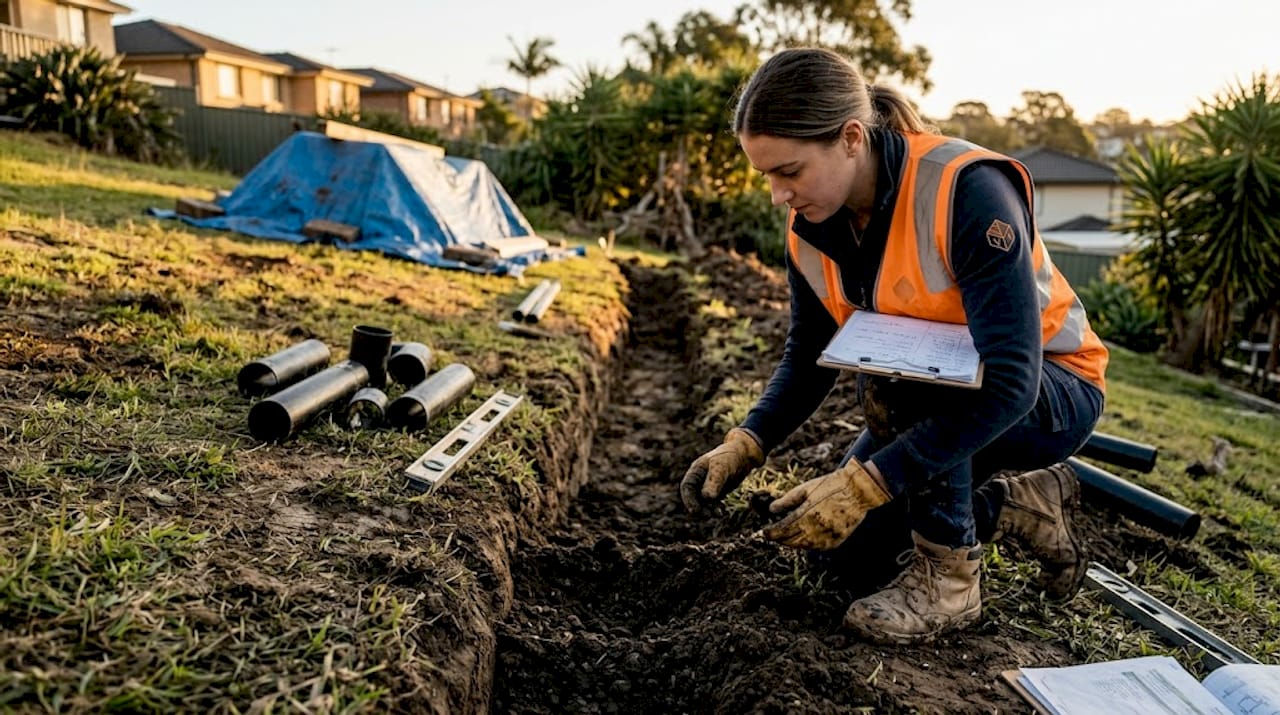
- Dig a trench at least 100mm deep along the wall line
- Add and compact a gravel base to provide drainage and a firm footing for posts
- Set timber posts leaned at a 1:10 angle toward the retained soil and secure in concrete
- Fix sleepers horizontally between posts with staggered vertical joints (so joints don’t align between rows, which would create a weak point)
- Install a 100mm gravel drainage layer directly behind the sleepers
- Lay an ag-drain pipe (agricultural drain, a flexible perforated pipe) at the base of the drainage layer
- Cover the gravel drainage layer with geotextile fabric before backfilling to prevent soil migration into the drainage zone
Working with a concrete retaining wall process that is properly engineered from the start means each of these steps is verified against the site conditions, not guessed. If you’re uncertain about any stage, consult wall construction experts before proceeding.
Ensuring drainage and preventing common failures
Even the best-built wall can fail without good drainage. Here’s how to make sure yours stands the test of time.
Drainage is the single most important factor in retaining wall longevity. Full stop. When water saturates the soil behind a wall and has nowhere to go, hydrostatic pressure (the force of water pushing outward against the wall face) builds to extreme levels.
Poor drainage causes 90% of retaining wall collapses, and hydrostatic pressure can literally double the total load on a wall compared to dry conditions. This is why a wall that looks fine for two years can fail suddenly after one wet Melbourne winter.
What a proper drainage system looks like:
According to retaining wall drainage design best practice, every well-built retaining wall should include:
- A 200 to 300mm thick gravel blanket (using 20mm aggregate) directly behind the wall face
- An ag-drain pipe installed at the base of the gravel layer, sloped continuously toward a legal discharge point
- Geotextile filter fabric wrapped around the gravel layer to prevent fine soil particles from clogging the drainage stone
- Weep holes (openings through the wall face) spaced every 2 meters to allow emergency pressure relief
- Surface drains such as channel drains, spoon drains, or swales on slopes above the wall to intercept stormwater before it reaches the retained soil zone
“A retaining wall without drainage is just a dam waiting to fail.” That’s how we think about it at VW Concreting, and after more than two decades of builds across Melbourne, we’ve seen exactly what happens when this step is rushed.
Common failure scenarios and how to prevent them:
- Hydrostatic buildup: Prevented by the full drainage system described above
- Footing settlement: Prevented by proper geotechnical assessment and footing depth
- Overturning: Prevented by correct footing width and reinforcement design
- Sliding: Prevented by a footing key (a downward projection of the footing into firm soil)
- Clay water retention: Prevented by replacing native clay behind the wall with free-draining crushed rock
Our perspective: The planning step most Melbourne homeowners underestimate
After completing well over 145 projects since 2001, we’ve noticed a consistent pattern. Homeowners are eager to pick materials and get started, but they underestimate the planning phase. Not because they’re careless, but because the planning phase is invisible. Nobody takes a photo of a soil test or frames a drainage specification on the wall. The finished sleepers get the Instagram moment.
But the truth is, the planning phase is where your wall either succeeds or fails. Every collapse we’ve been called in to fix after the fact had one thing in common: the drainage and soil assessment were skipped or rushed. The materials were often fine. The installation looked okay. But the water had nowhere to go, and eventually, the soil won.
Our honest advice is this: budget more time for planning than you think you need, and treat the engineering fee as mandatory rather than optional. A $1,500 engineering report is cheap compared to a $15,000 remediation job. Melbourne’s clay-heavy western suburbs and the steep blocks in the hills demand it. This is not a city where you can guess at soil behavior and get away with it for long.
Plan your retaining wall project with VW Concreting
If you’re at the planning stage of a retaining wall project in Melbourne, the right next step is a proper site assessment by a team that has built walls across Melbourne’s most challenging soil types and slope conditions.

At VW Concreting, we handle the full process from regulatory checks and soil assessment through to engineering coordination, construction, and drainage installation. Whether you need a concrete sleeper wall on a steep western suburbs block or a timber feature wall in a flat backyard, our team brings the experience and attention to detail that keeps walls standing for decades. Visit vwconcreting.com.au or reach out directly to discuss your project and get a realistic, transparent quote.
Frequently asked questions
Do I need council approval for a retaining wall in Melbourne?
Most retaining walls over 1 meter high or on boundaries require council approval and neighbor consent in Melbourne, as site planning rules require assessment of setbacks, drainage, and impact on adjoining properties. Always confirm the specific threshold with your local council before starting.
How much does it cost to build a retaining wall in Melbourne?
Total costs range from $250 to $700 per square meter depending on material, wall height, and site conditions, with engineering and drainage adding to the overall budget. Concrete sleeper walls generally cost less per linear meter over their lifespan than timber when you factor in longevity.
What causes most retaining wall failures?
Poor drainage causes 90% of retaining wall collapses because hydrostatic pressure can double the load on a wall when water saturates retained soil. Installing a proper gravel blanket, ag-drain, and weep holes is the most important step in any build.
How long do concrete and timber retaining walls last?
Concrete retaining walls last over 50 years with minimal maintenance, while timber walls typically need replacement or major repair after 20 to 30 years. The longevity gap is especially significant on Melbourne sites with heavy clay or high moisture.
Is DIY retaining wall construction recommended?
DIY carries a high failure risk without engineering input, particularly for walls over 1 meter or near boundaries, and professional guidance is strongly recommended. The liability exposure from a failed wall that damages neighboring property makes professional construction the far safer option.
Leave A Comment