
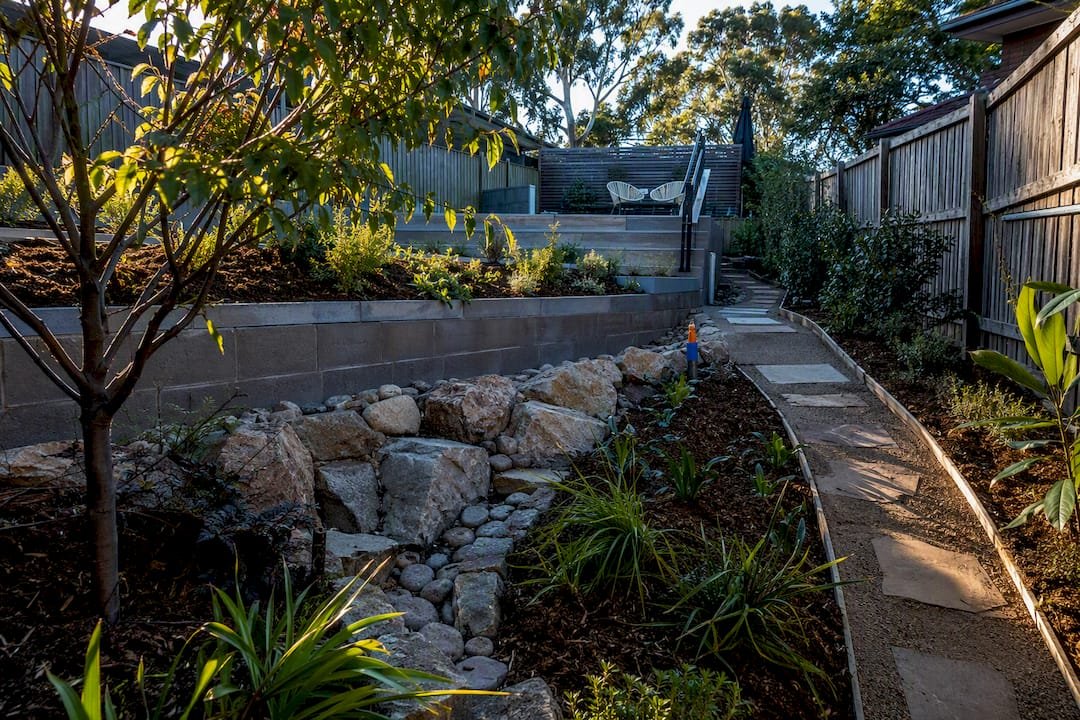
The most reliable backyard levels solutions fall into four camps: retaining walls and terracing for steep drops over two feet, layered planting with check dams for erosion control on a budget, grading and topdressing for mild bumps and dips, and multilevel decks for slopes you’d rather not touch at all. Start by measuring your slope and checking where water pools, then pick the method that matches your grade and your goals.
TL;DR:
- Building retaining walls over two feet tall requires proper drainage, reinforcement, and a qualified contractor, as DIY solutions are only reliable for shorter walls.
- Combining layered planting, check dams, and drainage solutions like swales or French drains creates a sustainable system to stabilize slopes without extensive excavation.
- Materials such as stone, concrete, and timber each have specific longevity and cost considerations, with stone offering the best durability on slopes.
- Proper site assessment, including measuring slope and watershed, is essential before installation to prevent water pooling and structural failure.
- Contractors emphasize prioritizing drainage assessment and layered solutions over expensive, large-scale walls to ensure long-term stability and cost-effectiveness.
Table of Contents
- Quick-Scan Guide to Backyard Slope Solutions
- When Do You Need a Terraced Retaining Wall?
- How Do You Stabilize a Slope With Plants Instead of Walls?
- Measuring and Grading Your Yard Without a Bulldozer
- Where Should Drainage Go on a Sloped Yard?
- What’s the Safest Way to Build Access on a Slope?
- Which Materials Hold Up Best on a Sloped Yard?
- What Does It Cost to Fix a Sloped Backyard?
- Backyard Slope Design Ideas You Can Actually Use
- What Contractors Wish Homeowners Knew Before Grading a Slope
- A Contractor’s Honest Take on Sloped Backyards
- Get a Site Assessment for Your Sloped Backyard
- Sources
Quick-Scan Guide to Backyard Slope Solutions
Different slopes call for different fixes, and mixing methods is often smarter than picking just one. Here’s how the main options stack up against each other.
- Terraced retaining walls: Best for steep slopes where you want flat, usable ground. Pricier and sometimes permit-heavy, but it’s the only option that reliably holds back serious grade changes.
- Layered planting and check dams: Best for erosion control on a budget. Slower to establish (a full growing season, often two) but low-cost and low-maintenance once roots take hold.
- Grading and topdressing: Best for mild slopes, ruts, or drainage dead zones near the foundation. Cheap and DIY-friendly, but it won’t touch anything steeper than a gentle grade.
- Multilevel decks and platforms: Best when you want outdoor living space without moving dirt. Higher upfront cost, minimal excavation, and it sidesteps drainage headaches that come with cut-and-fill work.
- Drainage fixes (swales, French drains, dry creek beds): Not a standalone fix, but nearly every one of the above methods works better paired with one.
Most sloped yards end up using two or three of these together rather than a single silver-bullet fix.
When Do You Need a Terraced Retaining Wall?
A retaining wall stops being a landscaping nicety and becomes a structural requirement once you’re holding back more than 2 feet of soil. Below that threshold, a dry-stack stone wall or timber edge can often do the job without an engineer’s stamp. Above it, terracing breaks a steep slope into shorter, flatter steps using cut-and-fill construction, and that’s where drainage and compaction standards start to matter more than the finish material.
Your material choice shapes both the look and the lifespan:
- Gravity or dry-stack stone: No mortar, relies on weight and batter (backward lean) for stability. Good for medium-height walls; charming, but limited in height without reinforcement.
- Timber: Fast to build and budget-friendly, but lifespan is limited; pressure-treated lumber resists rot but will eventually degrade.
- Poured concrete or segmental block: Handles taller retained heights and heavier loads; needs a proper footing below the frost line.
- Reinforced masonry: The go-to for anything approaching 4 feet or more, especially with structures or driveways above the slope.
Every wall option needs drainage behind it or it will fail, usually within a few wet seasons. That means weep holes at the base, a free-draining gravel backfill, geotextile fabric to keep soil from clogging the gravel, and a footing sized for the load above. DIY terraces should stay modest in height and always follow proper drainage and compaction guidelines; anything taller belongs with a contractor and, often, a structural engineer. If you’re getting quotes, ask specifically about backfill material, footing depth, and whether the warranty covers drainage failure, not just cracking. An overview of retaining wall types for residential projects breaks down which material fits which slope condition in more detail.
Pro Tip: Ask any contractor bidding on a wall what happens to water behind it during a storm. If they can’t describe the drainage path in one sentence, that’s a wall you’ll be repairing in five years.
How Do You Stabilize a Slope With Plants Instead of Walls?
Deep-rooted native plants, check dams, and drip irrigation can stabilize a steep slope without a single block of retaining wall. It’s slower than construction, but it costs less and looks better every year instead of aging out.
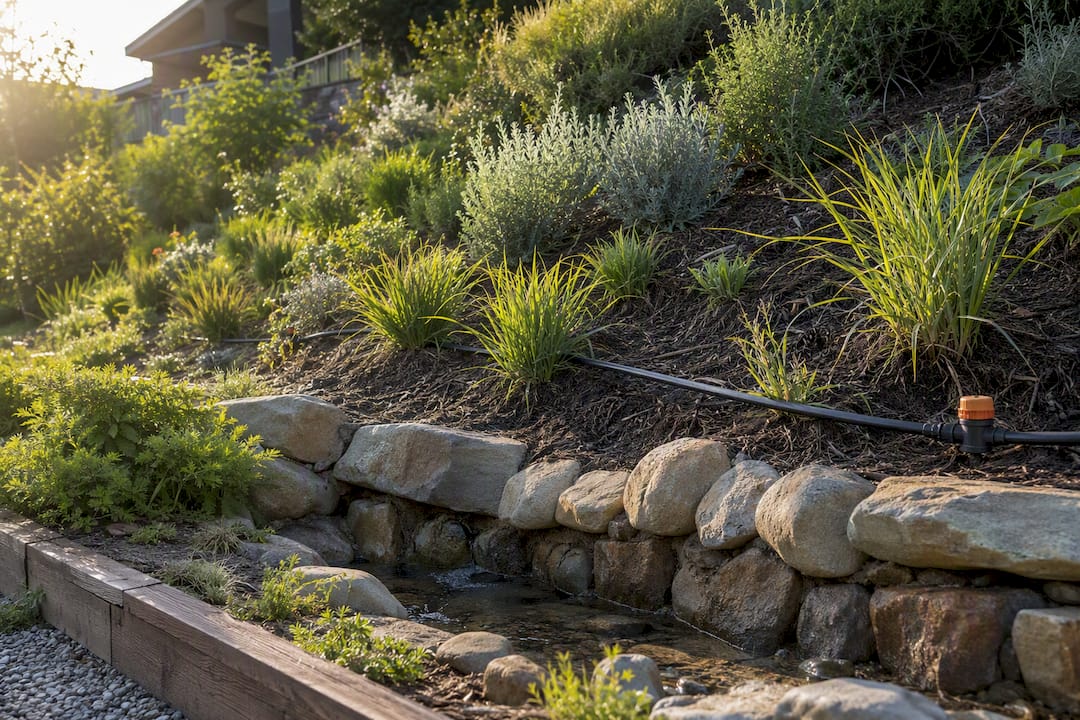
Slope management works best as one integrated system, not a patchwork of separate fixes. The Master Gardener Association of San Diego County frames it around four linked principles, plus a fifth that’s easy to overlook: erosion control, plant selection, water management, mulching, and safe access for maintenance. Skip anyone and the others tend to fail with it.
Layer your planting the way nature would: trees or large shrubs anchoring the top and mid-slope, groundcovers and low shrubs filling in below. There’s a specific placement rule worth knowing here, sometimes called the water inflection principle: put smaller, low-water plants near the top of the slope and larger, thirstier plants toward the bottom, following the natural path water takes as it moves downhill.
While roots establish, temporary measures hold the soil in place:
- Jute netting or biodegradable erosion blankets over bare soil
- Straw wattles or compost socks laid across the slope’s contour
- Small rock weirs at points where water concentrates
Turf grass generally struggles on anything steeper than a gentle grade. Its roots run shallow, and mowing on an incline is both a hassle and a safety risk. For sun, look at low shrubs and ornamental grasses; for shade, ferns and spreading groundcovers tend to outperform anything resembling a lawn.
Measuring and Grading Your Yard Without a Bulldozer
Grab a level, a long board, and a tape measure before you touch a shovel. Lay the board across the slope, hold the level on top, and measure the gap at the low end against the board’s length to get your slope percentage. If the ground drops more than 6 inches over 10 feet near your house, you’re dealing with more than a cosmetic fix.
That’s roughly a 2-inch drop over 10 feet, enough to move water away without being noticeable underfoot.
- Mow the area short and clear debris so you can see the actual contours.
- Dethatch if there’s a thick layer of dead grass hiding low spots.
- Walk the yard and mark high and low points with flags or spray paint.
- Mix a topdressing blend of topsoil, compost, and a bit of sand for filling shallow depressions.
- Apply it in a thin layer, about a quarter to a half inch, over low spots.
- Compact with a lawn roller or hand tamper so it doesn’t just wash away.
- Seed or lay sod over the repaired area and keep it consistently watered.
For larger dips or hills you need to bring down, renting a compact tractor or hiring an excavator usually beats hand-digging. Once you’re moving more than a few cubic yards of soil, or grading near a foundation, a landscape contractor with grading experience is worth the call.
Where Should Drainage Go on a Sloped Yard?
Water always finds the lowest point, so map where it’s currently exiting your property before you build anything. Stand outside during the next real rain and watch where it pools, channels, or slips toward the neighbor’s fence. That fifteen minutes tells you more than any diagram.
- Swales: Shallow, vegetated channels that redirect surface water along a gentle path instead of letting it cut straight downhill.
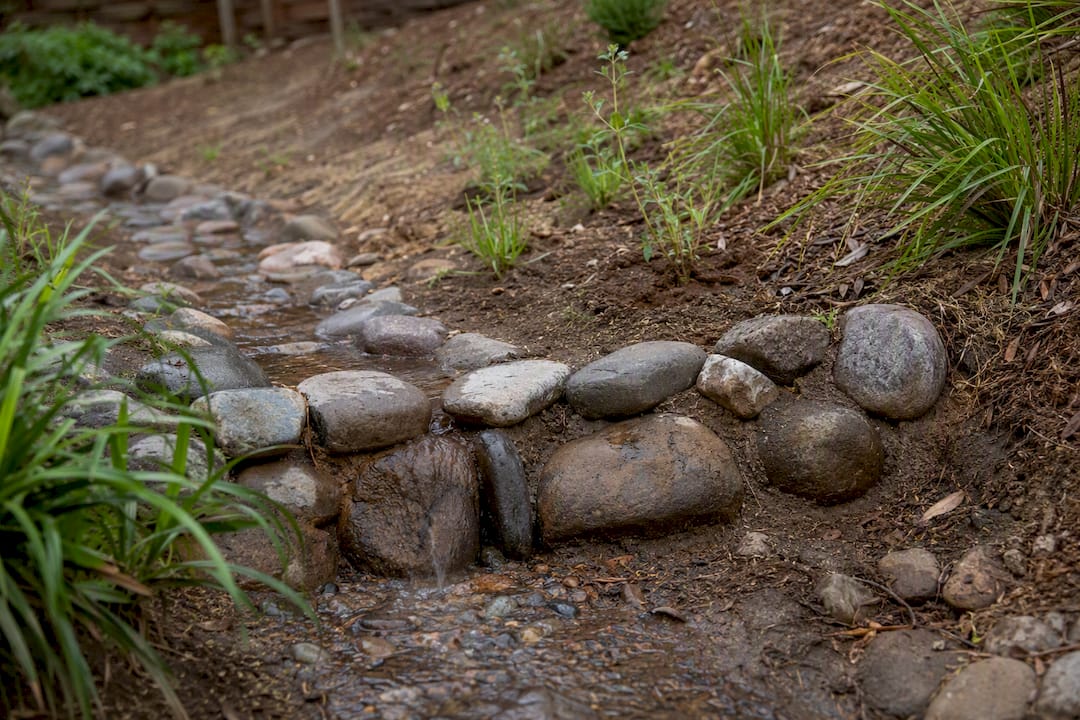
- Dry creek beds: Rock-lined channels that double as a design feature and a functional drainage path during storms.
- French drains: Underground perforated pipe wrapped in gravel, useful when water is saturating soil below the surface rather than just running across it.
- Check dams: Small barriers made from compost socks, straw wattles, or rock weirs that slow concentrated flow in a gully before it carves a permanent channel.
A French drain makes sense when the problem is underground moisture or a soggy low spot that never dries. Surface measures like swales and dry creek beds handle visible runoff. Drip irrigation matters here too, since it delivers water directly to roots with far less surface runoff than a sprinkler, which keeps newly planted slopes from washing out during establishment.
Pro Tip: A rock weir doesn’t have to stay a rock weir. Left in place, it collects sediment over a season or two and can eventually be backfilled and planted as a permanent mini-terrace.
What’s the Safest Way to Build Access on a Slope?
Steps should feel unhurried, not like a workout. Aim for a gentle rise and run per step to make stairs comfortable; steepness beyond that can feel difficult to climb. On a long slope, switchback paths (zigzagging rather than running straight up) cut the effective grade in half and give you landing spots to catch your breath.
- Gravel or flagstone steps suit informal, garden-style slopes and cost less than poured options.
- Timber steps work well on moderate grades but need periodic replacement as wood weathers.
- Concrete or block steps hold up longest under heavy foot traffic or steep pitches.
- Decks and platforms turn an unusable slope into a flat outdoor room, though they carry higher material and footing costs than a path.
Every path or step run should shed water sideways, not funnel it straight down the middle, or you’ll end up maintaining a drainage problem disguised as a walkway.
Which Materials Hold Up Best on a Sloped Yard?
Stone ages the best of any material on a slope. It shrugs off freeze-thaw cycles and rarely needs more than an occasional reset. Timber costs less upfront but rots faster on slopes where water lingers against the wood. Concrete splits the difference: high upfront cost, minimal upkeep, and it handles heavier loads on terraces or platforms.
- Pavers and synthetic turf both work well on terrace surfaces and decks where drainage below has already been solved.
- Mulch types matter more than people expect. Shredded bark stays put on slopes better than loose nuggets, which tend to migrate downhill in heavy rain.
- Gravel bands along contour lines double as erosion breaks and a visual transition between planting zones.
- Tiered gardens and rock cascades tend to age better than flat turf lawns on a grade, since they’re designed for the slope instead of fighting it.
What Does It Cost to Fix a Sloped Backyard?
Cost tiers vary widely by scope. Layered planting with a few strategic check dams sits at the low end, often achievable over a weekend or two of labor. Small timber terraces and topdressing land in the middle. Engineered retaining walls, heavy excavation, or drainage systems tied into a French drain network sit at the top, both in dollars and in weeks on the calendar.
- Planting establishment typically takes one to two growing seasons before roots fully anchor the soil.
- Topdressing and grading projects can often wrap in a weekend for small areas.
- Terraced walls and decks usually run from a few days to a couple of weeks, depending on height and access.
- Watch for cost creep from foundation proximity, permit requirements, or excavation deeper than a few feet, all of which push a simple project into engineer-and-permit territory.
The cheapest approach that holds up long term almost always combines the same three moves: fix drainage first, add layered planting for the bulk of the slope, and reserve small terraces for the spots where you actually need flat, usable ground. Trying to solve everything with one expensive wall usually costs more than solving it in stages.
Backyard Slope Design Ideas You Can Actually Use
A small yard with a modest slope often does best with a single mini-terrace near the house, backed by a short retaining wall and a planting bed layered above it. It’s a manageable weekend-to-week project that still delivers usable flat space.
Medium yards have room for a split patio, one level near the house and a second connected by a short run of steps, with planting terraces filling the gap between them. Larger sloped lots can support multiple outdoor rooms connected by switchback paths, with split patios and rock gardens marking the transition between levels.
Place your swales and check dams where the layout naturally funnels water, usually along path edges or at the base of each terrace, rather than bolting them on as an afterthought. For designing an elevated outdoor space with limited earthwork, a raised deck often beats a full terrace rebuild. Renters or anyone on a tight budget can get a version of this with raised containers stepped up a slope instead of permanent construction.
What Contractors Wish Homeowners Knew Before Grading a Slope
Nice finishes hide bad prep for exactly one season. Compaction, proper subgrade, and drainage are what actually keep a terrace or wall standing; the surface material is just what you see on installation day.
- Undersized drain pipe is the single most common failure point behind residential retaining walls.
- Skipping geotextile fabric behind a wall lets soil migrate into the gravel backfill and clog it within a few years.
- Poor backfill compaction causes visible settling and cracking, often showing up after the first winter.
- Plants and drains both need a first-season check during the rainiest stretch of the year, not just at installation.
Pro Tip: Walk your finished slope project during the heaviest rain of the season, not the driest week. That’s when you’ll actually see whether the drainage does its job. A guide to site preparation best practices covers the subgrade work that most homeowners never see but always end up paying for if it’s skipped.
A Contractor’s Honest Take on Sloped Backyards
The most common mistake on a sloped yard isn’t picking the wrong material. It’s building the pretty part before solving where the water goes. I’ve seen a beautiful timber terrace fail within two winters because nobody asked where runoff from the roof above it was landing.
Three things worth remembering: assess drainage before you choose a wall or a plant list, favor layered solutions over one big fix, and call a professional the moment you’re retaining more than 2 feet of soil. If a slope involves a structure, a driveway, or a wall taller than knee height, that’s the line where DIY should stop and a licensed contractor should start.
— Vic
Get a Site Assessment for Your Sloped Backyard
Reading about drainage and terracing only gets you so far when the slope behind your own house is actively eroding. A company with over two decades of experience handles the parts of a sloped yard that homeowners can’t safely DIY: retaining walls, site preparation, terraced concrete platforms, and turf installation on grades that would wash out a standard lawn.

A site visit typically starts with an assessment of your slope, drainage patterns, and soil, followed by a scope and quote that spells out wall type, footing depth, and how runoff will be managed before any concrete goes in. That’s the same groundwork covered in a guide to choosing the right concreting services, and it applies whether you need a full terraced backyard or just a single retaining wall to reclaim flat space near the house. If synthetic turf is part of the plan for a terrace or platform, turf installation work shows what that looks like on a finished slope. Request a site assessment to get a scope and quote built around your yard’s actual grade, not a generic estimate.
Sources
- Gardening steep slopes — Mississippi State Extension
- Key principles to planting, managing backyard slopes — Master Gardener Association of San Diego County
- Stabilize steep slopes — Missouri Botanical Garden
- How to level a yard — Lowe’s
Leave A Comment