
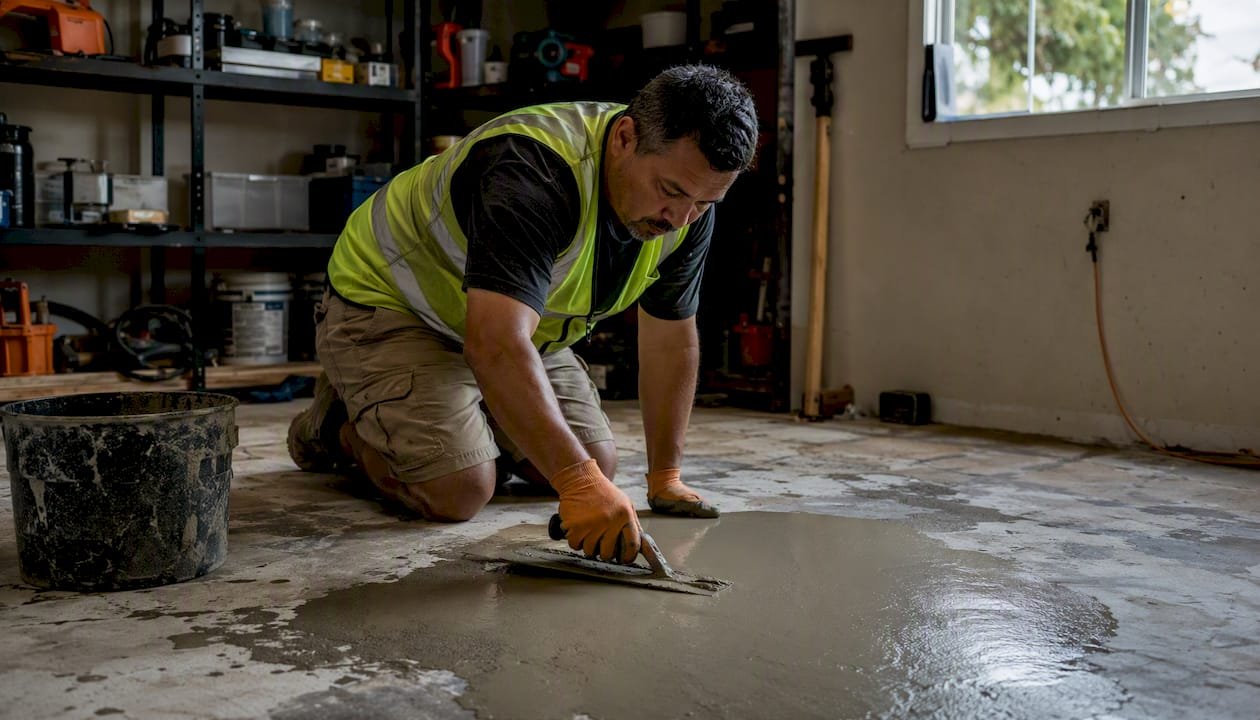
For most homeowners dealing with an uneven concrete subfloor, a cement-based self-leveling underlayment is the fastest, most reliable DIY fix. These compounds correct minor to moderate dips up to about 1 inch deep, and some products handle up to 1.5 inches per pour. Before you mix a single bag, though, you need to rule out a structural problem. If the cause is settling, failing joists, or foundation movement, surface leveling only masks the issue and the compound will crack again within months.
One non-negotiable step: moisture testing before priming. Even a visually dry slab can carry enough moisture to delaminate a leveling compound within weeks of installation. Skip the test, skip the primer, and you will be tearing up your new floor sooner than you think. VW Concreting publishes this guide to help homeowners make the right call before they spend money on materials.
Table of Contents
- Which subfloor leveling method fits your situation?
- How to apply self-leveling underlayment step by step
- How to patch deep spots, cracks, and spalls before pouring
- Why moisture testing and substrate prep come first
- What tools and materials do you actually need?
- What does this project actually cost and how long does it take?
- When should you call an engineer or hire a pro?
- Common DIY mistakes and how to avoid them
- Key Takeaways
- The part most guides skip
- VW Concreting handles the jobs that go beyond DIY
Which subfloor leveling method fits your situation?
The right concrete leveling method depends on how deep the problem is, how large the area is, and whether the slab is structurally sound. Here is a plain-language breakdown.
Self-leveling underlayment is the go-to for low spots and general unevenness up to 1–1.5 inches. It flows into depressions, self-smooths, and cures hard enough for tile, vinyl, or hardwood. DIY-friendly, medium cost, and finish-ready in about 24 hours.
Cement or epoxy patching mortar suits isolated cracks, spalls, and voids before a full pour. Low cost, easy to apply, but not a standalone fix for large uneven areas.
Grinding and honing removes high spots and humps rather than filling low ones. Diamond cup wheels on a hand or walk-behind grinder work well, but grinding generates silica dust, so dust control and PPE are mandatory. Best for localized high points at shallow depths.
Thin cementitious overlays (1/8–3/8 inch) resurface a slab that is mostly flat but worn or contaminated. Higher skill requirement, and the slab must be structurally sound and properly primed.
Plywood underlayment and shimming applies to wood subfloors, not concrete slabs. Useful context if you are dealing with a wood-framed floor over a crawl space.
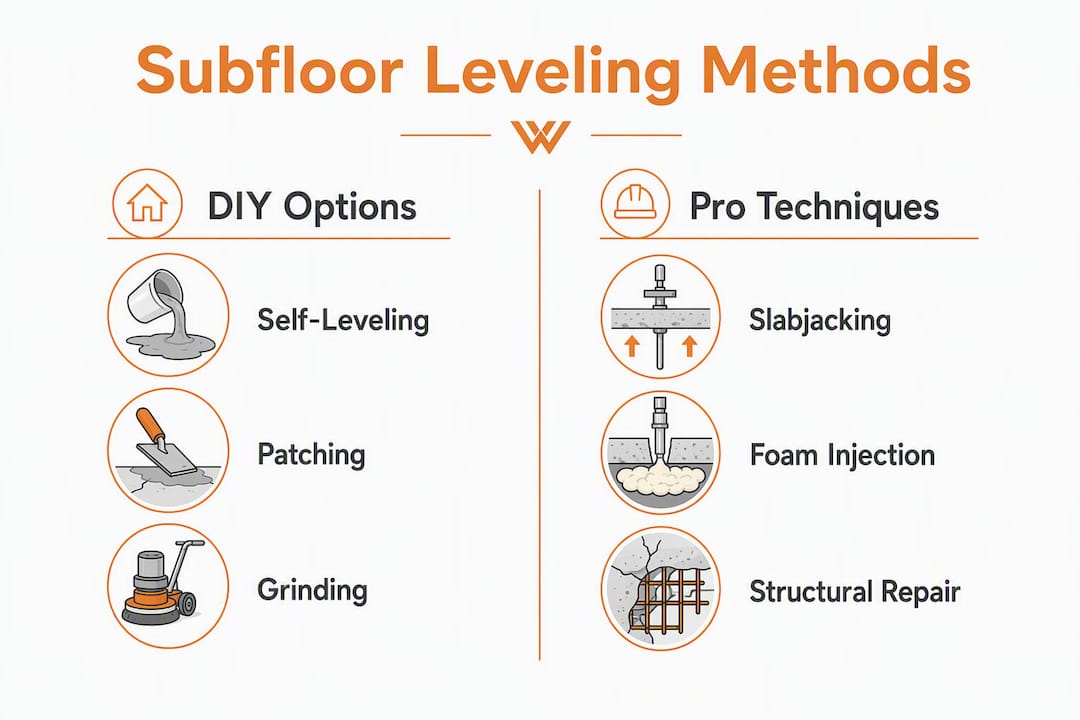
Slabjacking and foam injection are pro-only methods that lift a sunken slab by filling voids beneath it. Neither fixes poor soil compaction or active settlement, so they may need repeating if the underlying cause is not addressed.
How to apply self-leveling underlayment step by step
The process runs in roughly eight stages: assess, patch, dam, prime, mix, pour, spike-roll, and verify. Work with a partner. One person mixes; one pours. That division of labor is not optional for a room larger than a bathroom.
- Measure and mark low spots. Use a 6-foot or 10-foot straightedge and a pencil to mark all depressions. A laser level speeds this up considerably.
- Patch cracks and voids first. Fill cracks wider than 1/4 inch and any spalls with a cementitious or epoxy repair mortar. Let patches cure fully per the manufacturer’s spec before proceeding.
- Clean the slab. Sweep, vacuum, and degrease. Remove all adhesive residue, paint, and loose material. Contaminants prevent bonding.
- Dam doorways and floor drains. Use foam backer rod or hydraulic cement to block any opening the compound could flow through.
- Test for moisture. Run an in-place relative humidity (RH) probe test or a calcium chloride (CM) test. If readings exceed the compound manufacturer’s threshold, apply a moisture mitigation layer before priming.
- Apply primer. Roll or brush the manufacturer-specified primer over the entire area. Let it tack up fully, typically 30–60 minutes. Do not skip this step.
- Mix and pour. Add compound to water (not the reverse) and mix with a drill and paddle until lump-free, about 3–5 minutes. Pour immediately and work toward a wet edge. Mix only what your team can pour in 20–30 minutes to avoid early setting and visible seam lines.
- Spike-roll and cure. Run a spiked roller over the wet surface to release air bubbles. Keep the area closed to foot traffic and drafts during cure.
Pro Tip: Always pour the next batch directly into the wet edge of the previous one. Letting an edge skin over before the next pour lands creates a permanent ridge that no amount of sanding will fully hide.
Cure time reference
| Compound type | Walkable | Ready for flooring |
|---|---|---|
| Standard self-leveling | 2–4 hours | ~24 hours |
| Fast-set / quick-set | 1–2 hours | 6 hours |
| Deep-pour (up to 1.5 in) | 4–6 hours | 24 hours |
Walkable and flooring-ready times vary by product; always confirm against the specific manufacturer’s data sheet.
How to patch deep spots, cracks, and spalls before pouring
Patching before leveling is not optional. Self-leveling compound is not a crack filler. Pour it over an open crack and it will flow straight through.
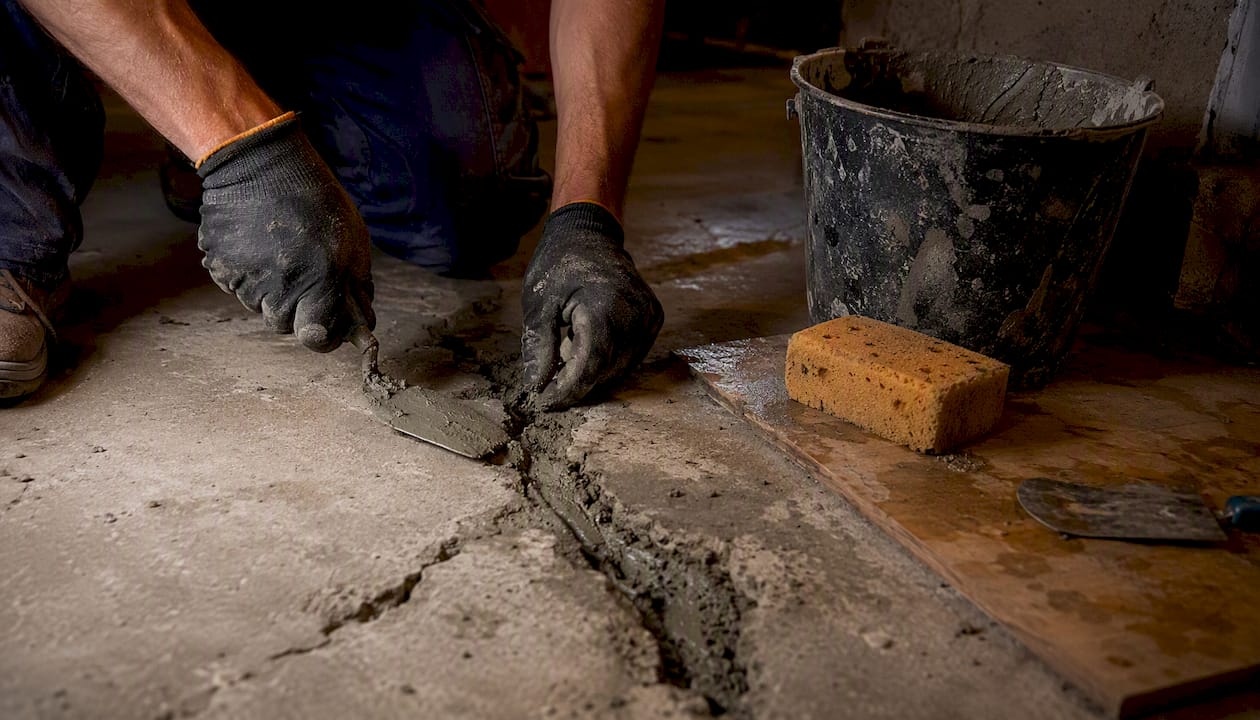
Cementitious patching mortar handles most surface cracks and shallow spalls. Clean the crack, undercut the edges slightly with an angle grinder, vacuum out dust, and pack the mortar in firmly. Non-shrink formulas are worth the small price premium because shrinking patches create a low spot right where you filled one.
Polymer-modified mortar bonds better to old concrete and handles deeper voids (up to about 2 inches in a single lift). Use it for drilled-out voids and larger spalls.
Epoxy or urethane crack injection is the right call for structural cracks that are stable but need a rigid, waterproof fill. It is more expensive and slower, but it bonds to both crack faces and does not shrink.
When a crack is still moving or widening, no patching product will hold long-term. That is a structural conversation, not a materials one.
| Repair type | Best use | DIY feasibility |
|---|---|---|
| Cementitious mortar | Surface cracks, shallow spalls | High |
| Polymer-modified mortar | Deep voids, larger spalls | Medium |
| Epoxy injection | Stable structural cracks | Medium |
| Partial slab removal | Severely damaged sections | Low (hire a pro) |
Pro Tip: After patching, re-test moisture in the repaired areas. Freshly placed mortar retains water longer than the surrounding slab, and pouring compound over a wet patch is one of the most common causes of localized delamination.
Why moisture testing and substrate prep come first
Moisture is the single most common reason self-leveling compounds fail. A slab that looks and feels dry can still be pushing enough vapor to break the bond between primer and compound within weeks.
The two standard tests in the US are:
- In-place RH probe (ASTM F2170): Measures relative humidity inside the slab at 40% depth. Most compound manufacturers require RH below 75–85% before installation.
- Calcium chloride test (ASTM F1869): Measures moisture vapor emission rate (MVER) at the surface. Typical limits run 3–5 lbs per 1,000 sq ft per 24 hours depending on the product.
- Surface moisture meter: A fast screening tool, but not a substitute for the above tests on a slab of unknown history.
If either test fails the manufacturer’s threshold, you have two options: wait and retest, or apply a moisture mitigation primer or vapor barrier rated for the measured level.
Temperature and humidity during application matter too. Most self-leveling compounds require an ambient and substrate temperature between 50°F and 85°F. Below 50°F, the compound sets too slowly and can freeze before curing. Above 85°F, pot life shrinks dramatically, sometimes to under 15 minutes. Humidity above 75% can prevent the primer from tacking properly.
What tools and materials do you actually need?
Essential checklist
- Mixing drill (650+ RPM) and a paddle mixer
- 5-gallon buckets (at least two, ideally four)
- Gauge rake (notched to your target depth)
- Spiked roller (for bubble release)
- 6-foot or 10-foot straightedge or laser level
- Concrete moisture meter plus RH probe kit
- Manufacturer-specified primer and roller
- Bags of self-leveling compound (calculate coverage at your target depth)
- Foam backer rod for damming
- PPE: safety glasses, knee pads, nitrile gloves, N95 or P100 respirator
| Tool | Buy or rent | Notes |
|---|---|---|
| Mixing drill + paddle | Buy | Inexpensive; useful for future projects |
| Walk-behind floor grinder | Rent | Only needed for grinding high spots |
| Floor scraper | Rent | For adhesive/paint removal |
| Laser level | Rent or borrow | Worth it for rooms over 100 sq ft |
| Spike roller | Buy | Low cost; single-use is fine |
Pro Tip: Check the compound bag for its maximum pour depth per lift. Exceeding it to save time causes the center to cure slower than the edges, which leads to cracking. If you need more depth, do two pours with a full cure between them.
What does this project actually cost and how long does it take?
A typical single-room project (200–400 sq ft) runs across three to four days, not counting the flooring install itself.
- Day 1: Inspection, crack patching, damming
- Day 2: Moisture testing, priming, self-leveling pour
- Day 3–4: Cure wait and flatness verification
- Day 5+: Flooring installation begins
| Approach | Material cost | Labor/rental | Total estimate |
|---|---|---|---|
| DIY (self-leveling) | ~$1.30/sq ft at 1/8 inch depth | $50 tool rental | $400 for 200 sq ft |
| Pro-performed leveling | Included in quote | $3–$8/sq ft labor | $600 for 200 sq ft |
| Slabjacking (pro only) | N/A | $500 per area | Varies by void size |
Material costs are approximate US ballpark figures and vary by region and product. Deep repairs, moisture mitigation systems, or slabjacking raise both cost and timeline substantially, sometimes extending a project significantly.
When should you call an engineer or hire a pro?
Surface leveling works when the slab is stable. When it is not, no amount of compound will hold.
Call a structural engineer or licensed contractor when you see:
- Progressive slope change over weeks or months (active settlement)
- Stair-step cracks in block or brick walls near the slab
- Wide cracks (1/4 inch or wider) that reopen after patching
- Visible voids or hollow sounds when you tap the slab
- Significant heave, ponding water, or a floor that tilts noticeably in one direction
- Joist or beam failure in a wood-framed floor system
Slabjacking fills voids and lifts a sunken slab, but it does not fix poor soil compaction or active settlement. If the soil beneath is still moving, the slab will sink again. Full replacement becomes the right call when repair costs approach or exceed the cost of a new slab, or when differential settlement is ongoing.
Before any professional repair work begins, photograph the entire floor with a timestamp. Document crack widths with a ruler. These records matter for insurance claims, permit applications, and contractor accountability.
Good site preparation practices address soil conditions before a slab is ever poured. When those steps were skipped originally, the consequences often show up years later as the settlement problems described above.
Common DIY mistakes and how to avoid them
Most failed leveling jobs trace back to one of a handful of errors.
Not mixing to spec. Too much water makes the compound weak and prone to cracking. Too little and it will not flow. Follow the water-to-powder ratio on the bag exactly.
Ignoring pot life. Mixing more than your team can pour in 20–30 minutes means the last buckets start setting before they hit the floor. The result is a lumpy, seamed surface.
Skipping primer or using the wrong one. Not all primers are compatible with all compounds. Mismatched products cause delamination even on a dry, clean slab.
Pouring in extreme temperatures. Cold slabs slow cure unpredictably. Hot conditions kill pot life. Both produce a surface that looks fine until the flooring goes down.
Leaving wet edges to dry between batches. This is the most common cause of visible seam lines. Pour the next batch before the previous edge skins over.
The most expensive mistake in floor leveling is not the failed pour itself. It is the finished flooring installed on top of it before the failure becomes visible.
Cleanup: Rinse tools immediately after use. Hardened compound requires mechanical removal. Dispose of rinse water containing compound slurry according to local regulations. Do not pour it down a storm drain.
Pro Tip: For bubbles that appear after spike-rolling, lightly mist the surface with water and re-roll within the first 10 minutes. After that window closes, the compound is too stiff to self-heal.
Key Takeaways
Self-leveling underlayment corrects most concrete subfloor unevenness up to moderate depths, but moisture testing and structural assessment must come before any pour.
| Point | Details |
|---|---|
| Match method to depth | Use self-leveling compound for dips up to about 1 inch deep (some products allow up to 1.5 inches); patch deeper voids with mortar before pouring. |
| Moisture test first | Run an RH probe or calcium chloride test; a visually dry slab can still cause delamination. |
| Patch before you pour | Fill all cracks wider than 1/4 in and spalls with non-shrink mortar and let them cure fully. |
| Know the structural red flags | Active settlement, wide reopening cracks, or hollow voids under the slab require a pro or engineer. |
| VW Concreting | For slab work beyond DIY scope, VW Concreting’s team handles assessment, repair, and full concrete placement in Melbourne. |
The part most guides skip
Most DIY leveling articles treat the compound as the whole story. The compound is actually the last 20% of the job. The other 80% is diagnosis, moisture control, and surface prep, and that is exactly where most failed projects went wrong.
The pattern I see repeatedly: a homeowner buys the bags, skips the moisture test because the slab “looks dry,” skips the primer because it adds a step, and pours. Six months later the new vinyl is bubbling and the compound is delaminating in sheets. The compound did not fail. The process did.
Self-leveling underlayment is genuinely good technology when used correctly. It is forgiving of minor imperfections, it cures fast, and a careful DIYer can absolutely get a flat, flooring-ready surface. But it rewards preparation more than any other step in the project. Get the diagnosis right, test the moisture, patch the defects, prime properly, and the pour almost takes care of itself.
For anything that looks structural, do not guess. A structural engineer’s assessment costs a few hundred dollars. A failed slab repair on top of an unresolved foundation problem costs far more.
VW Concreting handles the jobs that go beyond DIY

When the assessment reveals something bigger than a bag of self-leveling compound can fix, VW Concreting is the team Melbourne homeowners and builders call. With over 145 completed projects across driveways, slabs, and concrete placement work, the crew brings hands-on experience to slab repair, site preparation, and full concrete replacement. If your floor shows signs of active settlement, wide cracks, or voids under the slab, the right next step is a professional assessment, not another DIY pour. Get in touch with VW Concreting to discuss your slab situation and find out whether repair or replacement makes more sense for your project.
Leave A Comment